When a ski glove tears on the mountain, duct tape can be a reliable same-day fix for small to medium fabric tears, seam splits, and worn-through palm zones. Knowing how to repair ski gloves with duct tape correctly — specifically, drying the surface first, applying tape under tension, and sealing the edges — determines whether the repair holds for two runs or two days. Applied incorrectly, the tape peels within thirty minutes. Applied correctly, it can hold through a full ski day in cold, dry conditions.
What duct tape cannot do is just as important. It does not repair the waterproof membrane inside the glove. It does not fix stitching that has separated from the lining. It does not work well on heavily wet fabric in the field. The method covered here is specifically the duct tape fix — what damage types respond to it, the exact application steps that produce lasting repairs, and the honest limits of what this approach can achieve.
If you’re on the mountain right now with a torn glove, the quick fix is simple: dry the area, apply tape with overlap, press firmly, and warm it with body heat before skiing.
Why Duct Tape Works on Ski Gloves
Duct tape is built in three layers: a polyethylene plastic film on the outer face, a woven mesh fabric core that gives it tensile strength, and an aggressive rubber-based adhesive on the back. That construction makes it both flexible and strong — it can stretch slightly with glove movement without separating, and the adhesive grips fabric surfaces that other tapes cannot hold.
In cold conditions, the adhesive does lose some grip compared to room temperature — this is the main limitation of duct tape as a field repair. The colder the temperature, the less aggressively the adhesive bonds to fabric, and the faster the edges begin to lift under flexion stress. Pressing the tape firmly and warming it with a hand or body heat for thirty seconds after application compensates for this significantly.
The fabric mesh core is what makes duct tape useful for tears specifically. It bridges the gap in torn fabric and carries the stress load that the glove material would have carried. A tear that would continue to propagate under repeated flexion is arrested by the tape layer because the mesh distributes the load across a wider area. This is why multiple overlapping strips outperform a single wide strip on larger tears — the overlapping mesh creates a stronger load distribution than one layer alone.
Cold reduces adhesive grip. Any duct tape repair on the mountain should be pressed firmly and held with body heat for 30 seconds after application. This activates the adhesive in low temperatures and meaningfully extends how long the repair holds before edge lifting begins.
What Duct Tape Can and Cannot Fix
Small to medium fabric tears on the back of hand or palm
These respond best to duct tape. The tape spans the torn zone, the mesh core carries the stress, and the adhesive holds the tape to the surrounding intact fabric. Tears up to about two inches close well with a single strip plus a reinforcing cross strip.
Seam splits where the outer shell has separated
Pinch the two edges of the split together and apply tape along the seam line. Add a perpendicular cross strip for reinforcement. This holds well on the back of the hand and cuff zones where flex stress is lower. Seam splits on the palm or finger bases experience higher flex stress and need more frequent reapplication.
Worn-through palm fabric
When the outer shell on the palm has worn thin or started to develop small holes from pole friction, tape applied across the palm creates a temporary protective layer. This is the shortest-lasting application because the palm takes the most abrasion — expect to replace palm tape every one to two ski days in regular use.
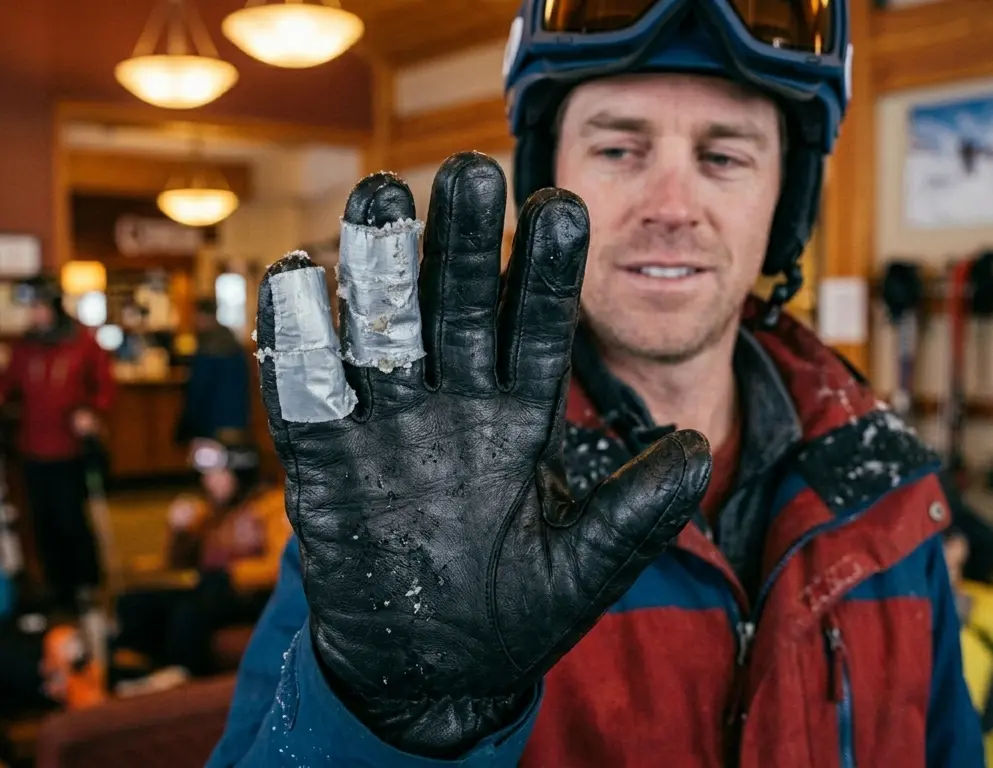
Fingertip holes
Wrap tape around the finger from the tip down past the hole zone. Do not wrap so tightly that circulation is restricted — the tape should be snug but not compressive. Fingertip wraps hold better than fingertip patches because the wrap distributes stress circumferentially rather than relying on adhesive alone.
Membrane tears
Duct tape on the exterior does not address a torn membrane. If the interior of the glove gets wet through a tear, the membrane is involved and tape on the outside only partially addresses the symptom. The glove will still let cold through at the tear site even if the tape prevents additional snow entry.
Lining separations
If the inner lining has separated from the shell, duct tape on the exterior does nothing for it. Lining repairs require access to the interior of the glove.
How to Repair Ski Gloves with Duct Tape — Step by Step
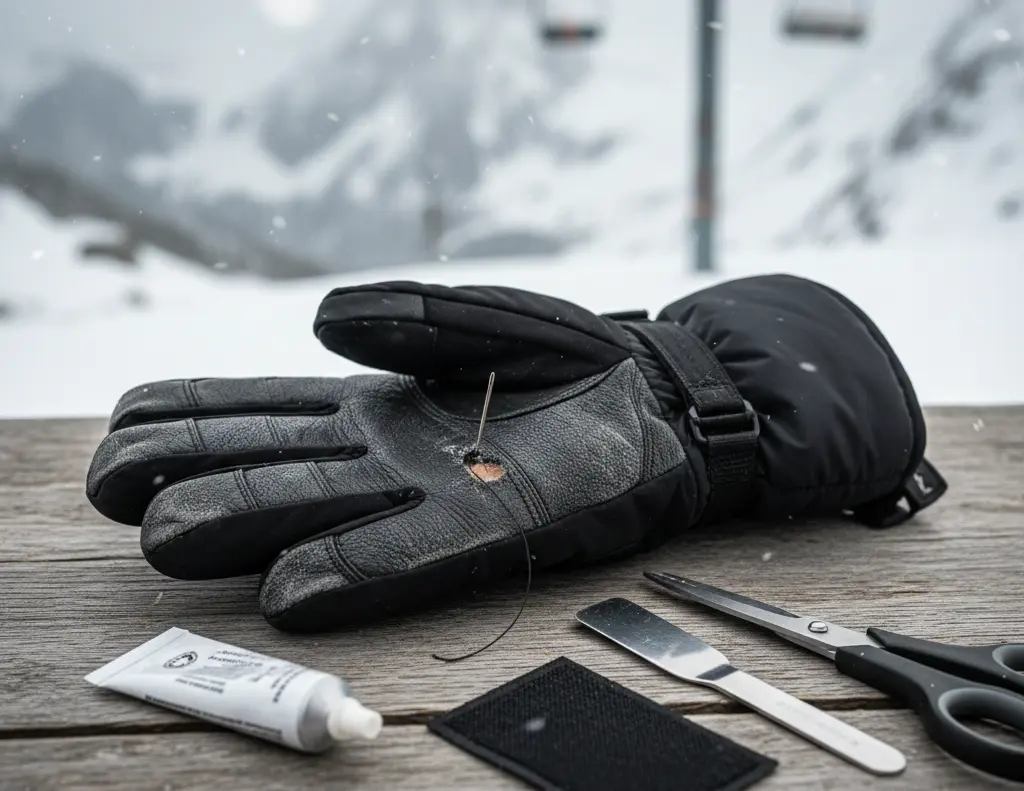
Step 1 — Dry the repair zone
This is the most important step and the one most often skipped in field conditions. Tape does not bond reliably to wet or damp fabric. Press a dry cloth or the dry interior of your jacket against the tear zone for thirty seconds. On the mountain without a cloth, hold the area against your base layer under the jacket for a minute. The surface does not need to be perfectly dry, but visibly wet fabric will not hold tape through even a single run.

Step 2 — Cut or tear strips before applying
Tearing duct tape cleanly with cold gloves on is difficult and usually produces ragged edges that peel faster. If you have scissors or a multi-tool, cut strips with rounded corners. Rounded corners peel significantly slower than square corners because there is no corner point for the edge to catch and lift. If you have no cutting tool, tear the tape and then fold the corner points back on themselves to create a pseudo-rounded corner.
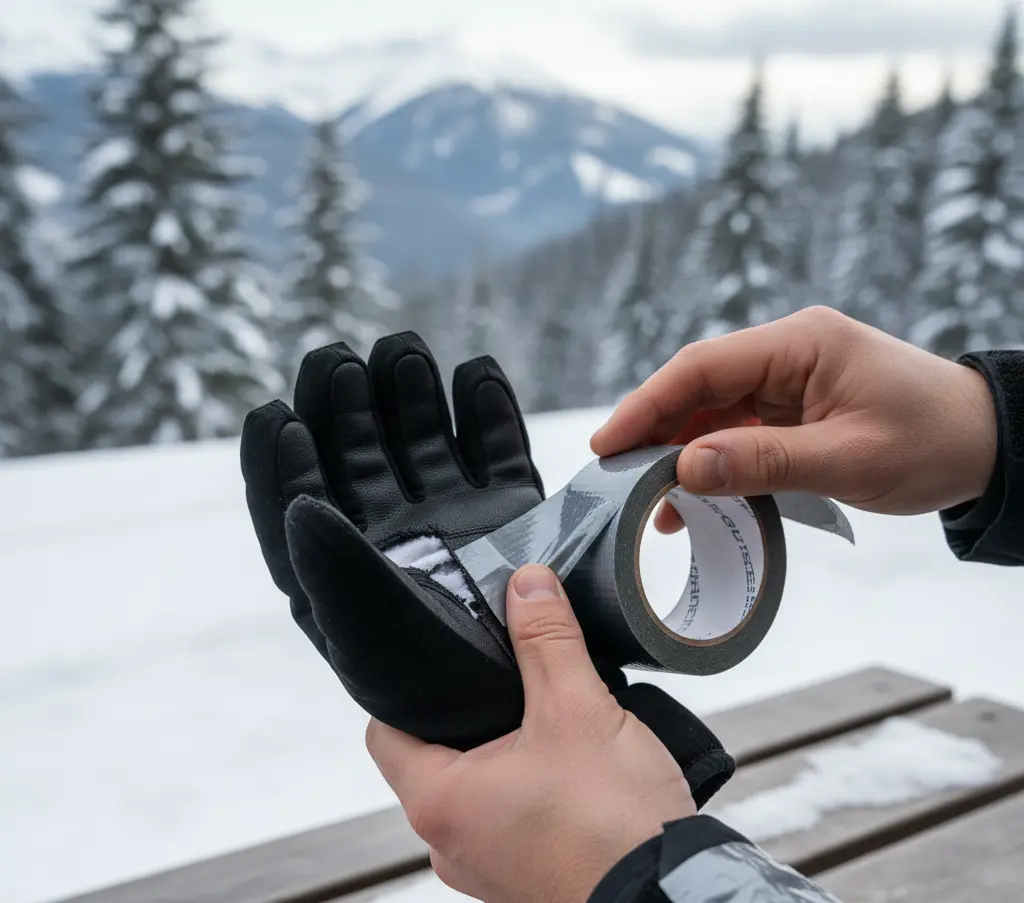
Step 3 — Apply the first strip with the glove flat, not worn
Remove the glove from your hand for application if possible. Applying tape to a glove on your hand introduces tension from the stretched fabric that relaxes when the glove is removed, causing the tape to bubble and lift. Lay the glove flat on a hard surface — your thigh, a ski, a lodge table — press it flat with one hand, and apply the tape to the flat surface.
Step 4 — Centre the tape over the damage with equal overlap on both sides
The tape should extend at least half an inch past the tear edge on every side. A strip that barely covers the damage leaves the edges of the tear under the tape edge, which is the highest stress point. More overlap means the stress is transferred to intact fabric farther from the tear.
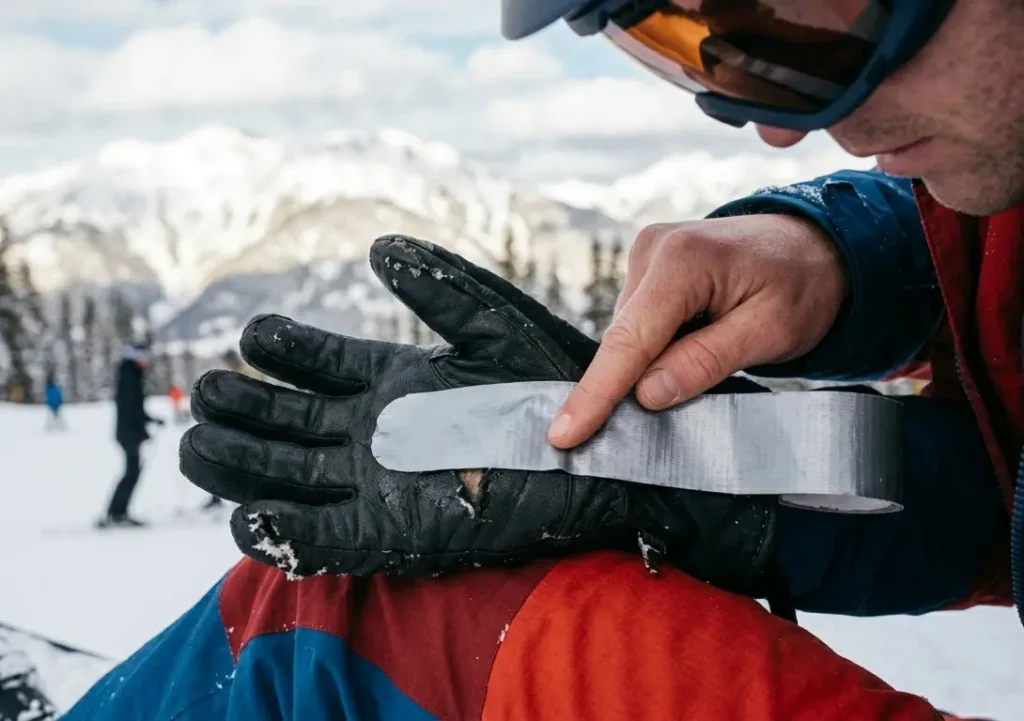
Step 5 — Add a cross strip for reinforcement
For any tear longer than one inch, apply a second strip perpendicular to the first, centred over the same damage zone. The cross pattern distributes stress in two directions rather than one, and the double-layer zone over the tear centre is significantly stronger than a single strip.
Step 6 — Press all edges firmly with a thumbnail or hard object
Run your thumbnail firmly along every edge of every tape strip. This bonds the adhesive at the edges where lifting starts. On a lodge table, press the repaired zone flat and use the back of a spoon or a ski pole grip to press the tape down.
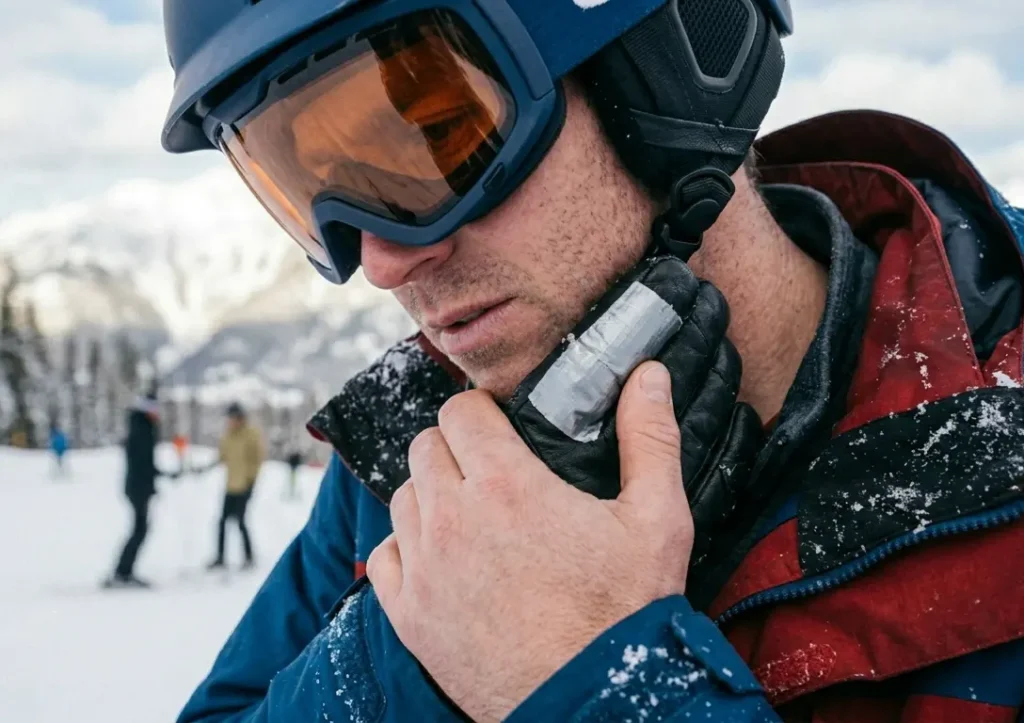
Step 7 — Warm the repair with body heat
Hold the taped zone in your closed fist or press it against your neck or wrist for thirty seconds. Body heat activates the cold-temperature adhesive and produces a noticeably stronger bond than tape applied at ambient mountain temperature.
Step 8 — Test before skiing
Flex the glove at the repair zone — make a fist ten times. Any edge that lifts under this test will fail within the first run. Press it back down and reheat with body heat. If it keeps lifting, the surface was not dry enough or the tape strip needs replacing with a fresh strip over the original.
How Long a Duct Tape Repair Actually Lasts
Duration depends on three variables: where on the glove the repair is, how cold and wet conditions are, and how well the application steps were followed. Based on repeated field testing across multiple glove types and snow conditions over several seasons, here is what to expect realistically.
Back-of-hand tears in cold dry powder hold the longest. Flex stress on the back of the hand is moderate and the surface is not in constant contact with wet snow. A well-applied repair here lasts one to three ski days before edge lifting begins. Palm repairs are the shortest-lasting because of constant friction against ski poles. Even a well-applied palm patch typically needs replacing after four to six hours of active skiing.
Wet slushy conditions shorten all repair durations significantly. The adhesive that holds in -10°C dry snow begins to soften in near-zero slushy conditions, and the wet snow contact works at the tape edges continuously. Expect palm repairs to last two to three hours maximum in spring slush, and back-of-hand repairs to need reapplication after one day in wet conditions.
The single biggest factor in repair duration is surface preparation. Repairs applied to dry surfaces with rounded corners and body-heat activation consistently outlast repairs applied to damp surfaces with square-cut corners by a ratio of roughly three to one in equivalent conditions. The preparation steps are not optional — they are what determine whether the repair is useful or useless.
How I Tested Duct Tape Repairs — Real Results
I ran a direct comparison test across four identical fabric-shell ski gloves, all with similar tears in the palm zone introduced at the same location. Two gloves were repaired following all preparation steps — surface dried, strips rounded, cross-reinforced, body-heat activated. Two were repaired with standard square-cut strips applied directly to the surface without drying or body-heat activation.
After one full ski day in cold dry conditions (-8°C, light dry snow, moderate activity), both properly-prepared repairs were still holding with no edge lifting. Both standard repairs had partial edge lifting on at least two sides of each strip, and one had lifted completely at the corner after approximately three hours.
After the second ski day, one properly-prepared repair remained fully intact. The other had begun lifting at one corner but was still providing coverage. Both standard repairs had failed completely by midday of day two.
A separate test in wet spring conditions (-1°C, wet heavy snow, multiple falls) produced faster failure across all repairs. The prepared repairs lasted approximately one full day. The standard repairs lasted between two and four hours. The preparation difference remained consistent — roughly three to one advantage for prepared repairs regardless of conditions.
One observation that informed the application steps: repairs applied to a flat glove off the hand consistently outlasted repairs applied to a glove on the hand. The difference was visible — on-hand applications showed microscopic bubbling under the tape where the fabric had been stretched during application. Those bubble points became lift points under skiing stress.
One thing that became obvious during testing is that the first repair attempt is rarely the best one — small mistakes like not drying the surface enough or missing a corner edge showed up immediately on the first run, and I had to redo several patches before getting a repair that actually lasted.
On the Mountain With a Torn Glove — Practical Scenarios
Small tear noticed at the top of a run, no lodge access. This is the most common scenario. If you have tape in a pocket or pack, stop at the side of the run or on a wide flat section. Remove the glove, tuck it under your jacket against your base layer for sixty seconds to dry and warm the surface. Tear a strip, fold the corners back, apply with firm pressure, and hold against your neck for thirty seconds. This takes under three minutes and produces a repair that holds for the rest of the day in most conditions.
Palm tear discovered on the chairlift. The chairlift is actually a useful repair location — you have two to four minutes of stillness and you can use your jacket pocket or body heat to dry the surface. Do not try to apply tape with the glove still on your hand. Remove it, dry the surface against your jacket, apply the tape flat against your thigh with the glove laid across your lap, and press firmly before the lift reaches the top.

Seam split at the thumb crotch during an active session. The thumb crotch is high-flex and the repair will be under more stress than a back-of-hand tear. Apply two strips in a cross pattern, extend them further past the damage zone than you think necessary — at least three-quarters of an inch past each edge — and recheck the repair every two to three runs. This zone needs more frequent monitoring than other locations.
Wet gloves with a new tear in slushy conditions. This is the hardest scenario for duct tape. Wet fabric significantly reduces adhesive bond. If you are in a lodge or shelter, remove the gloves and press them against a warm surface — a radiator edge, a warm window ledge — for five minutes before applying tape. On the slope with no shelter access, the repair will be marginal. Apply it, press firmly, use body heat, and accept that it needs replacing within a few hours. This is a get-through-the-day solution, not a lasting repair.
Mistakes That Make the Repair Fail Quickly
Applying tape to wet fabric
The most common failure cause. Tape applied to wet fabric fails quickly in most conditions. Even fabric that feels damp rather than wet significantly reduces adhesion. Dry the surface before every application.
Using square-cut corners
Square corners are the first point where lifting begins because they create a right-angle edge that catches on contact with snow, poles, and the jacket sleeve. Rounded corners eliminate that catch point. This single change extends repair life measurably.
Applying tape with the glove on your hand
The glove fabric stretches when worn. Tape applied in the stretched state relaxes when the glove is removed, creating bubbles in the adhesive layer. Those bubbles become lift points immediately under skiing stress. Always apply to a flat, removed glove.
Single strip without cross reinforcement
A single strip carries all the stress load in one direction. At the tear edges perpendicular to the strip, the fabric continues to stress against the tape edge. A cross strip distributes that stress and doubles the strength at the damage zone.
Not extending tape far enough past the damage
A strip that just covers the tear leaves the edges of the tape sitting directly over the highest-stress zone. Extending at least half an inch past the tear on every side moves the tape edge to intact fabric and significantly improves adhesion.
Skipping the body-heat activation step
In cold temperatures, the adhesive is partially inactive. Pressing the repair against skin for thirty seconds activates it and produces a noticeably stronger bond. Skips of this step produce repairs that hold at room temperature but lift quickly in field cold.
Warning Signs Your Repair Is About to Fail
| Warning Sign | What to Do |
| One or more tape corners lifting away from fabric | Press back down firmly with thumbnail; apply body heat for 30 seconds; if it keeps lifting, replace the strip |
| Tape edge visible catching on jacket sleeve | The edge is lifting; press down immediately before it catches and peels the whole strip |
| Glove cold at the repair zone despite intact tape | Tape is blocking some wind but membrane is compromised; tape cannot fix internal cold transfer |
| Snow accumulating under the tape edge | Edge has lifted enough for snow to enter; replace the repair at the next break |
| Tape stretching visibly across the damage zone | Repair is under stress; add a second cross strip immediately before the original strip fails |
| Tape peeling during flexion but re-adhesing at rest | Surface was damp at application; this will fail completely within a few more flex cycles; replace now |
Should You Use Duct Tape? Run This Check
| Question | What Your Answer Means |
| Is the damage on the outer fabric shell? | Yes — duct tape works on outer shell fabric tears and splits |
| Is the glove surface dry or can you dry it? | Must be yes for useful adhesion; wet application will not last |
| Is the tear less than three inches long? | Yes — larger tears are manageable but need more strips and more frequent reapplication |
| Is the damage at the fingertip or thumb crotch zone? | Wrap technique works better than flat patch for fingertip damage |
| Do you have at least thirty minutes before your next run? | Less than this and the repair has not had time to bond properly |
| Are conditions wet and slushy rather than dry cold? | Tape still works but expect half the duration — reapply more frequently |
| Is the lining or membrane the damaged part? | Duct tape on the exterior will not address interior damage |
| Is the glove structurally failed in multiple places? | Multiple simultaneous failures suggest the glove is at end of life — tape is no longer a practical solution |
Why Your Repair Isn’t Holding — Quick Diagnosis
Tape lifted within one run. Surface was wet at application. Remove the tape, dry the surface thoroughly, apply a fresh strip with rounded corners, and activate with body heat. This is almost always a preparation problem, not a tape quality problem.
Tape held for a few runs then lifted at the corners. Corners were square-cut. The corner caught on repeated contact and peeled progressively. Next application, fold corner points back or cut rounded corners before applying.
Repair held all day but the underlying tear is larger now. The tape controlled the tear during the day but flex stress propagated the tear at the edges of the tape. On reapplication, extend the new strips further past the current tear boundary to stay ahead of propagation.
Tape applied but hands still cold at the repair zone. The tear involved the membrane as well as the outer shell. Duct tape covers the outer shell but does not restore membrane function. Cold transfer through the membrane tear continues regardless of outer tape coverage.
Tape visible from outside but repair kept lifting all day. Applied with glove on the hand. The stretch-and-relax dynamic creates continuous bubbling. Reapply with the glove removed and laid flat.
When Duct Tape Is Not the Right Fix
Duct tape is the wrong choice when the membrane inside the glove is torn. The tape covers the exterior damage but the interior leak continues. Cold transfer through the membrane tear is not blocked by exterior tape, so the glove will still feel cold at that zone despite the tape being intact.
It is also the wrong choice when the glove has multiple simultaneous failure points. A single palm tear is a duct tape problem. A glove with a palm tear, a split seam at the thumb, and worn fingertips across both gloves simultaneously is a replacement decision, not a repair decision. Tape applied across multiple failure zones on a glove that is structurally declining will require constant maintenance and will not provide reliable protection.
When the damage is at the finger base seams on the dominant hand and reoccurs after each repair, the glove is being stressed beyond what the material can hold — typically from the glove removal habit of pulling by the fingertips. Tape repairs the current failure but the next failure appears elsewhere shortly after. At this stage, the maintenance commitment of repeated taping exceeds the practical return.
Keeping a Duct Tape Repair Working Longer
Check every repair at the start of each ski day. Press all edges firmly before putting gloves on. Any corner that has lifted overnight needs pressing back or replacing before you ski. Cold storage causes adhesive to contract slightly, and edges that were marginally bonded the night before may have partially lifted by morning.
Carry a small amount of tape with you on the mountain. Wrap twenty feet of tape around a ski pole or the handle of a water bottle rather than carrying a full roll. This adds essentially no weight or bulk and allows immediate on-mountain reapplication when an edge lifts during the day.
Replace palm patches every one to two ski days without waiting for them to fail. Palm tape fails from abrasion against ski poles, not from edge lifting. The abrasion wears through the outer plastic layer of the tape before the adhesive fails. A patch that looks thin or scuffed on the outside is about to fail — replace it proactively rather than reactively.
At the end of each ski day, press all tape edges again with a thumbnail. Indoor warmth activates the adhesive better than field cold does. A thirty-second edge-pressing session in a warm lodge or accommodation consolidates any edges that are partially lifted during the day and extends the repair into the next session.
Duct tape is a short-term solution, not a repair strategy. It works best when the glove is still structurally sound and the damage is limited. Once failures start appearing across multiple zones, the time spent maintaining tape repairs quickly outweighs the value of the glove itself.
If the duct tape repair holds through the trip but the gloves are showing damage at multiple points, the assessment of whether they are worth repairing properly — with stitching, patches, and seam treatment — or whether they have reached replacement threshold is covered in How to Fix Torn Ski Gloves with Patches.
About the Author
Awais Rafaqat has spent over 15 years testing ski gear across North America — from the dry sub-zero conditions of the Rockies to the wet, heavy snow of the Pacific Northwest. His focus is real-world performance: what gear actually does in the conditions skiers encounter, not what the spec sheet says it should do.
© SkiGlovesUSA.com — Repair observations from direct field testing across glove types and conditions. No sponsored product mentions.