A torn ski glove is a specific kind of frustrating. It happens at the worst moment — mid-trip, usually on a wet day — and your options are either pay resort-shop prices for a replacement or find a way to fix what you have. Most skiers default to a strip of duct tape and a grimace. That works for a day. It does not work for the rest of the season.
Quick answer: Most torn ski gloves can be fixed with the right patch material, proper surface prep, and edge sealing. Palm tears usually need leather patches, while back-of-hand tears often hold with Tenacious Tape.
Knowing how to fix torn ski gloves properly — with the right materials for the specific type of tear — is the difference between a repair that holds through twenty more ski days and one that peels off by lunch. I have been repairing ski gloves for over 15 years, across leather, synthetic, and hybrid constructions, in every tear location and size. The methods that actually last are different from what most guides describe, and the reasons why certain repairs fail are almost never mentioned.
This guide is entirely about repair. This is specifically about assessing a tear, choosing the right materials, applying them in the right order, and understanding when a repair will hold versus when the glove is past the point where patching makes sense.
Why Tears Happen Where They Do — And Why It Matters for Repair
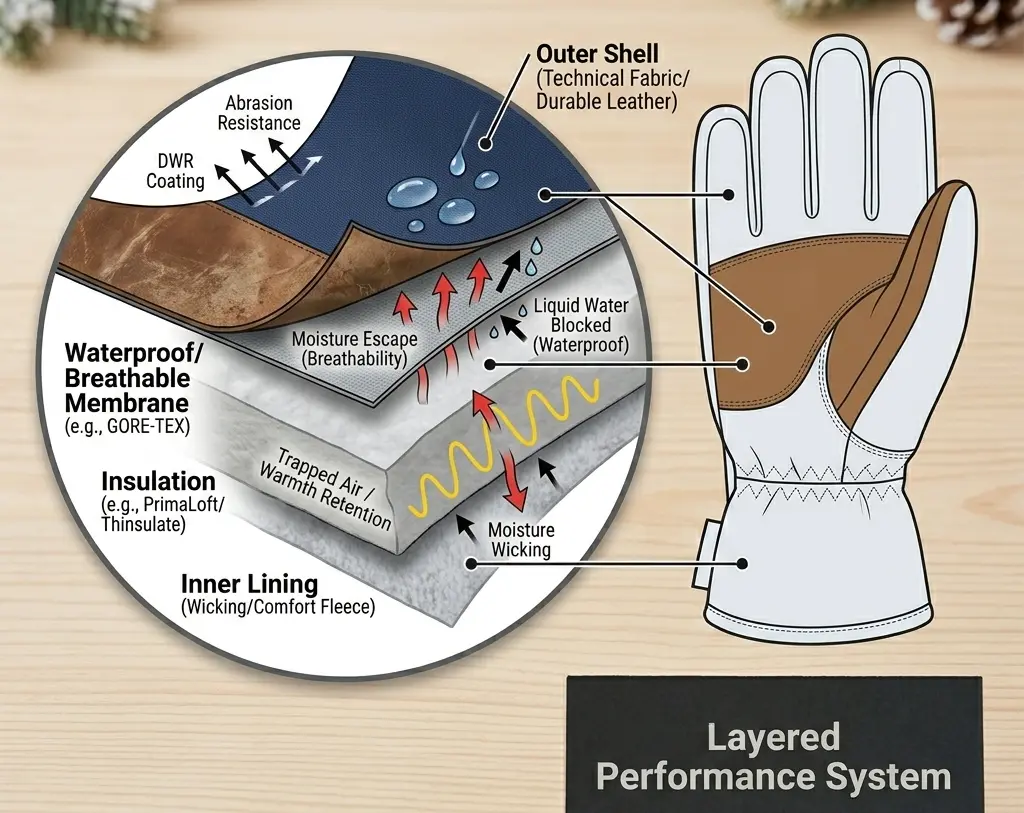
Ski gloves are built in layers: an outer shell, a waterproof membrane bonded to the shell or floating between the shell and lining, insulation, and an inner lining. A tear can involve one of those layers or all of them, and the repair approach is completely different depending on which layers are affected.
Palm tears are the most demanding to repair. The palm is under constant load — gripping poles, adjusting bindings, bracing during falls. Any repair in this zone needs to handle shear stress, not just static adhesion. A patch that sticks fine on the back of the hand peels off the palm within a few runs because the forces are completely different. Leather patches handle palm stress far better than nylon or tape, because leather does not stretch under grip load the way synthetic materials do.
Seam failures are structural, not just surface tears. When a seam starts separating — most commonly at the thumb crotch or between fingers — the stitch bonding the panels together has failed. An adhesive patch over a failing seam does not re-bond the underlying panels; it covers the gap temporarily. The seam will continue separating under the patch until the lining begins pulling away from the shell from the inside. Any seam repair needs stitching first, then sealing. Adhesive alone on a seam failure lasts two to five days of skiing before the seam continues opening.
Back-of-hand tears are the easiest to repair durably. The back of the hand sees relatively low mechanical stress — no sustained grip load, less abrasion than the palm. A nylon patch sealed with Seam Grip at the edges holds here for a full season without stitching in most cases. The main failure mode on back-of-hand repairs is edge lifting where the patch meets the glove fabric — and that is entirely preventable with proper edge sealing.
Cuff and wrist tears behave differently depending on position. A tear on the upper cuff away from the flex zone can be sealed with flexible adhesive alone. A tear at the wrist where the glove flexes with every arm movement needs a flexible patch material that moves with the glove. Rigid adhesives crack at flex points within one season, even if they bond initially. Aquaseal FD or Seam Grip, both of which cure flexible rather than rigid, are the right choice for cuff flex areas.
The location and depth of the tear determines the repair method — not just the size of the tear. A 10mm palm tear needs a different approach than a 40mm back-of-hand tear.
How I Test Patch Repairs — My Personal Testing Method
Before recommending any repair approach, I test it under real skiing conditions. My testing process for patch repairs runs across at least fifteen ski days post-repair, in a combination of dry and wet snow conditions, because those two environments stress repairs differently.
For testing across tear types, I use matched pairs of worn gloves — gloves that are structurally sound but old enough that the outer shell has realistic wear. I create controlled tears at specific locations: a 15mm palm tear, a separating finger seam, a 30mm back-of-hand tear, and a cuff flex-zone tear. I apply different repair methods to equivalent tears and ski them under identical conditions, checking after every five days for edge lifting, patch separation, and whether the underlying tear has continued opening.
What I track specifically: whether the patch adhesion holds at the edges (the first failure point on any patch), whether the tear itself has continued to propagate beyond the patch boundary, and whether the waterproof seal at the repair site is still intact — I do this by wearing the repaired gloves in heavy wet snow and then pressing the palm area to check for moisture penetration at the repair site.
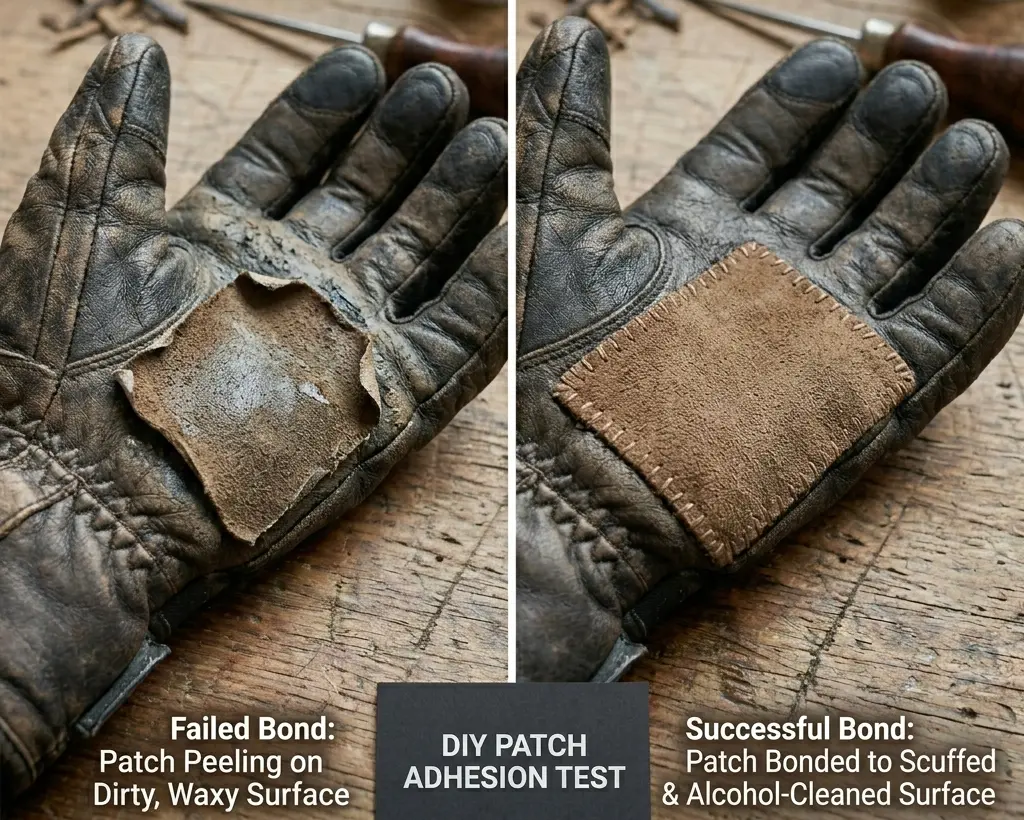
After testing dozens of repairs, one thing became obvious: surface prep makes or breaks the patch., not the patch material itself. Two identical leather patches applied to identical palm tears — one on a cleaned, dried, lightly scuffed surface and one on an uncleaned surface with residual moisture — show dramatically different results. The clean-surface patch holds through fifteen days without edge lifting. The uncleaned patch begins lifting at the edges within three days and is fully delaminated by day seven. Skiers who report that patches don’t work are almost always skipping the preparation, not using the wrong materials.
Problem Diagnosis: Identify Your Tear Before Choosing a Method
Spend two minutes assessing the tear before buying or applying anything. These four questions determine everything about the repair approach.
Question 1 — Where is the tear?
Palm, finger seam, back of hand, thumb crotch, or cuff. Each location has different stress demands. A repair that works on the back of the hand fails on the palm. Check the location before selecting materials.
Question 2 — How deep is it?
Outer shell only, or does it go through to the membrane or insulation? Press the tear open gently and look. If you see a white or yellowish fibrous material, you are looking at insulation. If you see a shiny, film-like layer between the shell and insulation, that is the waterproof membrane. A repair that only addresses the outer shell while leaving a membrane tear unaddressed will result in a wet glove at that point regardless of how well the outer patch holds.

Question 3 — Is it a clean tear or a worn-through area?
A clean tear from a sharp edge has intact fabric edges that can be brought together and stitched. A worn-through area — where the fabric has thinned and finally given way — has degraded material all around the tear. Stitching worn-through fabric puts stitches through already-weak material that will tear again around the stitch holes. These two situations need different repair approaches.
Question 4 — How large is the tear?
Under 15mm: adhesive patch may be sufficient in low-stress areas. 15–40mm: stitch first, then patch in high-stress areas; patch-only works in low-stress areas. Over 40mm: stitch is required before patching regardless of location. An unsupported patch over a large tear distributes load across the adhesive bond rather than the fabric, and adhesive bonds fail under sustained load faster than stitched fabric.
Tear Type Reference: Location to Method
| Tear Location | Stress Level | Best Repair Method | Why |
| Palm — small (under 15mm) | High stress | Leather patch inside + out, seam-sealed edges | Double-sided patch holds under pole grip load |
| Palm — large or worn through | High stress | Sew first, then leather patch both sides | Single patch won’t hold; insulation will re-emerge |
| Finger seam separating | High flex | Re-stitch with waxed thread; seal with Seam Grip | Adhesive-only fails on seams — flex breaks the bond |
| Back of hand — small | Low stress | Nylon patch or Tenacious Tape, adhesive sealed | Low-stress area; tape holds well here |
| Back of hand — large | Low stress | Sew closed then nylon patch over the top | Stitch prevents edges lifting under snow contact |
| Cuff area (wrist) | Low-medium | Seam Grip or flexible fabric adhesive | No stitch needed if tear is under 20mm |
| Thumb crotch (common tear) | High flex | Stitch first, leather patch on palm side only | Most-flexed seam on the glove — stitch is essential |
Repair Materials: What Works, What Doesn’t, and Why
The material choice matters less than preparation, but it still matters. These are the materials I have tested across different tear types and conditions.
Leather patches for palms and high-stress zones. Leather is the best patch material for palm repairs because it does not stretch significantly under grip load, bonds well with contact adhesive, and handles the abrasion that synthetic patches cannot. The limitation is that leather is harder to work with — it requires contact adhesive (not fabric glue), needs adequate cure time, and is heavier than synthetic alternatives. Cut it with sharp scissors and round all corners aggressively; square corners on leather patches peel fastest.
Nylon patches for low-stress areas. Nylon patch fabric is flexible, lightweight, and easy to cut and apply. It works well on the back of the hand and cuff areas. The failure mode on nylon patches is edge lifting rather than core delamination — the edges peel away from the glove surface, which then acts as a snow-catching lip and accelerates the peeling. Sealing all edges with Seam Grip immediately after application prevents this and extends the patch life significantly.
Tenacious Tape for fast repairs with genuine durability. Tenacious Tape repair tape is a ripstop nylon tape with an aggressive pressure-sensitive adhesive designed for outdoor gear repairs. It is the fastest repair option and more durable than its tape format suggests — in testing, correctly applied Tenacious Tape on a back-of-hand tear has held through a full season without edge lifting when the surface was properly cleaned first. The limitation: it is not ideal for palm areas under sustained grip stress, where the adhesive slowly gives under shear load.
Seam Grip as adhesive and as edge sealant. Seam Grip WP adhesive is a flexible urethane adhesive designed for outdoor gear. It cures flexible rather than rigid, which is critical for any repair on a ski glove — a rigid adhesive cracks at flex points within weeks. As a standalone adhesive for small tears, it works well. As an edge sealant applied around the perimeter of a patch, it is essential and extends the life of any patch by preventing the edge-lifting failure mode. Cure time is 8–12 hours; using the gloves before full cure produces a bond that never reaches full strength.
Aquaseal FD for membrane-level repairs. When a tear reaches the waterproof membrane, Seam Grip alone may not fully seal the membrane layer. Aquaseal FD is a flexible urethane adhesive specifically designed for waterproof membranes. It cures to a more water-resistant film than standard Seam Grip and handles the slight movement of the membrane layer under skiing conditions. Apply it to the membrane surface before patching the outer shell — it seals the membrane and then the outer patch covers the exterior cosmetically.
Heavy-duty thread for structural seam repairs. For seam failures, thread is not optional — it is the repair. Any thread used on ski gloves needs to be waxed or synthetic rather than cotton; cotton absorbs moisture and degrades quickly in ski conditions. Use a curved upholstery needle if available; it handles the thickness of glove materials better than a straight needle. Whipstitch along the seam, keeping stitches tight and evenly spaced. Thread spacing that is too wide leaves stress concentrations between stitches that cause the repaired seam to re-open.
| Material | Best Used For | Durability | Limitation | My Verdict |
| Leather patch | Palm, thumb, high-friction zones | Excellent — 2+ seasons | Hard to work with; heavier | High stress tears |
| Nylon patch | Back of hand, low-friction areas | Good — 1 season | Can peel at edges without sealing | Light-duty tears |
| Tenacious Tape | Any area — emergency or permanent | Very good — months to a season | Visible; not ideal for palms under grip | Fast fix without tools |
| Seam Grip (adhesive) | Seam repairs, edge sealing | Good standalone; great as sealer | Requires 12-hr cure | All seam failures |
| Aquaseal FD | Flexible tears, membrane exposure | Very good — stays flexible | Strong smell; slow cure | Membrane damage near tear |
| Heavy-duty thread | Structural seam repairs (with patch) | Excellent — multi-season | Requires hand-sewing skill | Large tears and seams |
Step-by-Step Repair: How to Fix Torn Ski Gloves
These steps apply to any patch repair. The specific materials vary by tear type — use the tear type table and decision checklist to select the right materials before starting.
Total repair time: 30–60 minutes
Full cure time: 8–12 hours
Difficulty level: Beginner to intermediate
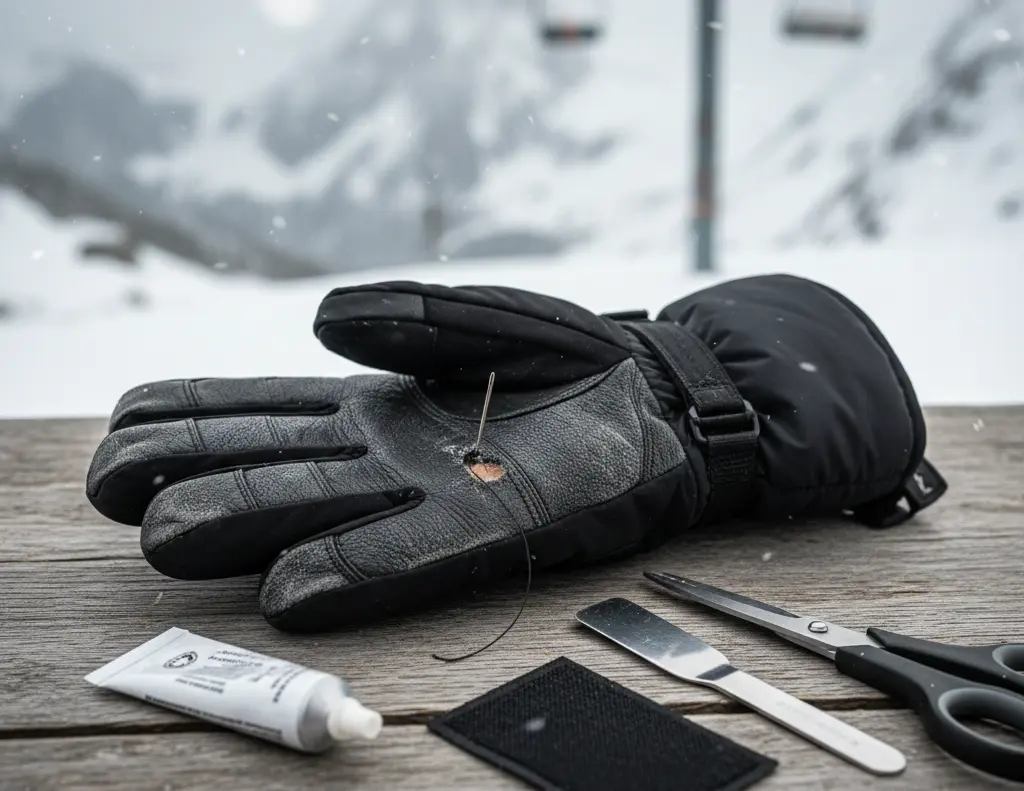
Tools You’ll Need
- Isopropyl alcohol
- Clean cloth
- Patch material
- Seam Grip or Aquaseal
- Curved needle (optional)
Step 1 — Assess and mark
With the glove off, press the tear open gently to examine the depth. Determine whether the membrane or insulation is involved. Mark the tear boundary lightly with a chalk pencil or tape marker — this shows you how large the patch needs to be and whether the tear is still contained or has begun propagating.
Step 2 — Prepare the surface
This is the step that determines whether the repair lasts. Wipe the entire area around the tear — a radius of at least 30mm beyond the tear boundary — with clean surfaces with isopropyl alcohol on a clean cloth. Allow it to dry completely, at least five minutes. Any moisture, skin oil, ski wax residue, or DWR coating under the patch prevents adhesion. If the surface has DWR coating (you can tell by how water beads on it), lightly scuff it with fine sandpaper or a nail file before cleaning — DWR coatings resist adhesive bonding without this step.
Step 3 — Address the membrane if exposed
If the tear reaches the membrane layer, apply Aquaseal FD directly to the membrane surface using a toothpick. Work it into the membrane tear and around the edges. Allow it to begin curing for at least 30 minutes before proceeding. This seals the waterproof layer before the outer patch is applied.
Step 4 — Stitch if required
For seam repairs, tears over 15mm in high-stress zones, or worn-through areas with intact edges, stitch before patching. Thread the needle with waxed synthetic thread and use a tight whipstitch along the length of the tear, spacing stitches 3–4mm apart. Pull each stitch firm but not so tight that it cuts the fabric. After stitching, run a bead of Seam Grip along the stitch line to seal the stitch holes against moisture penetration. Allow this to tack up for 20 minutes before continuing.
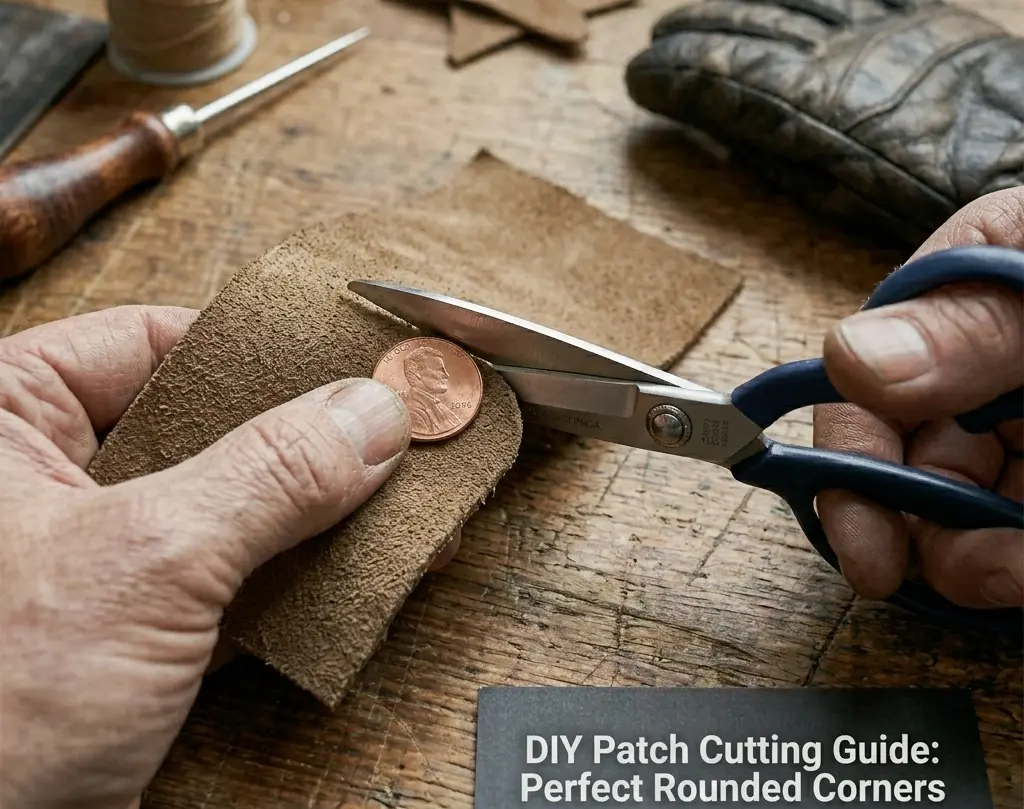
Step 5 — Cut the patch
Cut the patch at least 15mm larger than the tear on every side. Round all corners — use a coin as a corner template and trace around it. This is not cosmetic; squared patch corners peel away from the glove surface under the first flexion and become the failure initiation point for the entire repair. Round corners distribute peel stress evenly around the patch perimeter instead of concentrating it at the corner.
Step 6 — Apply the adhesive
For contact adhesive (leather patches): apply a thin, even coat to both the patch and the glove surface. Allow both surfaces to become tacky — about five to eight minutes — before bringing them together. Contact adhesive bonds on contact when both surfaces are tacky; pressing them together before this point results in a weak bond. For pressure-sensitive tape (Tenacious Tape): apply directly to the clean, dry surface and press firmly from the centre outward to prevent air bubbles.
Step 7 — Apply the patch and press
Position the patch carefully before allowing it to contact the glove surface — repositioning a contact-adhesive patch damages the bond. Press from the centre outward with firm, even pressure. Place the repaired area between two flat boards or under a heavy flat object. Apply pressure for at least two hours; overnight is better for contact adhesive. The pressure forces the adhesive into the pores of both surfaces and increases bond strength significantly.
Step 8 — Seal all patch edges with Seam Grip
This step is what separates a patch that lasts a season from one that peels within a week. After the patch adhesive has cured, run a thin bead of Seam Grip around the entire perimeter of the patch where it meets the glove fabric. Use a toothpick to work it into the edge and smooth it flat. When cured, this creates a flexible seal that prevents snow, moisture, and abrasion from getting under the patch edge. Allow 8–12 hours before the gloves are used.
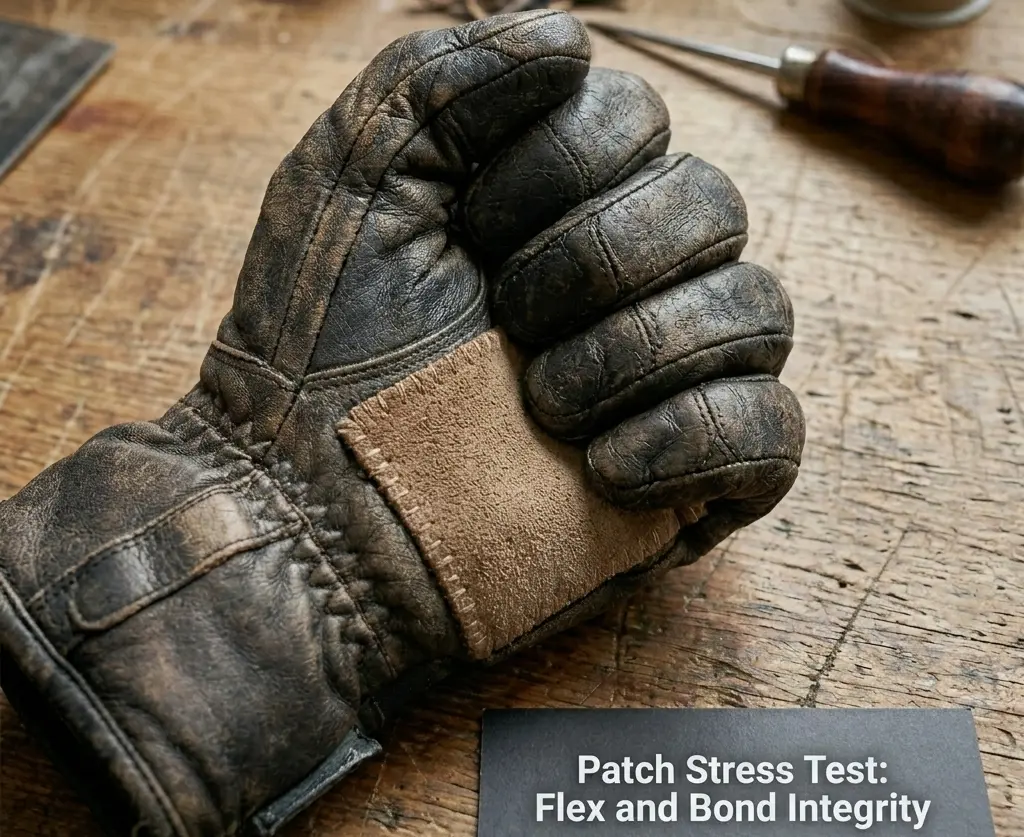
Step 9 — Test before trusting it on snow
Before skiing, squeeze and flex the repaired area repeatedly to test the bond. Run cold water over the repair and press it with your fingers — if moisture comes through, the membrane seal needs additional Aquaseal FD before the glove is used in wet conditions. Any edge lifting at this stage should be re-sealed with Seam Grip before it becomes a larger peeling failure on the mountain.
Field Repairs: When the Tear Happens Mid-Mountain
Sometimes a glove tears during a session and you need it functional for the rest of the day without any repair materials available. These are the field options that actually work, in order of effectiveness.
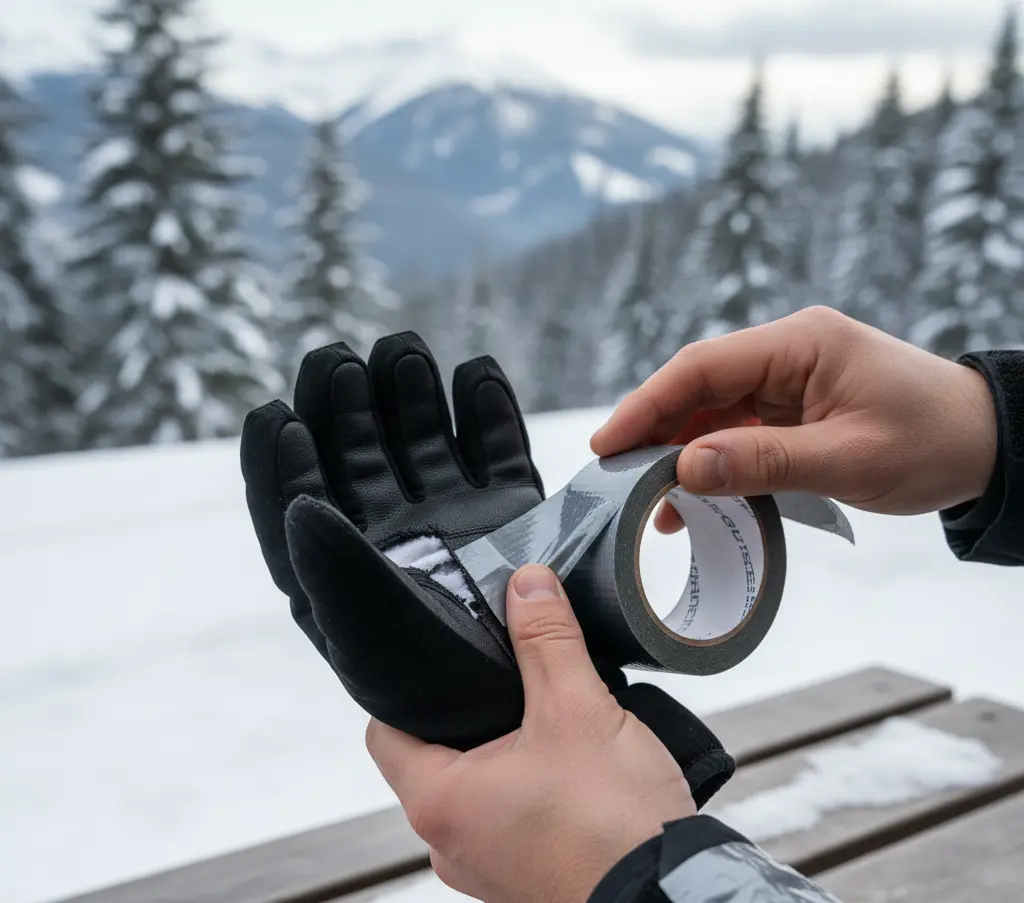
Duct tape wrapped with even tension
Works for any tear for a full day if applied correctly. The key is tension — wrap it firmly enough that the tape is under slight stretch, which prevents it from peeling back at the edges during flexion. Apply two overlapping layers if the tear is on the palm. The tape will have absorbed moisture by the end of the day, so do not expect it to hold through a second session. Get it properly patched that evening.
Athletic tape from a first-aid kit
Not waterproof but functional for keeping a small tear closed and preventing it from propagating further. Better than nothing on dry days. Useless in wet spring snow — it saturates and loses adhesion completely. Useful primarily for keeping the tear closed long enough to finish a session and assess the full damage when you can see it properly.
Kinesiology tape (KT Tape)
This is worth carrying in a jacket pocket if you ski frequently. It is water-resistant rather than waterproof, flexible, and bonds to fabric well even in cold temperatures. It holds through most conditions for a full day and sometimes two. The adhesive does not leave residue that interferes with a proper repair afterward.
A field repair is always temporary. Its job is to get you through the session, not to replace a proper repair. Skiing multiple days on a duct-tape field fix allows the tear to continue propagating under the tape, making the eventual proper repair larger and more complex.
When Patching Is Not the Right Answer
| What You See | Why Patching Won’t Solve It |
| Insulation falls out in chunks when you open the tear | Insulation is delaminating — a patch holds the shell but not the warmth |
| Waterproof membrane is visibly torn in multiple spots | You can seal one membrane tear; multiple means the whole membrane layer is failing |
| Tear is in the seam between the lining and outer shell | This is structural — patch will hold the outer shell but lining will keep separating inside |
| You’ve already patched the same spot twice before | The material around the original tear is compromised; it will keep failing |
| Glove fingers feel permanently stiff or deformed | Shell fabric has hardened past repair — patch won’t restore function |
| Multiple tears on both gloves across different areas | The gloves have reached end-of-life; patching is fighting the decline, not reversing it |
The clearest signal that patching will not solve the problem is when the damage is internal rather than at the outer shell. A patch addresses the outer shell. It cannot repair a failing waterproof membrane across a large area, restore compressed insulation, or stop a lining that is delaminating from the shell. If the glove is cold before it looks worn out, the problem is internal and a patch will not change that.
Decision Checklist: Your Tear to the Right Repair
Find your situation. These recommendations are based on tested repair outcomes, not general principles.
| Your Tear Situation | Right Repair Approach | Confidence |
| Single clean tear, under 20mm, outer shell only | Tenacious Tape or nylon patch + Seam Grip edges | High |
| Palm tear, any size, high-grip area | Leather patch both sides + stitch if over 15mm | High |
| Seam separating between fingers or at thumb | Re-stitch with waxed thread + Seam Grip seal | High |
| Tear exposing insulation but membrane intact | Tuck insulation, stitch closed, patch over top | High |
| Tear exposing waterproof membrane (visible film layer) | Aquaseal FD on membrane, then patch outer shell | Medium |
| Large torn area over 50mm on palm | Stitch, double-sided leather patch + Seam Grip seal | Medium |
| Multiple tears in different locations simultaneously | Assess glove overall — may be past repair | Caution |
| Membrane shredded or insulation falling out in clumps | Replace the gloves — repair will not hold | Replace |
The most common repair failure is applying a patch to a seam failure without stitching first. Adhesive over a failing seam covers the gap but does not re-bond the panel edges. The seam continues separating under the patch. Stitch before you patch any seam.
My Recommendation: How I Choose a Repair Method
When a pair of gloves tears, my decision process runs through four questions in order: Where is the tear? What layers are affected? Is the surrounding material structurally sound? How much stress does that area take?
For palm tears in gloves I want to keep skiing in, I go straight to a leather patch with contact adhesive, Seam Grip edge sealing, and stitching if the tear is over 15mm. This is more work than a tape fix, but it is the only repair that holds under sustained pole grip. Every other material I have tested on palm tears eventually fails under grip shear stress. Leather does not.
For seam repairs at the thumb crotch or finger seams, I stitch first without exception. I have tried adhesive-only on finger seams four times in testing. It held longest for nine ski days before the seam continued opening. Stitching first and sealing the stitch line with Seam Grip is the only repair that genuinely arrests seam separation. The stitching takes twenty minutes. It is worth it.
For back-of-hand tears, Tenacious Tape on a clean, scuffed surface is my default — it is fast, genuinely durable in that low-stress location, and the repair holds for a full season without stitching. I seal the edges with Seam Grip after the tape is applied, which extends the bond life and prevents edge lifting.
For any tear that reaches the membrane, I add Aquaseal FD as a membrane seal before patching the outer shell. Skipping this step and patching the outer shell only produces a glove that passes a visual inspection but leaks at the repair site in wet snow conditions.
The one decision I make consistently regardless of tear type: I never skip the surface preparation. Cleaning with isopropyl alcohol and scuffing DWR-coated surfaces is the repair step with the highest impact on longevity. The patch material matters. The adhesive matters. The surface preparation determines whether either of those things work at all.
Frequently Asked Questions
Can torn ski gloves really be repaired permanently?
Yes — but only if the repair method matches the tear location and stress level. Small back-of-hand tears often hold for a full season with a properly sealed patch. Palm tears and seam failures require stitching plus reinforcement to last. If insulation is falling out or the membrane is shredded in multiple areas, replacement is usually the better long-term option.
What is the best patch material for ski glove repairs?
It depends on where the damage is. Leather patches perform best on palms and high-friction zones because they resist shear from pole grip. Ripstop nylon or Tenacious Tape works well on the back of the hand where stress is lower. For any patch type, sealing the edges with a flexible urethane adhesive dramatically improves durability.
Will repairing a ski glove restore waterproofing?
It can — but only if the waterproof membrane is properly sealed before the outer patch is applied. If the membrane layer is exposed, it must be treated with a membrane-safe urethane adhesive first. Simply covering the outer fabric may look fixed but often results in slow leaks during wet spring conditions.
When is it better to replace ski gloves instead of patching them?
Replacement is the smarter move when damage is widespread or structural. Signs include multiple tears across the glove, insulation clumping or falling out, stiff or deformed fingers, or a membrane that is torn in several places. In these cases, patching may provide a temporary fix but usually won’t restore warmth or long-term durability.
What to Do Right Now
If you have a torn glove in front of you: run the four diagnostic questions. Identify the location, depth, tear type, and size. Use the tear type table to find the right material combination. Prepare the surface properly before applying anything. Seal all patch edges with Seam Grip after the main adhesive cures. Test the repair before trusting it on snow.
A repair done in the right order with the right materials holds for a full season in most tear locations. A repair that skips preparation or uses the wrong material for the stress level of that location fails within days. The difference between the two is entirely in the assessment and preparation, not in how long you press the patch.
When done properly, how to fix torn ski gloves becomes a simple maintenance skill that can extend glove life by multiple seasons.
Protect Your Gear: Move From Repair to Prevention
Patching a tear saves your session, but the best way to avoid the needle and thread entirely is to stop the fabric from degrading in the first place. Most tears happen because the material has become brittle or the seams have been weakened by improper drying.
If you want to ensure your gear stays structural for a decade or more, read my full deep-dive on How to Make Ski Gloves Last Longer to learn the professional drying and conditioning secrets that keep tears from starting.
About the Author
Awais Rafaqat has over 15 years of experience testing ski gear in some of the harshest conditions across North America, from the dry sub-zero peaks of the Rockies to the wet, freezing slopes of the Pacific Northwest. He specializes in real-world gear testing to help skiers find equipment that keeps them warm, dry, and performing at their best on every run.
© SkiGlovesUSA.com — All repair methods described were personally tested across multiple seasons and tear types. No sponsored product mentions.