How to layer ski gloves — sounds simple, right? You just throw on another pair and call it a day. But oh man, if only it were that easy. If you’ve ever felt your fingers go numb halfway down a run, you already know bad layering can ruin an otherwise perfect powder day.
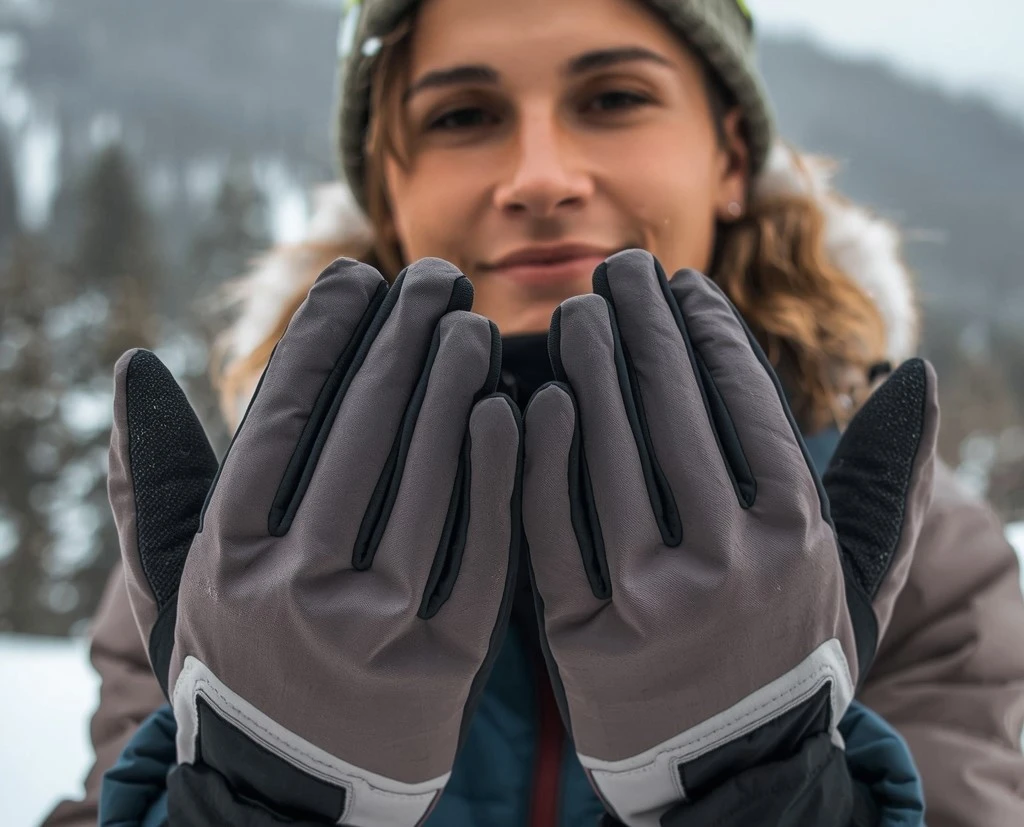
I remember Amy first real winter trip — minus fifteen, wind howling, snow slicing my face like tiny knives. I thought my thick “insulated” gloves would do the job. They didn’t. Within minutes, my hands were stiff, burning cold, and I couldn’t even hold my poles properly. That’s when I learned layering gloves isn’t about more, it’s about smart.
So yeah, how to layer ski gloves isn’t some fancy trick — it’s survival science. The right combo of liner, insulation, and shell turns your hands into a personal heating system. Do it wrong, and you’ll spend more time thawing than skiing.
In this post, we’re breaking down the real-world tricks skiers use — not the fluffy “just wear wool” stuff. You’ll learn what pros do differently, how to trap heat without losing grip, and the kind of liners that actually make sense for your setup. Because when your hands are warm, every turn, every grab, every moment on the mountain just feels… better.
- How Ski Glove Layering Works
- Step 1: Start with a Proper Glove Liner
- Step 2: Choose the Right Insulated Glove
- Step 3: Add an Over-Mitt or Shell
- Balancing Warmth vs Dexterity
- Step 4: Manage Moisture and Sweat
- Step 5: Use Hand Warmers Smartly
- Layering for Different Conditions
- Special Layering Tips for Different Users
- Common Mistakes When Layering Ski Gloves
- Caring for Layered Ski Gloves
- Quick Layering Checklist for Ski Gloves
- FAQs — Ski Glove Layering Guide
- Conclusion
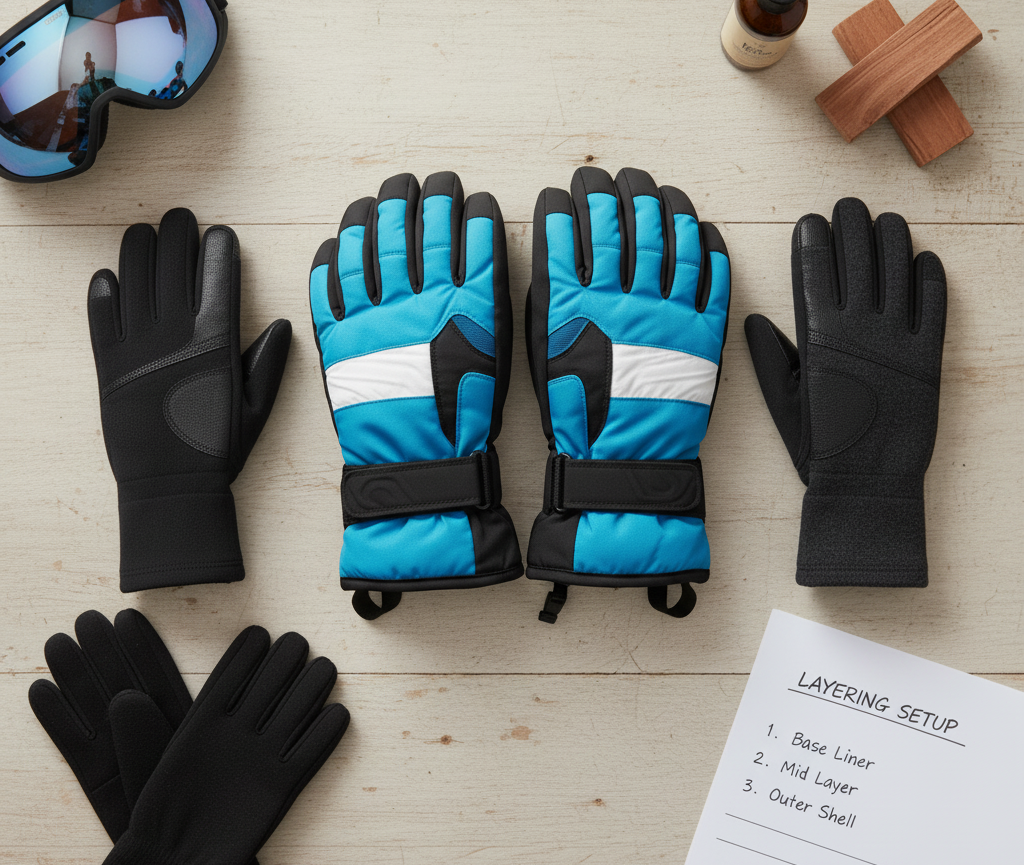
How Ski Glove Layering Works
Ever wonder why some people look totally chill on the slopes while your fingers feel like frozen French fries? The secret is understanding how ski glove layering works. It’s not just about piling on extra fabric — it’s about creating a mini climate system for your hands.
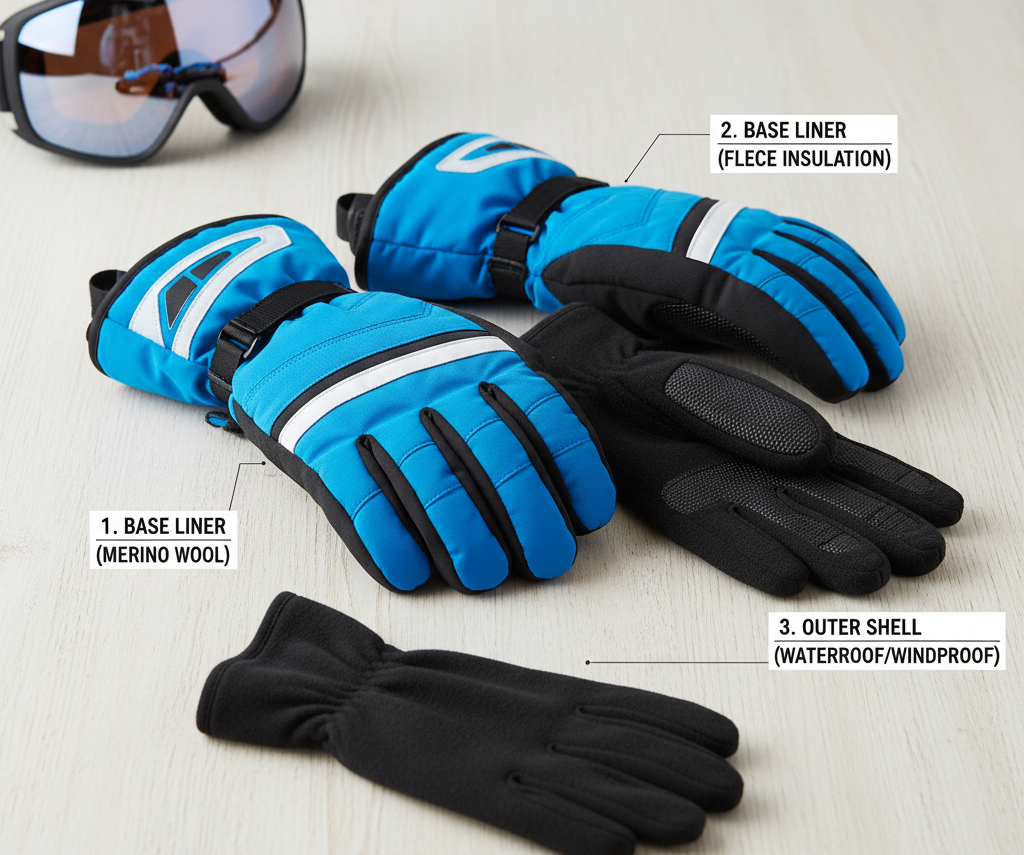
Think of it like this: your gloves are a three-part team, each layer with its own job. The liner pulls sweat away from your skin (because yes, your hands sweat even in the cold). The middle layer — usually insulation — traps body heat. And the outer shell keeps wind, snow, and water out. Together, they balance warmth and breathability so your hands stay dry, warm, and flexible.
From my experience, this setup works kind of like a high-tech sandwich — thin base, warm center, strong outer crust. If one layer fails, the whole thing falls apart. For example, if your liner gets damp, your insulation can’t trap heat properly. Or if your shell isn’t waterproof, all that warmth just… escapes.
That’s why knowing how ski glove layering works is more than a gear tip — it’s a performance hack. Once you understand the science behind it, you can tweak your setup for any weather: light liners and shells for spring skiing, or full insulated layering for those brutal January mornings.
So before you buy another pair of “extra warm” gloves, take a minute to get the layering right. It’s cheaper, smarter, and honestly, it might save your next powder day.
Step 1: Start with a Proper Glove Liner
If you want to master how to layer ski gloves, everything starts with a good liner. Think of glove liners as your hands’ thermal base layer — the unsung hero that keeps moisture out and warmth in. They’re thin, light, and surprisingly powerful when it comes to keeping your fingers from freezing solid.
Here’s the deal: when you ski, your hands sweat more than you realize. That moisture doesn’t just vanish — it cools down fast, leaving your fingers icy. A proper glove liner acts like a sponge that wicks away that sweat before it can chill you. It’s basically your first defense against cold, clammy misery.
From my experience, materials matter here — a lot. Go for merino wool or synthetic liners if you want breathability and moisture control. Avoid cotton like the plague (it soaks, freezes, and ruins your day). If you ski in sub-zero temps, silk liners can be a secret weapon: super thin yet great at trapping heat.
And don’t overdo it. If your liners are too thick, your outer gloves won’t fit snugly, which kills dexterity and creates cold air pockets. The goal is a liner that feels like a second skin — not a bulky extra layer.
Get this first step right, and the rest of your glove layering setup becomes a whole lot easier. Warm, dry hands start here — simple as that.
Step 2: Choose the Right Insulated Glove
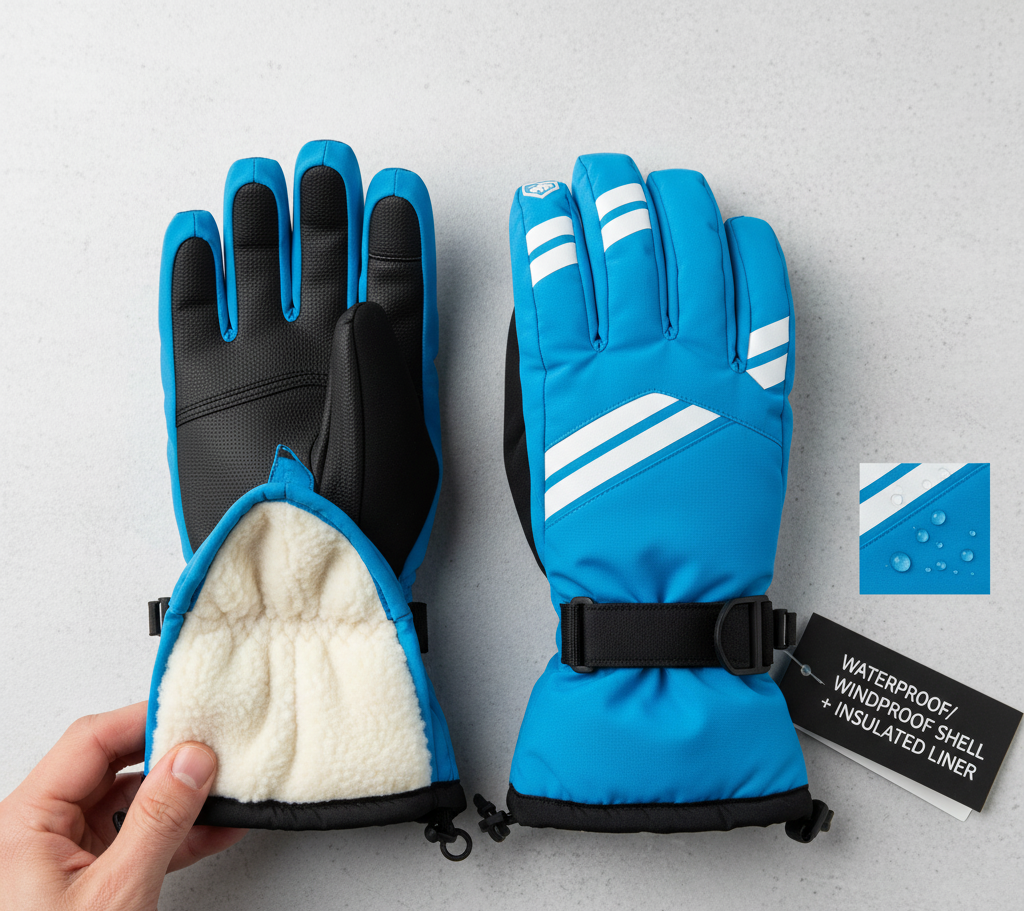
Once you’ve nailed your liner, the next big move in how to layer ski gloves is choosing the right outer glove — the layer that does the heavy lifting against snow, wind, and bitter cold. Think of it as your hands’ armor: tough, insulated, and weatherproof, yet flexible enough to move naturally.
The outer glove’s main job? To trap the heat your liner generates and keep it from escaping into the mountain air. That means insulation matters — a lot. You’ll usually see two main types: down and synthetic. Down is warmer, lighter, and feels ultra-soft, but it loses its edge when wet. Synthetic insulation (like Thinsulate or PrimaLoft) doesn’t pack down as tightly, but it keeps you warm even when damp.
From my experience, if you ski in wet snow or unpredictable weather, go with synthetic. If you’re in dry, freezing temps — like Colorado or the Alps in January — down gloves can feel like little furnaces.
Also, pay attention to fit. A glove that’s too tight will squeeze out the warm air your liner is trying to trap. Too loose, and you’ll lose dexterity. Aim for a snug-but-not-restrictive feel — kind of like a firm handshake.
And here’s something most people miss: make sure your outer gloves have adjustable cuffs or wrist closures. They seal out snow and wind, keeping all that precious warmth inside.
If your outer glove hits that perfect balance between insulation, flexibility, and weather protection, you’ll never have to think about cold hands again — no matter how long you’re out there carving the slopes.
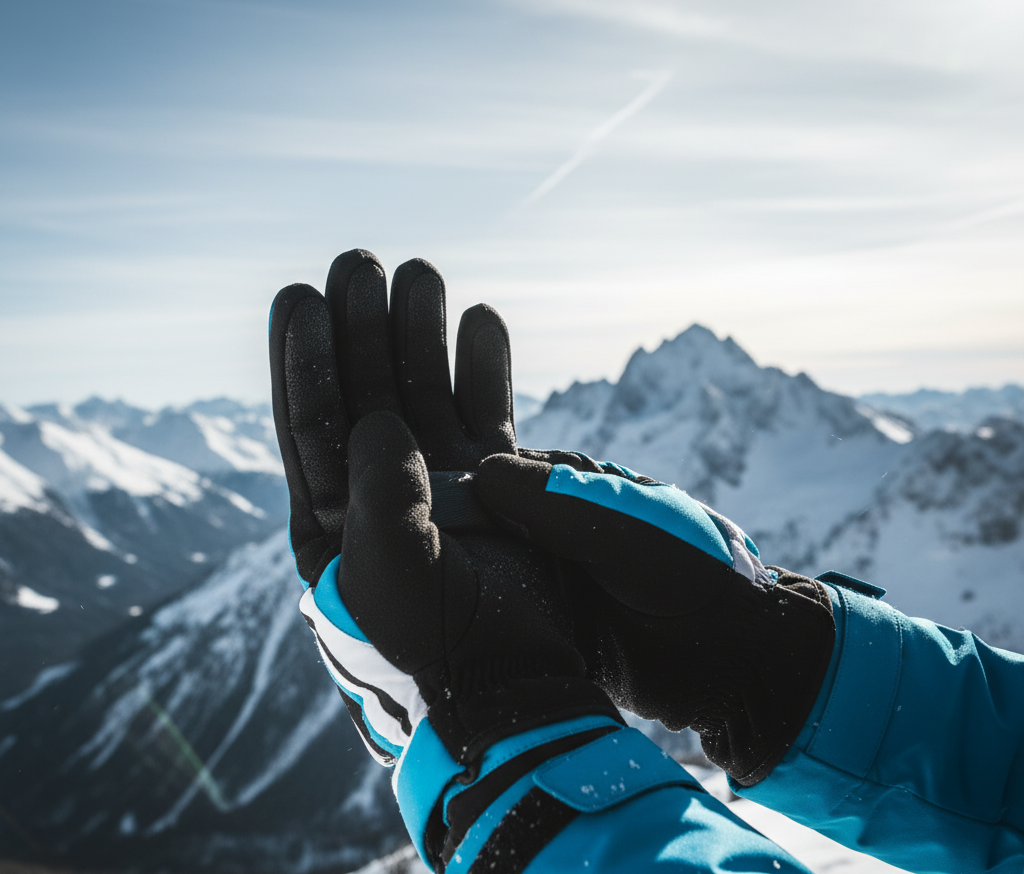
Step 3: Add an Over-Mitt or Shell
Here’s where things get next-level in how to layer ski gloves — adding an over-mitt or shell layer. Most skiers skip this step, but honestly, it’s what separates the “I’m fine” crowd from the actually warm ones.
An over-mitt (also called a shell layer) is like a weatherproof jacket for your hands. It doesn’t add much insulation, but what it does add is priceless: protection. It blocks out icy wind, stops snow from sneaking in, and locks in all that cozy warmth your liner and insulated glove have built up.
Think of it as your last line of defense against the elements. On stormy days or high-altitude runs, a good shell layer keeps your gloves performing even when conditions get nasty. If you’ve ever been hit by blowing snow at the summit, you know how quickly exposed fabric soaks up moisture. That’s where an over-mitt saves the day.
From my experience, the best ones are made from waterproof yet breathable materials like GORE-TEX or nylon blends. You don’t want your hands sweating inside a plastic bag — the goal is to block out the cold, not trap in humidity.
And if you’re wondering, “Do I really need this extra layer?” — probably not for sunny resort days. But if you’re heading into backcountry terrain or anywhere temps drop below -10°C (14°F), having an over-mitt handy can be a game-changer.
Lightweight, packable, and easy to pull on when the weather turns — this third layer is your secret weapon for unpredictable conditions. Once you try it, you’ll never ski without one tucked in your pocket.
Balancing Warmth vs Dexterity
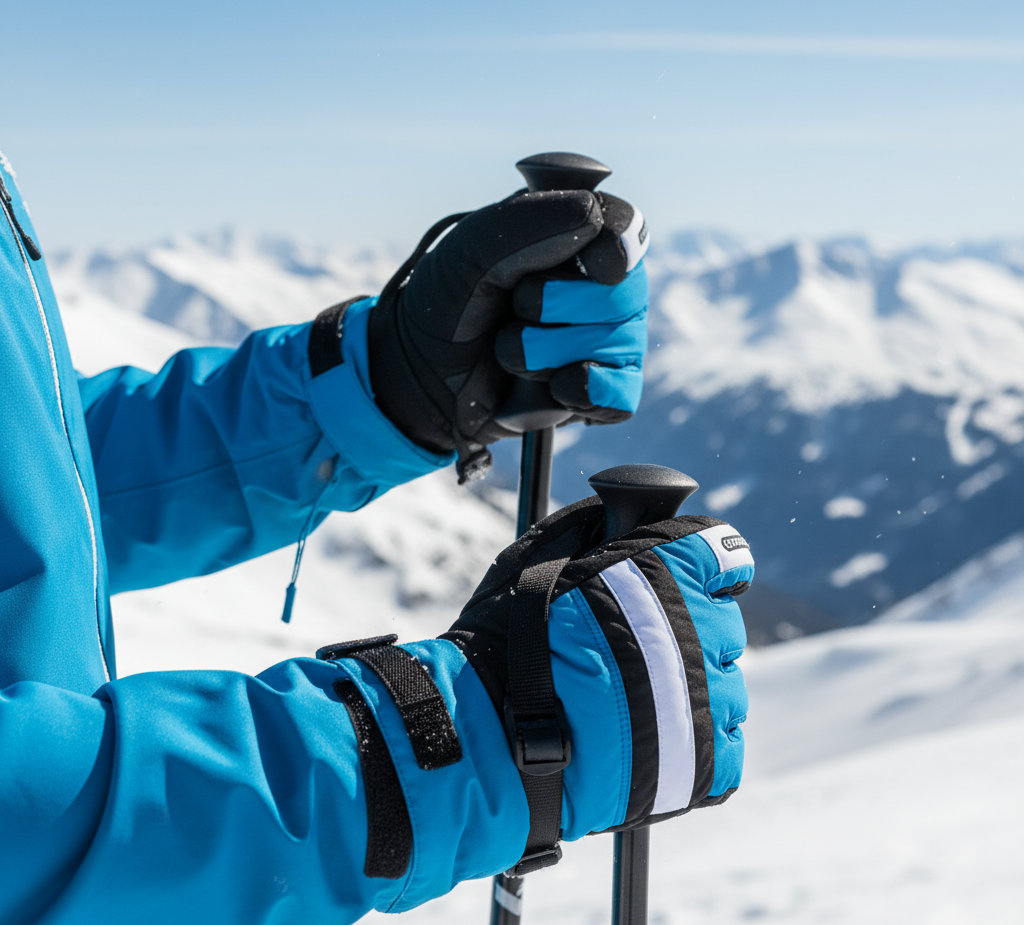
This is the part most people get wrong when figuring out how to layer ski gloves — finding that sweet spot between warmth and dexterity. Because yeah, it’s great to have warm hands… until you can’t even buckle your boots or grip your poles.
It’s a tricky balance. Too much insulation, and your hands feel like they’re wrapped in pillows — safe but clumsy. Too little, and your fingers freeze before you even reach the lift. The goal is to create a setup that traps heat without turning your hands into stiff blocks.
From my experience, this balance depends on two things: temperature and activity level. If you’re skiing aggressively or hiking uphill, your body generates more heat, so lighter layers work better. On the other hand, if you’re riding chairlifts all day or standing around teaching lessons, you’ll want that extra padding.
One simple trick? Test your gloves at home. Try picking up coins, adjusting zippers, or holding your phone. If you can’t do those things comfortably, you’ve gone too thick. Good layering feels natural — warm but mobile, protected but free.
Pro tip: liners with touch-screen compatibility and flexible insulation materials like PrimaLoft give you that perfect middle ground. They hold heat without sacrificing grip or feel.
In short, mastering warmth vs dexterity is what separates a comfortable skier from a frustrated one. With the right glove layers, you shouldn’t have to choose between cozy and capable — you can (and should) have both.
Step 4: Manage Moisture and Sweat
Here’s something a lot of skiers don’t realize — when it comes to how to layer ski gloves, moisture control is everything. Even the warmest gloves in the world won’t help if your hands are damp inside. Once sweat builds up, the insulation gets wet, heat escapes faster, and suddenly your fingers feel like they’re dipped in ice water.
From my experience, this usually happens when people wear too many layers or pick the wrong materials. Cotton liners, for instance, are a total no-go. They soak up sweat and never dry out. Instead, go for moisture-wicking liners made of merino wool or synthetic fabrics like polyester or bamboo blends. These pull moisture away from your skin and keep your hands dry — the first rule of glove layering done right.
If you tend to sweat a lot, it’s smart to bring an extra pair of liners. Swap them out midday when they get damp. It sounds excessive, but that quick change can literally save your day on the mountain.
Another key move? Avoid trapping moisture inside. Make sure your outer gloves are breathable — look for membranes like Gore-Tex or eVent. They let sweat vapor escape while blocking snow and water from coming in. It’s like having invisible air vents for your hands.
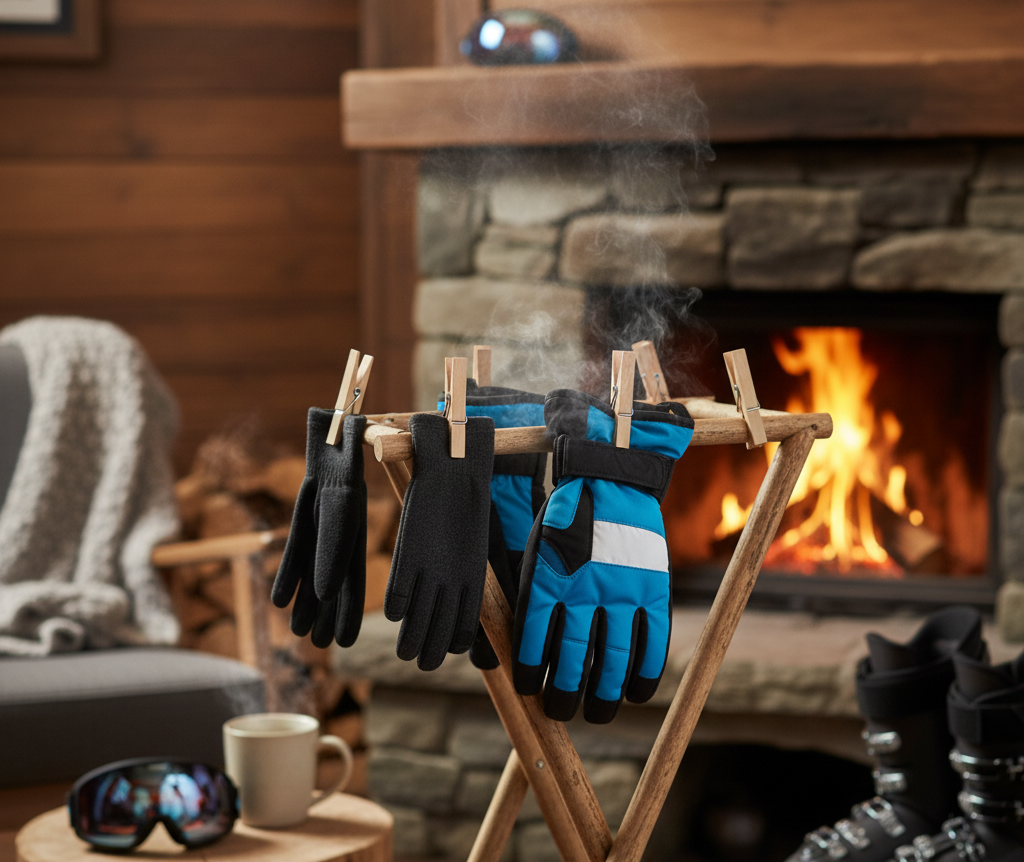
And when you’re done skiing, always dry your gloves thoroughly before the next run or storage. Stuffing damp gloves into your bag just breeds odor, bacteria, and stiffness — trust me, I learned that one the hard way.
So if you’re serious about mastering how to layer ski gloves for extra warmth, remember: staying dry is staying warm. Sweat control isn’t just a comfort hack — it’s the real secret to keeping your hands toasty all day without overheating or freezing halfway down the slope.
Step 5: Use Hand Warmers Smartly
Here’s the truth — even if you’ve mastered how to layer ski gloves for extra warmth, sometimes the mountain still wins. That’s when hand warmers become your secret weapon. But (and this is key) using them the wrong way can actually make your hands colder. Yep, I learned that the hard way one bitter day in Colorado when my fingers went from toasty to numb in ten minutes flat.
First off, never toss hand warmers directly inside your gloves against bare skin. That’s a rookie mistake. They can create uneven heat, make your palms sweat, and once moisture builds up, your gloves start losing insulation fast. Instead, slide the warmers between your liner and your outer glove — ideally on the back of your hand, not the palm. That way, the heat circulates naturally and keeps blood flowing to your fingertips without overheating.
If you’re using rechargeable electric hand warmers, keep them on the low or medium setting. High heat feels amazing at first, but it’ll dry out your gloves or overwork the insulation. Plus, batteries drain faster in freezing temps — nothing worse than a dead warmer halfway through a run.
Disposable warmers are great too, but always shake them up and let them activate before tucking them into your gloves. And if you’re layering with thin liners, go for slim-fit warmers designed for ski gloves so they don’t bulk up your grip.
One pro tip? Pack a few extra warmers in an inside jacket pocket. Body heat keeps them warm, and you’ll always have a backup ready to go when temperatures really drop.
So, when thinking about how to layer ski gloves for extra warmth, remember: hand warmers aren’t just accessories — they’re part of the system. Use them strategically, keep airflow in mind, and your hands will stay comfortable, nimble, and ready for another lift ride instead of another round of frostbite panic.
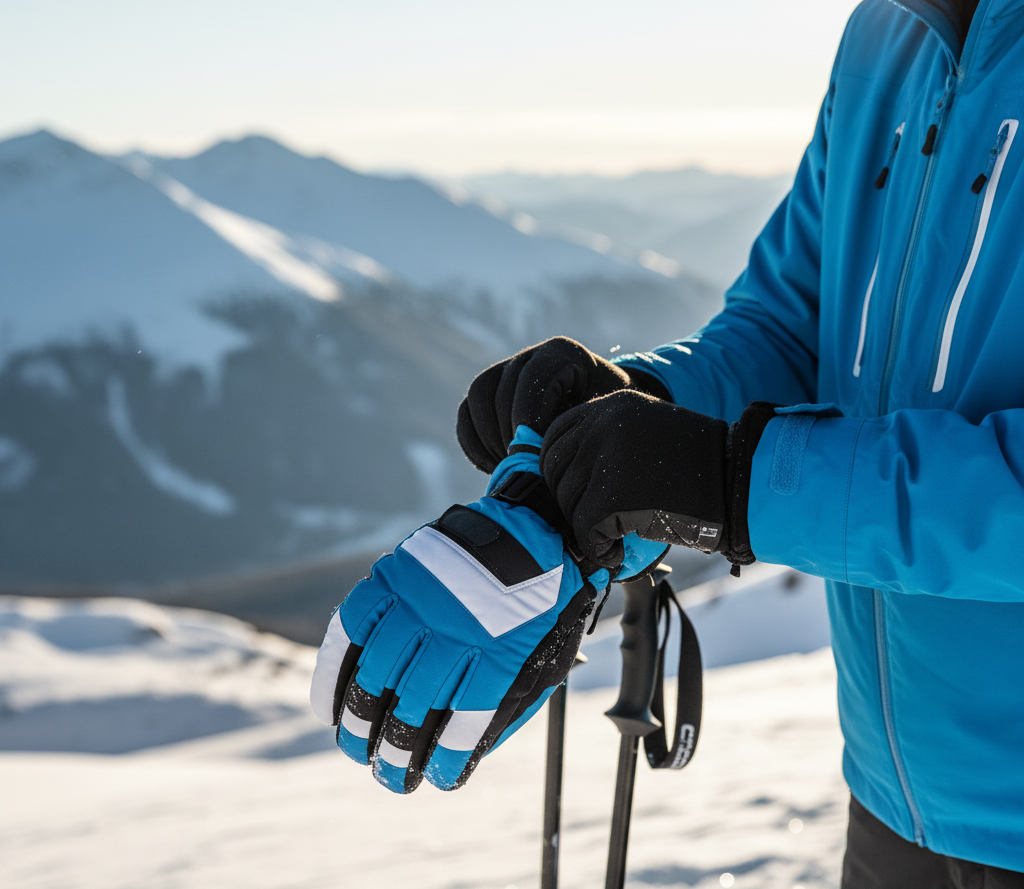
Layering for Different Conditions
Here’s where the real magic of knowing how to layer ski gloves for extra warmth comes into play — adapting your setup to the weather. Because, honestly, no single layering combo works for every day on the mountain. Some mornings are bone-chilling blizzards; others, the sun’s blazing like it’s spring. And if you wear the same glove setup all season, you’ll either freeze or sweat through your gear.
From my experience, glove layering is a bit like dressing in layers for your body — you fine-tune it based on the conditions, your activity level, and how “cold-blooded” you are. Let’s break it down:
1. Mild or Spring Conditions (Above 25°F / -4°C)
When temps are warmer, you want breathability over bulk. Go with a light liner — something thin like a merino wool or synthetic blend — and a lightly insulated outer glove. This setup keeps moisture in check while giving you solid grip for poles or zippers.
Skip over-mitts and chemical warmers; they’ll just make your hands sweaty. If things heat up mid-day, stash your liners in your pocket — flexibility is key.
2. Cold Winter Days (10°F to 25°F / -12°C to -4°C)
This is the sweet spot where proper layering really pays off. Start with thermal glove liners — ideally moisture-wicking ones that trap heat but stay dry. Over that, wear a medium-weight insulated ski glove with waterproofing (Gore-Tex, Thinsulate, or PrimaLoft work wonders).
If your hands tend to run cold, toss in a hand warmer between the liner and outer layer for steady warmth without sweating up your palms.
3. Extreme Cold (Below 10°F / -12°C)
When you’re skiing in brutal cold or high wind, you’ll need the full setup. That means:
- Base layer: Heavier merino or fleece liner.
- Mid layer: Insulated waterproof glove.
- Top layer: A windproof shell mitt or over-glove.
This triple-layer system locks in warmth while giving you the option to peel layers back when things warm up. Add hand warmers if needed — just position them carefully.
4. Wet Snow or Rainy Conditions
In slushy or mixed-weather conditions, moisture control becomes your top priority. Skip fleece or wool liners — they’ll soak up water fast. Instead, use synthetic liners (nylon or polyester) and a fully waterproof outer shell. You can even pre-treat your gloves with DWR (Durable Water Repellent) spray before heading out.
And don’t forget: once moisture sneaks in, no layering system can save you. Always pack an extra pair of liners in your jacket or pack — trust me, swapping into dry liners mid-day feels like magic.
So, the trick to mastering how to layer ski gloves for extra warmth isn’t about piling on more material — it’s about matching your glove system to the mountain’s mood. A smart skier knows when to scale up, when to strip down, and when to let their hands breathe.
Special Layering Tips for Different Users
When learning how to layer ski gloves for extra warmth, one thing becomes clear fast — there’s no one-size-fits-all formula. What works for a pro skier on an icy slope might feel bulky or overkill for a casual weekend rider. Your glove setup should match how your hands handle cold, how long you’re out, and even what kind of skiing you do.
For Cold-Handed Skiers
If your fingers freeze easily, start with a thermal liner made from merino wool or silk — they trap heat without feeling bulky. Add a well-insulated outer glove with Primaloft or down fill, and finish with a windproof over-mitt for those brutal, windy lift rides. You can even slip a small hand warmer between the liner and the glove for an extra punch of heat.
For Backcountry Skiers
Weight and moisture management matter most. Choose a thin, wicking liner (synthetic or bamboo works well) paired with a breathable shell glove instead of a heavy insulated one. You’ll generate plenty of body heat while climbing, so it’s better to layer light and carry an over-mitt for descents or rest breaks.
For Resort Skiers
You’re often dealing with temperature swings — warm in the lodge, freezing on the lift. Opt for a removable-liner glove or a medium-weight glove with room for a thin liner underneath. That way, you can easily adjust without overheating or losing grip.
For Kids and Beginners
Layering can get tricky for little ones, so simplicity is key. Go for a single insulated glove with a moisture-wicking liner built in. If it’s extremely cold, add a thin fleece liner, but make sure it doesn’t restrict movement — kids need to grip poles and zippers easily.
For Snowboarders
Since snowboarders use their hands more (adjusting bindings, sitting in snow), durability and dexterity take priority. Pair a stretchy liner with a reinforced leather glove or mitt. Some riders even prefer glove shells with removable liners so they can swap them out mid-day if they get damp.
In short, knowing how to layer ski gloves for extra warmth isn’t about piling on fabric — it’s about smart combinations that fit your activity and tolerance. The right setup feels natural, keeps your fingers dry, and lets you stay out longer without sacrificing movement or comfort.
Common Mistakes When Layering Ski Gloves
Learning how to layer ski gloves for extra warmth can be a total game-changer — but only if you do it right. Many skiers think more layers mean more warmth, but that’s not always true. Sometimes, too much layering can actually make your hands colder. Here are the most common mistakes to avoid so your layering works with you, not against you.
1. Over-Layering (Bulky Doesn’t Mean Warm)
It’s tempting to pile on thick liners under your gloves, especially on icy days. But too much bulk restricts circulation, and warm hands rely on good blood flow. If your gloves feel tight or you can’t move your fingers freely, you’ve gone too far. Remember — air space traps heat. Squeeze that out, and you lose insulation.
2. Mixing the Wrong Materials
Not all fabrics play well together. Cotton liners, for example, trap moisture and make your hands clammy fast. When that moisture cools, your hands freeze. Always choose moisture-wicking liners like merino wool, silk, or synthetics designed for cold weather performance.
3. Ignoring Moisture Management
Even if you have great layers, sweat can kill your warmth. Skiing generates heat, and if that moisture gets trapped inside your gloves, it’ll chill your fingers within minutes. Pick breathable outer gloves and, if possible, rotate liners during long ski days to keep things dry.
4. Wrong Fit Between Layers
Your liner and outer glove should feel snug but not tight. If your liner bunches up, or if your outer glove feels stretched over it, the layers won’t insulate properly. Always try them on together before hitting the slopes — like testing puzzle pieces to make sure they click.
5. Forgetting to Dry Layers Overnight
This one’s a classic. You take off your gloves, toss them in your bag, and call it a day. But even slightly damp liners will ruin your next morning on the mountain. Always air-dry your liners and gloves separately after skiing. Warm, dry layers are the secret to lasting comfort.
6. Using Hand Warmers Incorrectly
Hand warmers can be a blessing — or a waste. Many skiers put them inside their liners, directly on their palms. That can actually overheat one area and make others feel colder. The best spot? Between your liner and glove back, near your knuckles. That’s where blood flows to your fingers.
7. Not Matching Layers to Weather
Your glove setup should change with conditions. A combo that’s perfect for mild spring skiing might be useless in January blizzards. Adjust your layering based on the day’s forecast — sometimes, one well-insulated glove is all you need.
In short, how to layer ski gloves for extra warmth isn’t about adding more — it’s about adding smarter. Avoid these pitfalls, and your hands will stay warm, dry, and nimble from your first run to your last lift ride.
Caring for Layered Ski Gloves
Once you’ve mastered how to layer ski gloves for extra warmth, the next step is making sure those layers actually last. Good glove maintenance isn’t just about keeping them clean — it’s about preserving insulation, flexibility, and waterproofing so they perform season after season.
1. Dry Thoroughly After Every Use
This is non-negotiable. After skiing, separate your liners from the outer gloves and let them air dry completely. Never toss them near a heater or dryer — extreme heat can warp leather, crack synthetic shells, and destroy waterproof membranes. Instead, place them in a warm, ventilated area overnight.
2. Wash Liners Regularly (But Gently)
Your glove liners absorb sweat, oils, and even sunscreen — all of which can break down fabric over time. Wash them every few uses with mild detergent in cold water. Avoid fabric softeners; they reduce moisture-wicking ability. Air dry flat and make sure they’re fully dry before reusing.
3. Reproof Outer Gloves
If your gloves start soaking up water instead of repelling it, it’s time for a reproofing treatment. Use a spray-on or rub-in waterproofing product made for ski gear. Focus on seams and high-wear areas like fingertips. This keeps the outer shell breathable yet water-resistant — crucial for warmth.
4. Condition Leather Gloves
For leather outer shells, apply a leather conditioner a few times each season. This keeps them soft, flexible, and resistant to cracking. Skip petroleum-based products — they clog pores and reduce breathability. A beeswax-based balm or specialty ski glove conditioner works best.
5. Store Them Properly in the Off-Season
When ski season ends, make sure your gloves are completely dry and clean before storing. Keep them in a cool, dry, and dark space — not an attic or damp garage. Stuff them lightly with paper to maintain shape and prevent creases in the leather or insulation.
6. Rotate Liners During Long Trips
If you’re skiing multiple days in a row, pack an extra pair of liners. Rotating them daily gives each set time to dry and recover its insulating loft. Fresh, dry liners make a huge difference in both comfort and glove longevity.
7. Inspect and Repair Small Damages Early
Tiny tears or seam splits might not seem like a big deal, but they can spread quickly once moisture gets in. Seal small holes with fabric repair tape or patch kits. For bigger damage, consider professional gear repair — it’s cheaper than buying new gloves.
In the end, maintaining layered ski gloves is really about respecting your gear. When you take care of them — wash, dry, condition, and store properly — your gloves will reward you with seasons of reliable warmth.
Quick Layering Checklist for Ski Gloves
Before you hit the slopes, run through this simple checklist to make sure your ski glove layering setup is on point. It only takes a minute — but it can mean the difference between warm, comfortable hands and a miserable, frozen day on the mountain.
Start with Clean, Dry Liners — Moist liners trap sweat and make your hands cold fast. Always start fresh.
Use the Right Material — Choose merino wool or synthetic liners for moisture control — avoid cotton at all costs.
Add a Quality Insulated Outer Glove — Look for gloves with PrimaLoft or Thinsulate insulation. They’ll trap heat without making your hands feel bulky.
Check Fit and Dexterity — Flex your hands. You should be able to grip your poles or adjust goggles comfortably, even with all layers on.
Optional: Add a Shell or Over-Mitt — For extra-cold or windy days, a lightweight shell or over-mitt helps lock in warmth.
Keep Hand Warmers Handy — Slip them between liner and glove, never directly on skin.
Manage Moisture — If your gloves get damp mid-day, dry them during lunch using boot dryers or near a vent — not a heater.
Pack an Extra Pair of Liners — Swap them out if your hands get sweaty. Fresh liners = instant comfort boost.
Check for Damage — Inspect seams, zippers, and waterproofing. Small fixes now prevent cold hands later.
End-of-Day Routine — Separate layers, air dry overnight, and store them in a ventilated spot.
Honestly, this quick checklist is something every skier should pin inside their gear bag. Because when your gloves are perfectly layered, you don’t just stay warm — you ski longer, grip stronger, and enjoy every minute on the snow.
FAQs — Ski Glove Layering Guide
1. What does layering ski gloves mean?
Layering ski gloves means wearing a liner glove underneath your main insulated glove to create extra warmth and moisture control. It’s like layering clothes — each layer has a purpose: one to wick sweat, one to insulate, and one to block wind and snow.
2. Do I really need glove liners for skiing?
Not always, but they help a lot in freezing or wet conditions. If you ski in mild weather or have heavily insulated gloves, liners might be optional. But if your hands get cold easily, glove liners can make a huge difference.
3. What’s the best material for glove liners?
Merino wool and synthetic fabrics like polyester or silk are top choices. They wick sweat and stay warm even when damp. Avoid cotton — it traps moisture and makes your hands feel cold.
4. Can layering reduce dexterity?
Yes, if overdone. The trick is finding a balance between warmth and flexibility. Use thin liners and well-fitted gloves so you can still hold poles, adjust zippers, or use your phone without struggling.
5. Should I use heated liners and hand warmers together?
You can, but be cautious. Too much heat can make your hands sweat, which leads to chill later. Usually, one heat source — either battery-powered liners or disposable warmers — is enough.
6. How do I know if my glove layers fit correctly?
Your layers should feel snug but not tight. Wiggle your fingers — they should move freely without cutting off circulation. If your gloves feel stiff or cramped, go up half a size or switch to thinner liners.
7. Can I wear glove liners with mittens?
Absolutely. In fact, many skiers use liners inside mittens for added warmth and flexibility. When it warms up, you can remove the liners and still have solid protection from the cold.
8. How do I dry layered gloves after skiing?
Separate the liners and outer gloves. Air dry both in a warm, ventilated room — never directly on a heater. You can also use a boot or glove dryer for faster results.
9. How many layers are too many?
Usually, two layers (liner + glove) are enough. Three is pushing it unless you’re in extreme conditions. Too many layers can restrict blood flow — and ironically, make your hands colder.
10. Can I wash ski glove liners?
Yes! Most are machine washable on a gentle cycle. Just skip fabric softener and always air dry to maintain their moisture-wicking ability.
Conclusion
At the end of the day, knowing how to layer ski gloves for extra warmth isn’t just some pro-ski trick — it’s pure comfort science. The right combination of liners, insulation, and shells can turn a freezing, finger-numbing day into a smooth, all-day ride where you barely think about your hands.
From my experience, it’s not about how thick your gloves are — it’s about how smartly you layer them. Thin merino liners, a solid insulated glove, maybe a shell on the windiest days — that’s the golden combo. But here’s the thing most people forget: warmth means nothing if your hands can’t move. Dexterity and flexibility matter just as much.
So, take the time to test different setups. Try liners on warm days, double up in deep winter, and find your sweet spot. Once you do, you’ll realize it’s not just about keeping warm — it’s about skiing better, gripping stronger, and staying out longer.
Because honestly, when your hands are warm and dry, everything on the mountain feels just a bit more magical.