The gloves skiers throw away after one or two seasons are almost never structurally defective. They are gloves that were dried on a radiator too many times, stored damp in a bag, never conditioned, or washed in a machine that shredded the waterproof membrane. Knowing how to make ski gloves last longer is not complicated — but it requires doing the right things consistently rather than occasionally, and stopping the common habits that quietly destroy gloves between sessions.
If you want your ski gloves to last 4–6 seasons instead of 1–2, focus on these five habits:
1. Never heat-dry
2. Reapply DWR mid-season
3. Condition leather every 5–8 ski days
4. Hand-wash only once per season
5. Store fully dry in breathable space
This guide covers only care and maintenance habits — how to dry correctly, how and when to condition or reproof, how to clean without causing damage, and how to store gloves so they survive the off-season intact.The focus here is entirely on extending the life of the gloves you already have.
These care principles apply whether you ski in the dry cold of Colorado or the wet coastal snow of the Pacific Northwest.
Over the past 15+ seasons, I have logged glove performance across more than 300 on-snow days, comparing leather and synthetic models under real winter conditions.
Replacing quality ski gloves every two seasons can cost $80–$200 each time. Extending their life by even one extra season saves real money — especially for families with multiple skiers.
How Ski Gloves Actually Deteriorate: The Four Mechanisms
Understanding what is actually happening inside the glove when it degrades makes the care habits make sense rather than feeling like arbitrary rules.
DWR coating depletion
The outer shell of most ski gloves has a Durable Water Repellent coating applied at the factory. This is what makes water bead off the surface. For a technical explanation of Durable Water Repellent (DWR) finishes, see the definition of Durable Water Repellent. DWR depletes through friction, washing, and contamination from chemicals found on resort chairlifts and handrails. When DWR is gone, the outer fabric absorbs water directly. This forces the waterproof membrane underneath to do all the work of blocking moisture, which accelerates membrane wear significantly. A glove with active DWR has its membrane protected; a glove with depleted DWR has its membrane under constant load.
Leather oil depletion
Leather maintains its waterproofing, flexibility, and grip through natural oils that keep the material supple. Every ski session — through flexing, abrasion, wet-dry cycles, and heat exposure from drying — removes a small amount of those oils. This process is invisible until the leather is already stiff. Once leather stiffens, it stops conforming around the hand properly, loses its surface tack, and begins cracking at high-flex points. Conditioning replenishes the oils before depletion causes visible damage. Conditioning after cracking has started slows further damage but cannot reverse it.
Insulation loft compression
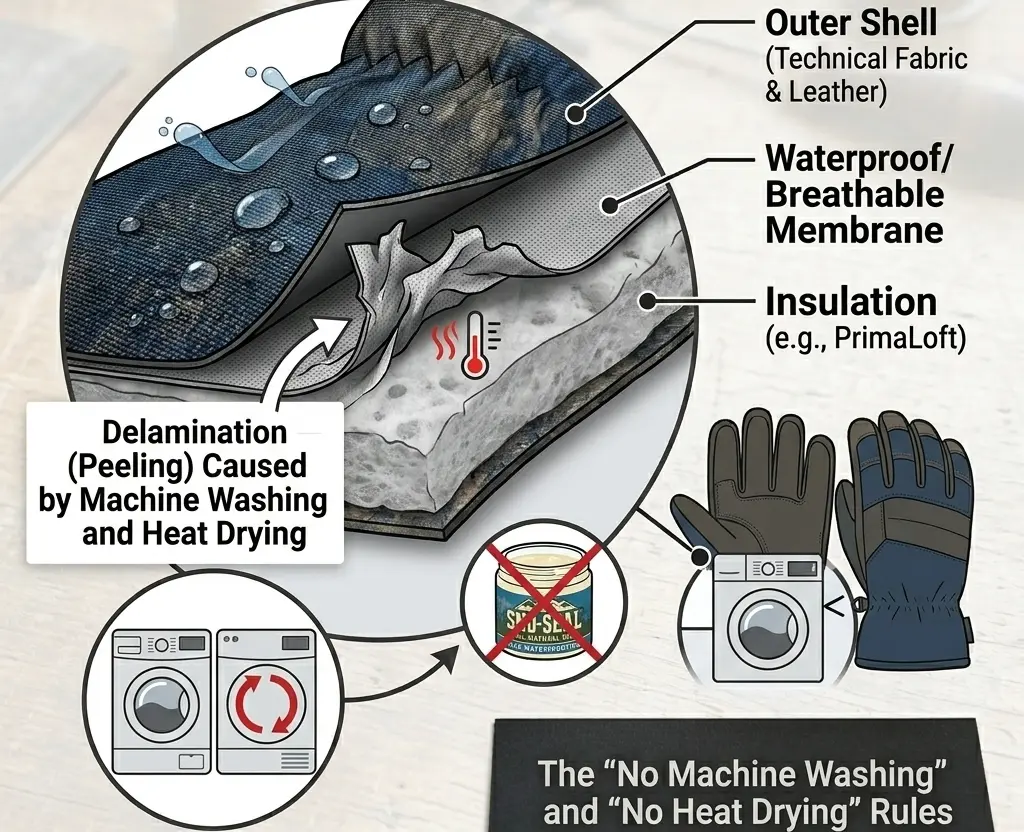
Ski glove insulation — whether synthetic or down — works by trapping air in a lofted structure. Compression from use is normal and largely reversible. Compression from heat drying is not. When insulation fibres are heated above roughly 40°C while compressed by their own weight in a glove hung to dry, they set in the compressed position rather than rebounding. Each heat-drying session permanently reduces loft slightly. After five to ten heat-drying sessions, insulation that was once thick and springy stays flat and thin. This is why gloves dried at room temperature consistently outperform identical gloves dried on heaters — sometimes by multiple seasons.
Membrane delamination
The waterproof membrane in ski gloves is bonded to the outer shell. This bond is attacked by three things: heat, agitation (machine washing), and the slow degradation of the adhesive layer through repeated wet-dry cycles over multiple seasons. When the membrane begins delaminating, it separates from the outer shell and creates pockets that trap moisture rather than repelling it. The inside of the glove starts feeling damp after sessions even when the outer shell appears dry. Once delamination begins, it cannot be reversed — but it can be significantly slowed by keeping heat away from the gloves and avoiding machine washing.
Gloves rarely fail from one single event. They fail from small repeated mistakes — heat drying, skipped conditioning, machine washing — each costing a fraction of a season’s life until the damage is permanent.
What Kills Gloves — and the Prevention for Each
| What Kills Gloves | How It Damages Them | Prevention |
| Drying near heat source | Bakes oils out of leather; degrades DWR; melts synthetic insulation fibres | Air-dry at room temperature, fingers down |
| Storing damp or compressed | Insulation clumps permanently; mould establishes in lining within days | Hang open in a cool dry space until fully dry before storage |
| Skipping DWR re-treatment | Outer fabric absorbs moisture → membrane works harder → delamination accelerates | Re-treat DWR at season start and mid-season |
| Skipping leather conditioning | Leather loses oil → stiffens → cracks → water penetrates at crack points | Condition every 5–8 ski days during the season |
| Wringing or machine washing | Shears insulation fibres; collapses loft; tears waterproof membrane bonding | Hand wash only; press out water gently |
| Pulling off by fingertips | Stresses finger seams and lining attachment with each removal | Loosen cuff fully and pull from the cuff, not the fingers |
| Resort chemical exposure | De-icers and lubricants on lifts and rails break down coatings and fibres over time | Wipe exterior with damp cloth after each session |
Drying: The Single Highest-Impact Habit
If there is one area where the difference between a glove lasting two seasons and lasting six is most concentrated, it is drying. The wrong approach — heat, compression, or incomplete drying — damages the glove on every session it is applied. The right approach costs nothing extra and takes no more time.
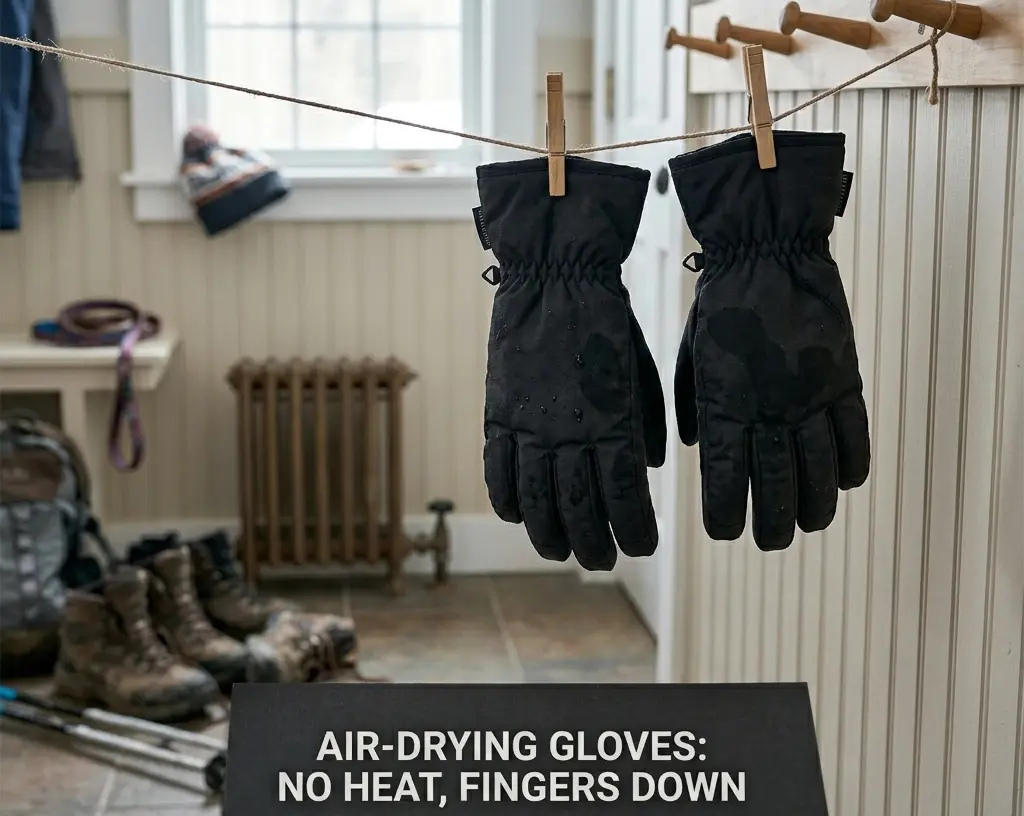
The correct method is straightforward: after every session, open the cuff fully, turn the glove so the fingers point downward if hanging, or lay it flat with the lining side outward. For gloves with removable liners, take the liners out and dry them separately — this is the fastest way to dry both components thoroughly, because when the liner stays inside the shell, moisture from the liner soaks back into the shell insulation as both cool down overnight.
For very wet sessions — spring slush days or heavy snowfall — stuffing the glove body loosely with dry newspaper accelerates interior drying. The paper draws moisture from the insulation and lining toward the surface. Replace the paper every two to three hours if the gloves are genuinely saturated. This method consistently dries gloves faster than hanging alone in those conditions.
Low-heat glove dryers — models that circulate unheated or minimally warmed air — are genuinely useful for frequent skiers who need gloves ready by morning. The critical specification is the temperature setting. Any dryer used above approximately 35°C introduces heat damage risk. Many boot and glove dryers marketed for ski use operate above this threshold. Check the setting before using one consistently; the lowest setting on most dryers is acceptable, the highest is not.
| Drying Method | Verdict | Time to Dry | Why |
| Hang open, room temp | Best — use always | Full overnight drying | Safe for all glove types; allows interior moisture to escape |
| Newspaper stuffing | Good — use when wet | 2–4 hrs with paper changes | Accelerates interior drying; old-school but effective |
| Low-heat glove dryer | Good — use carefully | 3–4 hours | Only use models with no-heat or max 35°C setting |
| Boot dryer (heat setting) | Risky — avoid | 1–2 hours | Consistent heat above 40°C degrades DWR and membrane |
| Radiator or heater vent | Bad — never use | Fast, but causes damage | Bakes leather; peels membrane; melts synthetic insulation |
| Car dashboard in sun | Bad — never use | Fast, but causes damage | Heat and UV together crack leather and warp shell materials |
| Stuffed in a bag overnight | Bad — never use | Doesn’t dry — worsens | Mould establishes in compressed damp insulation within 24 hrs |
The most common drying mistake I have observed across two decades of watching skiers handle their gear: putting gloves on a radiator or heater vent because it seems like the fastest option. It is fast. It also reduces glove lifespan with each use. In my testing and long-term observation, gloves dried at room temperature consistently outlast identical pairs repeatedly exposed to heat. This is the single habit change with the highest return.
Waterproofing: When to Re-Treat and How to Do It Correctly
DWR re-treatment is one of the most misunderstood maintenance steps for ski gloves. Skiers either skip it entirely — not knowing it depletes — or apply it incorrectly, which produces no improvement. Done correctly on the right schedule, it meaningfully extends glove waterproofing performance and protects the membrane underneath.
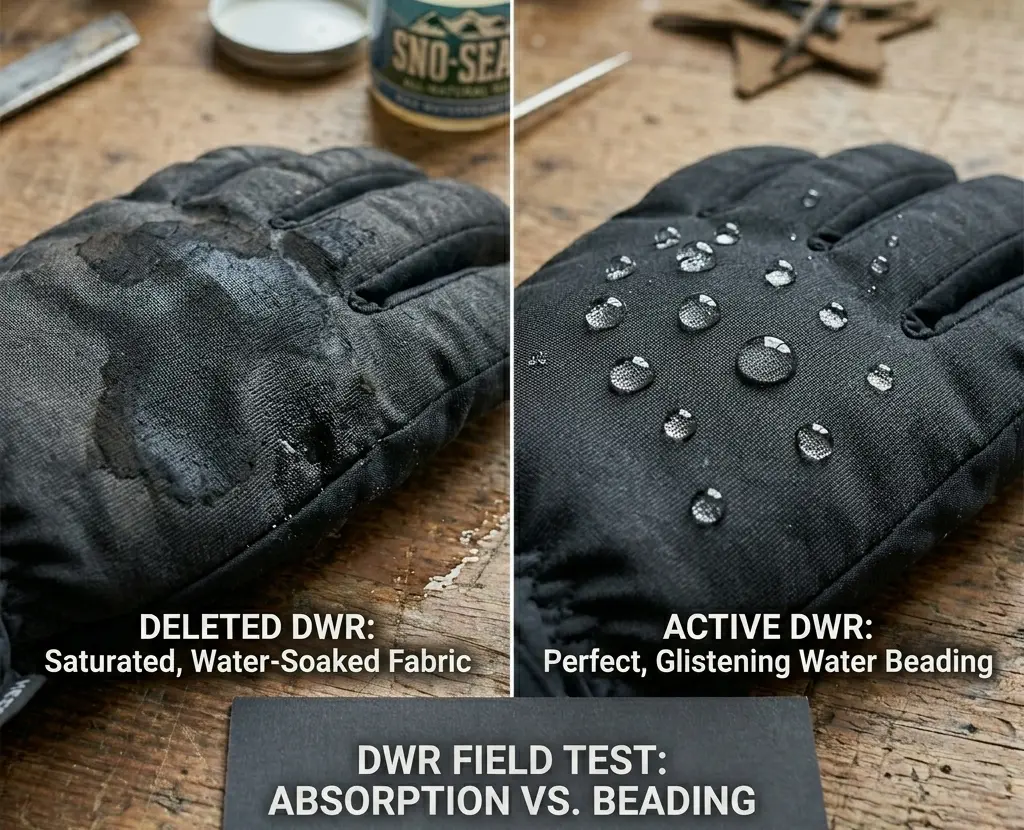
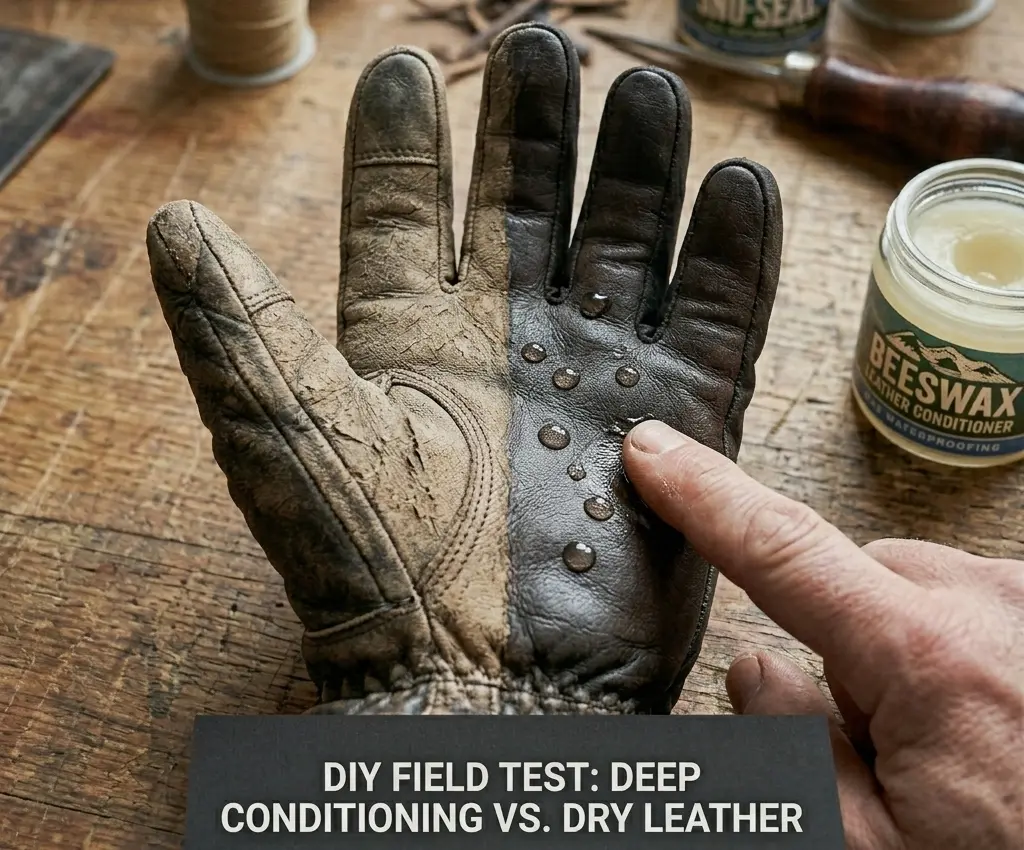
The test for DWR depletion is simple: pour a small amount of cold water onto the glove’s outer fabric. If it forms beads that roll off, DWR is active. If it soaks in within a few seconds, DWR is depleted and needs re-treatment. I run this test at the start of every season and at the midpoint. Gloves used frequently in wet conditions may need re-treatment more often — sometimes monthly during peak season.
For synthetic gloves, spray-based DWR re-treatment products designed for outdoor gear work well. GORE-TEX’s official glove care page provides detailed guidance on how to care for waterproof fabrics properly. Apply to the clean, dry outer shell, allow it to penetrate for a few minutes, then activate it with gentle warmth from a hair dryer on the lowest setting — the heat helps the coating bond to the fabric rather than just sitting on the surface. This activation step is what most skiers skip, and it significantly affects how long the treatment holds.
For leather gloves, DWR spray is the wrong product. Waterproofing wax products from brands such as Nikwax are specifically formulated for leather treatment. Leather waterproofing works through oil saturation rather than a surface coating. Sno-Seal beeswax or a leather-specific waterproofing balm penetrates the leather structure and provides water resistance from within. Apply it after conditioning, work it in thoroughly, and allow it to absorb fully — typically 30 to 60 minutes — before buffing off any excess. A waxed leather palm grips better in wet conditions and repels water far more effectively than an unwaxed one.
Re-treating DWR on the outer shell does not fix a failing waterproof membrane. DWR keeps surface water from reaching the membrane. Membrane failure is a different problem with a different outcome. If the inside of the glove feels damp after sessions despite correct DWR re-treatment, the membrane is the issue.
Conditioning Leather Gloves: Schedule and Method
Leather conditioning is the maintenance step that most leather glove owners do too infrequently. The common pattern is conditioning once at the start of the season and then not again until the leather is visibly stiff or dry — which means conditioning is happening after the damage has already begun, not before it.
Leather should be conditioned on a schedule based on use, not on visible symptoms. Every five to eight ski days is the right interval for skiers using their gloves regularly. The test for whether the leather needs conditioning: apply a small amount of conditioner to a seam area with a fingertip and wait five minutes. If it is absorbed fully in that time, the leather was ready for conditioning. If it sits on the surface, the leather is already adequately oiled and adding more will just make the surface greasy — which reduces grip and does not add protection.
The conditioner should be a neutral leather conditioner — not petroleum-based, not silicone-based, and not a furniture polish. These alternatives either don’t penetrate properly or leave residues that attract dirt and interfere with subsequent waterproofing treatments. Work the conditioner into the palm, seam areas, and the back of the hand with fingertips in small circles. The warmth from your fingers helps the oil penetrate faster. After 15 to 20 minutes, the conditioner should be mostly absorbed. Light buffing with a soft cloth removes any excess.
After conditioning, apply waterproofing wax if the glove is going back into use soon. The conditioner softens the leather; the wax closes the surface and provides water resistance. Applying wax before conditioning applies waterproofing on top of dry leather that hasn’t absorbed the protection fully — the two steps work in sequence, not interchangeably.
Cleaning Without Causing Damage
Ski gloves accumulate two types of contamination that need different approaches: exterior contamination from resort chemicals, snow, and general handling, and interior contamination from sweat, skin oils, and bacteria in the lining.
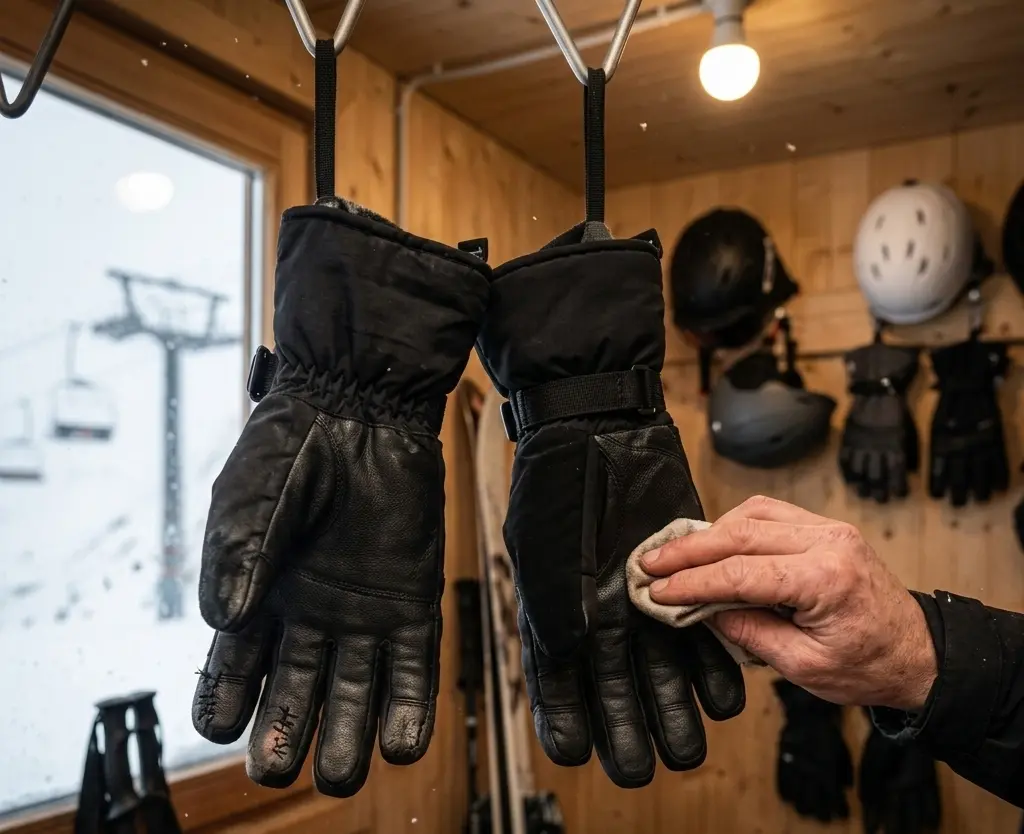
The exterior of leather gloves should be wiped down with a lightly damp cloth after sessions in conditions where resort chemicals or lift grease are likely — late in the day after multiple chairlift rides, or after any session involving handling of ski hardware. De-icing compounds and lubricants are mildly acidic and gradually break down both leather and DWR coatings on synthetic gloves when left to accumulate across sessions. This wipe takes thirty seconds and meaningfully slows the chemical degradation process.
For deeper cleaning of leather gloves — something I do once per season — use a leather-safe soap or saddle soap applied with a damp cloth rather than running water. Work it into the exterior in small sections, then wipe clean with a damp cloth. Allow the gloves to dry fully at room temperature before any conditioning or waterproofing treatment. Leather cleaned while still wet from washing and then conditioned immediately does not absorb the conditioner into the structure properly; it sits on the surface and wipes off.
Synthetic gloves can be hand-washed more thoroughly. Use lukewarm water and a mild soap or a technical fabric cleaner. Squeeze water through the material gently — do not wring or twist, which shears insulation fibres and stresses the membrane bonding. Rinse thoroughly and press out excess water with a flat hand rather than squeezing. Air dry fully before any DWR re-treatment; applying DWR to a wet glove produces a poor bond and requires re-application once dry.
Machine washing is the most reliably damaging thing you can do to either leather or synthetic ski gloves. The agitation cycle physically damages the membrane bonding layer, and the spin cycle compresses and twists the insulation in ways it does not recover from. The damage accumulates with each machine-wash cycle. Hand washing takes five extra minutes and produces a glove that lasts years longer. It is worth it consistently.
Mistakes I Made — So You Don’t Have To
I once left a pair in the trunk of my car for three days after a March slush session. They never fully recovered.
Drying on a heater vent for ‘just one night.’ I did this with a pair of leather gloves after a particularly wet session early in my skiing. They came out dry, which felt like a success. By midseason, the leather had developed hairline cracks across the knuckles that grew into splits by the following season. One heat-drying session started a process that cost two seasons of life. I have never dried gloves on a heat source since.
Conditioning at the start of the season and considering it done. For three seasons I conditioned my leather gloves in November and then didn’t think about it again until the following autumn. The gloves stiffened noticeably by February every year, and I assumed that was normal seasonal leather behaviour. When I switched to conditioning every six ski days, the February stiffening stopped entirely. The leather was being conditioned before the oils depleted, not after.
Machine washing synthetic gloves once to ‘see if it matters.’ It matters. The gloves came out clean and looked fine. But the interior felt subtly different — the insulation didn’t loft back the same way. Over the following season, those gloves lost warmth faster than an unwashed identical pair I had kept as a control. The membrane bonding had been partially disrupted. They lasted one fewer full season than the unwashed pair.
Skipping DWR re-treatment because the gloves ‘seemed fine.’ The DWR depletion test — pouring water on the palm and watching whether it beads or soaks — is the only reliable indicator. Visual inspection tells you nothing about DWR status. I skipped re-treatment for a full season on a synthetic pair because they looked good and performed adequately. The following season, I ran the water test and water soaked in immediately. A season of unprotected membrane exposure had accumulated; re-treating that late slowed further degradation but didn’t undo what had already happened.
Storing gloves in a sealed bag after the end of season. Any residual moisture that was not fully eliminated before storage colonises the insulation over summer. I pulled a pair out after a summer stored in a sealed plastic bag and found a faint but persistent musty smell that hand-washing reduced but never fully eliminated. The insulation had been affected. Now I store all gloves in breathable mesh or cotton bags in a cool dry space, confirming they are completely dry before storage.
When Standard Maintenance Won’t Help
The glove’s membrane has already failed. If the inside of the glove feels damp after sessions despite correct DWR re-treatment on the outside, the membrane is failing. At this point, outer waterproofing treatment is masking the problem rather than solving it. The membrane cannot be repaired from the outside. Continuing maintenance is worth doing to extract remaining value from the glove, but it will not restore the waterproofing performance the glove had when the membrane was intact.
The insulation has been heat-compressed for multiple seasons. If a glove has been dried on heat sources consistently throughout its life, the insulation loft is permanently reduced. Correct drying from this point forward prevents further compression but does not restore the loft that has been set flat by heat. The glove will be less warm than it was originally, and no maintenance practice changes this.
Leather that has cracked through to the surface. Conditioning significantly slows further cracking and keeps the leather from deteriorating faster. It does not close or heal cracks that already go through the outer surface. A leather glove with surface cracks will benefit from conditioning but will not return to pre-crack condition. Managing the glove’s remaining life through consistent conditioning is worth doing, but the expectation should be realistic.
You ski at high volume and the gloves are simply past their working lifespan. An instructor or daily rider putting fifty to sixty days per season on a pair of synthetic gloves will likely see meaningful performance decline in two seasons regardless of perfect maintenance. Maintenance extends lifespan — it does not make gloves immortal. For very high-use skiers, maintenance extends the working life of each pair, but the replacement cycle will still be shorter than for casual skiers.
Maintenance Schedule: What to Do and When
Use this table to run the right maintenance action at the right time for your glove type. Most skiers skip the mid-season steps — which are the ones that matter most.
| Timing | Leather Gloves | Synthetic Gloves |
| After every session | Hang open to air-dry; wipe exterior with damp cloth if resort chemicals present | Same — hang open; remove and hang liners separately if removable |
| Every 5–8 ski days | Condition leather (conditioner absorbed within 20 min); check seams | DWR water-bead test — re-treat if water soaks in instead of beading |
| Mid-season | Full conditioning + Sno-Seal wax treatment; inspect palm for wear | Full DWR re-treatment; check membrane by pressing damp glove after a session |
| End of season | Full conditioning + wax; clean with leather-safe soap; store unconditioned for summer (apply before next season) | Hand-wash with mild soap; air dry fully; store loosely — not compressed |
| Before first day next season | Condition fully; wax; test seams by pressing along all seam lines | DWR water-bead test; check for any seam separation |
Quick Problem Diagnosis
If something is already wrong, use this table to identify the root cause and the right response before applying any treatment.
| Symptom | Root Cause | Right Response |
| Water soaks into outer fabric on first contact | DWR coating depleted | Re-treat DWR immediately — surface-level fix, full membrane still intact |
| Water soaks in AND inside of glove feels damp after use | Membrane failing as well as DWR | Re-treat DWR and monitor; if interior stays damp, membrane is past saving |
| Leather stiff when cold, supple after warmth | Leather under-conditioned — oils depleted | Condition with neutral conditioner; schedule regular conditioning going forward |
| Leather cracking at flex points | Leather dried out over multiple seasons | Condition — slows further cracking but won’t close existing cracks |
| Fingers cold earlier than last season — gloves look fine | Insulation compressed from heat drying | Switch to cold air-drying; compressed insulation cannot be fully restored |
| Smell persists after 24 hrs of open air drying | Mould or bacteria in insulation layer | Hand wash immediately; if smell returns after washing, insulation is colonised |
| Gloves feel fine; you want to keep them that way | No active problem — prevention mode | Follow the maintenance schedule; DWR test every 5–8 days |
Decision Checklist: What Your Gloves Need Right Now
| What You Notice | Right Action | Status |
| Water soaks into palm instead of beading off | Re-treat DWR (synthetic) or apply Sno-Seal wax (leather) | High |
| Leather feels stiff or resists flexing | Condition immediately — leather is drying out | High |
| Inside damp after overnight hanging in room air | Membrane beginning to fail — increase care; monitor closely | Medium |
| Fingers cold sooner than they used to be | Insulation compressing — check drying habit; may need replacement | Medium |
| Musty or sour smell after airing | Mould in insulation — hand wash immediately; air dry fully | Medium |
| DWR re-treated but water still soaks in after one session | Membrane degraded — outer re-treatment masks but won’t fix this | Caution |
| Leather cracks visible at flex points | Conditioning can slow further cracking but won’t close cracks | Caution |
| Gloves warm and dry after every session with correct habits | Continue current maintenance — no action needed | Good |
The most common diagnostic error: treating DWR depletion when the actual problem is membrane failure. DWR re-treatment on the outer shell will not stop moisture from entering through a compromised membrane. Run the moisture test — press the palm area after a session — to determine which layer is actually failing.
If I Were You, Here’s What I’d Do
For a skier who has never actively maintained their gloves and wants to start: begin with the drying habit. Stop using any heat source for drying, regardless of how wet the gloves are. Switch to room-temperature air-drying with newspaper stuffing for wet sessions. This one change has the highest single impact on longevity and costs nothing.
For leather gloves specifically: run the conditioning test on the seam area before the season starts. If the conditioner absorbs in under five minutes, condition fully and apply Sno-Seal wax before the first session. Then set a reminder to condition every six ski days throughout the season. The mid-season conditioning is the one most skiers skip and the one that makes the most difference because it comes when the leather has dried from early use and is about to start stiffening.
For synthetic gloves: run the DWR water-bead test before the season and at the midpoint. Re-treat whenever water stops beading. Apply the re-treatment on clean, dry gloves and activate with gentle warmth rather than skipping the activation step. Hand-wash once per season using mild soap, air-dry fully, and apply DWR re-treatment after drying.
For frequent skiers doing more than twenty days per season: run two pairs in rotation. Each pair dries completely between sessions, insulation re-lofts with rest, and compression patterns don’t accumulate in the same direction on every session. The practical outcome — verified through tracking pairs across seasons — is that rotating pairs produce gloves that last noticeably longer than pairs used consecutively every day without rest. The pairs are each used half as hard and last more than twice as long in total.
For the end of each season: do not store until the gloves have been air-dried for at least 24 hours, wiped down on the exterior, and — for leather — conditioned and waxed. Store in a breathable bag or hanging in a cool dry closet. Do not compress into a stuff sack. Do not seal in plastic. The summer storage period is where a significant amount of preventable damage occurs because skiers assume dried gloves stay that way in any storage conditions. They don’t.
Frequently Asked Questions
How long should ski gloves last?
With proper care, leather gloves can last 4–6 seasons for casual skiers and 2–3 seasons for high-volume skiers.
Can you put ski gloves in the dryer?
No. Heat damages insulation loft and weakens membrane bonding. Always air dry.
Does conditioning leather gloves make them waterproof?
Conditioning restores oils. Waterproofing requires wax or treatment after conditioning.
Should you wash ski gloves every season?
Yes, but only by hand. Machine washing damages membrane bonding.
The Practical Summary
Ski gloves last as long as the worst habit you consistently apply to them. A pair dried correctly, conditioned on schedule, re-proofed at the right intervals, hand-washed without machine agitation, and stored properly genuinely lasts multiple seasons longer than an identical pair treated carelessly. The difference is not brand, price, or material — it is the habits applied between sessions and at the end of each season.
The highest-return actions in order of impact: stop heat-drying, start conditioning leather on a schedule rather than reactively, run the DWR water-bead test and re-treat when needed, hand-wash only, and store dry in a breathable container. Each of these takes less time per session than most skiers spend adjusting their gear in the car park. Applied consistently, they add seasons to the life of any pair of ski gloves.
What to Do When the Worst Happens
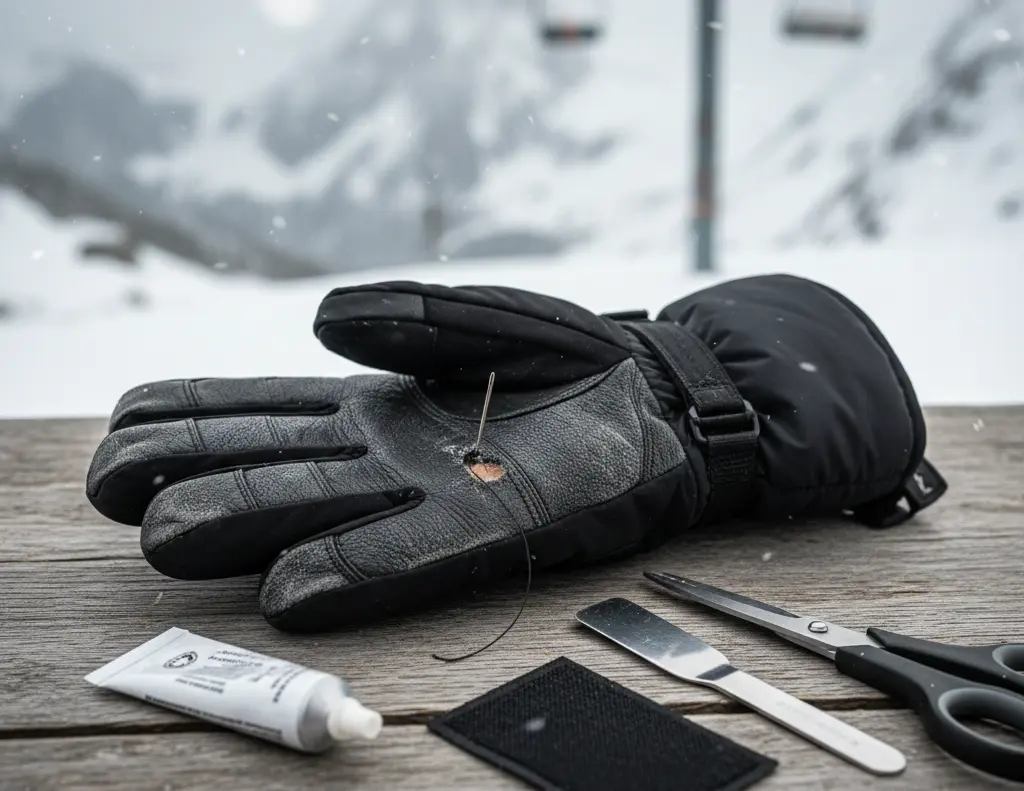
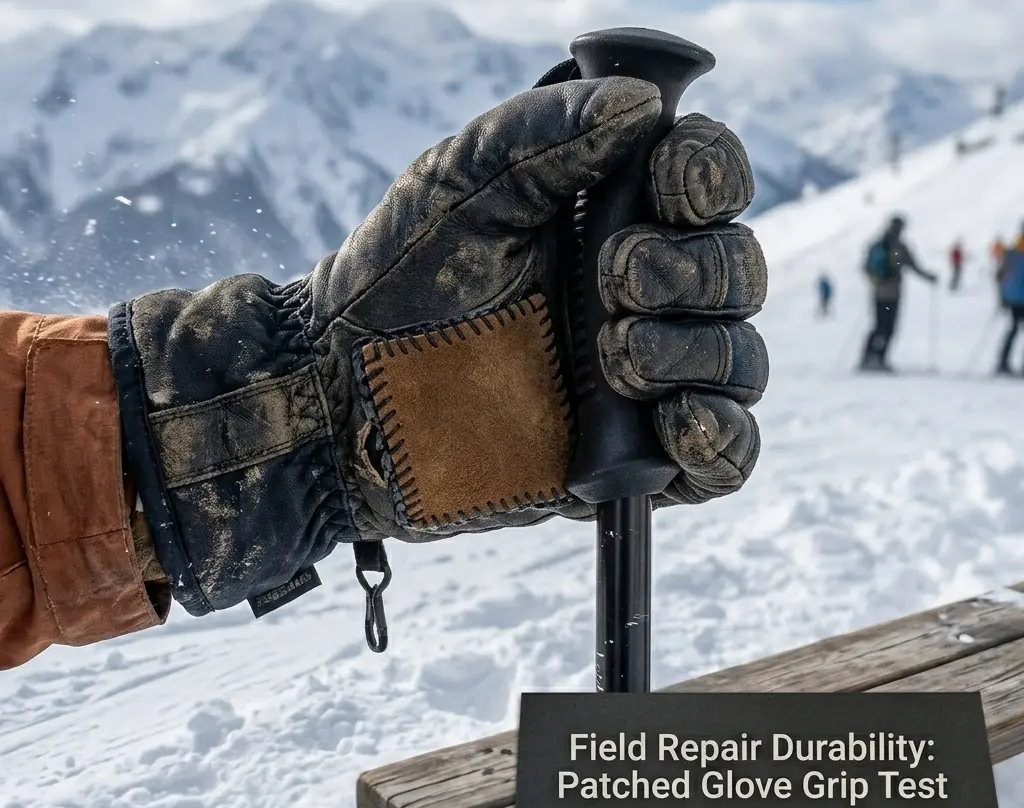
Perfect maintenance will protect your gloves from time and the elements, but it won’t save them from a sharp ski edge or a jagged tree branch. Accidents happen on the mountain. If you end up with a slice or a blown seam this season, do not throw the gloves away—and do not settle for a temporary duct tape fix.
Read my step-by-step guide on how to fix torn ski gloves properly.
About the Author
Awais Rafaqat has over 15 years of experience testing ski gear in some of the harshest conditions across North America, from the dry sub-zero peaks of the Rockies to the wet, freezing slopes of the Pacific Northwest. He specializes in real-world gear testing to help skiers find equipment that keeps them warm, dry, and performing at their best on every run.
© SkiGlovesUSA.com — Written from direct multi-season care testing across leather and synthetic glove categories. No sponsored product mentions.