Quick answer: The correct way to dry ski gloves is to separate the liner from the shell, open the cuff fully, and hang both pieces in a warm room with air circulating through the interior — never in direct contact with a heat source. This takes six to eight hours in most indoor environments. The reason this matters more than people assume is that the wrong method — laying gloves directly on a radiator or heater — permanently compresses the insulation, and that damage happens with no visible sign until the glove is noticeably less warm months later.
If you’re shopping for a replacement pair and want one built with drying and moisture management in mind from the start, the Ski Glove Finder matches gloves to your conditions instead of leaving you to guess from a spec sheet.
The three mistakes that permanently degrade ski gloves are direct heat contact, drying the liner inside the shell, and laying gloves flat rather than hanging them open. All three trap moisture against the insulation or damage it through heat exposure. This guide covers the correct process, the actual physics of why insulation fails under heat, and how to tell whether your current drying setup is doing its job.
- Why Drying Method Affects Warmth, Not Just Comfort
- Why Radiator Drying Feels Like It's Working — And Isn't
- How to Dry Ski Gloves — Step by Step
- Drying Method Comparison
- What Situation-Specific Drying Actually Requires
- The Mistakes That Cause Permanent Damage
- Signs Your Gloves Were Dried Incorrectly
- Pre-Session Dryness Checklist
- Frequently Asked Questions
Why Drying Method Affects Warmth, Not Just Comfort
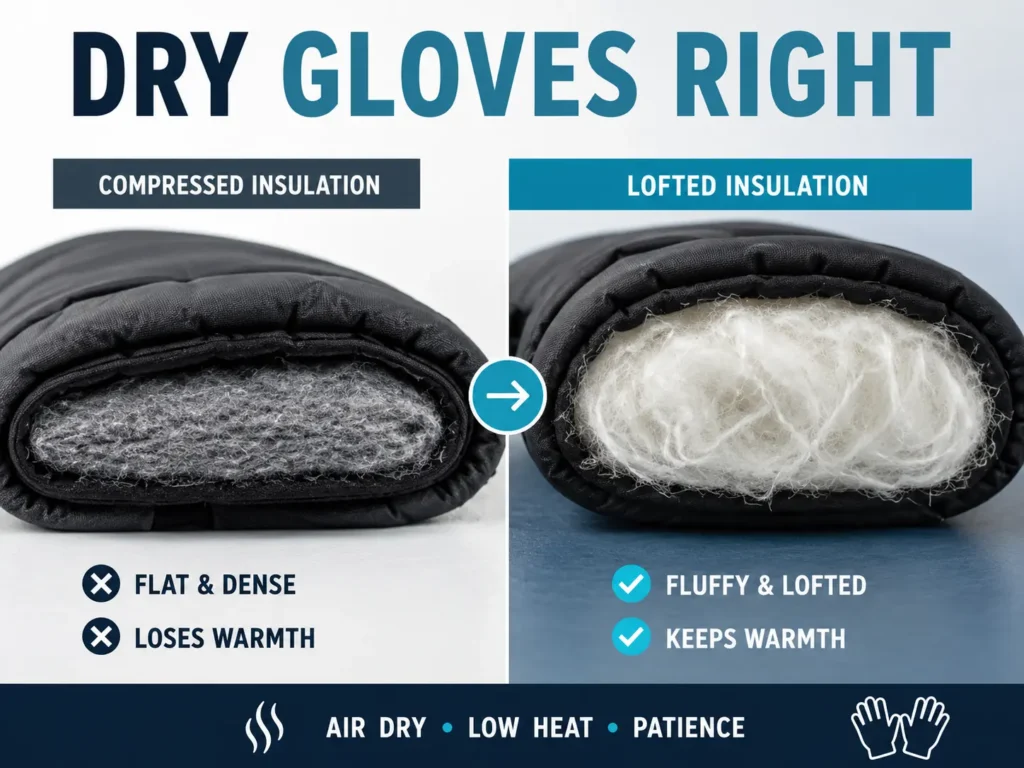
Ski glove insulation — whether synthetic fill or down — works by trapping small pockets of still air within its fiber structure. That trapped air is what creates warmth, not the material itself. When insulation fibers are compressed while still damp and under heat, they can bond together in the compressed state and fail to fully rebound afterward.
This isn’t a guess about how insulation behaves — it’s a documented property of compressible foam and fiber materials called compression set, the permanent loss of a material’s ability to recover its original thickness after being squeezed. Repeated compression under heat accelerates this permanent deformation far more than compression at room temperature does, which is exactly the combination a glove sitting directly on a hot radiator experiences — pressure from its own weight against the grate, combined with heat that makes the fiber structure more prone to setting in that compressed shape.
The result is a glove that feels lighter and less warm than it did earlier in the season, even though it looks identical from the outside. The damage is cumulative and doesn’t reverse. A glove dried on a radiator repeatedly loses insulation loft a little more each time, and because the shell and membrane usually remain intact, the glove looks fine while performing worse — which is exactly why so many skiers assume a colder-feeling glove means their hands have gotten more sensitive to cold, rather than recognizing it as insulation damage from how the gloves have been dried all along.
Why Radiator Drying Feels Like It’s Working — And Isn’t
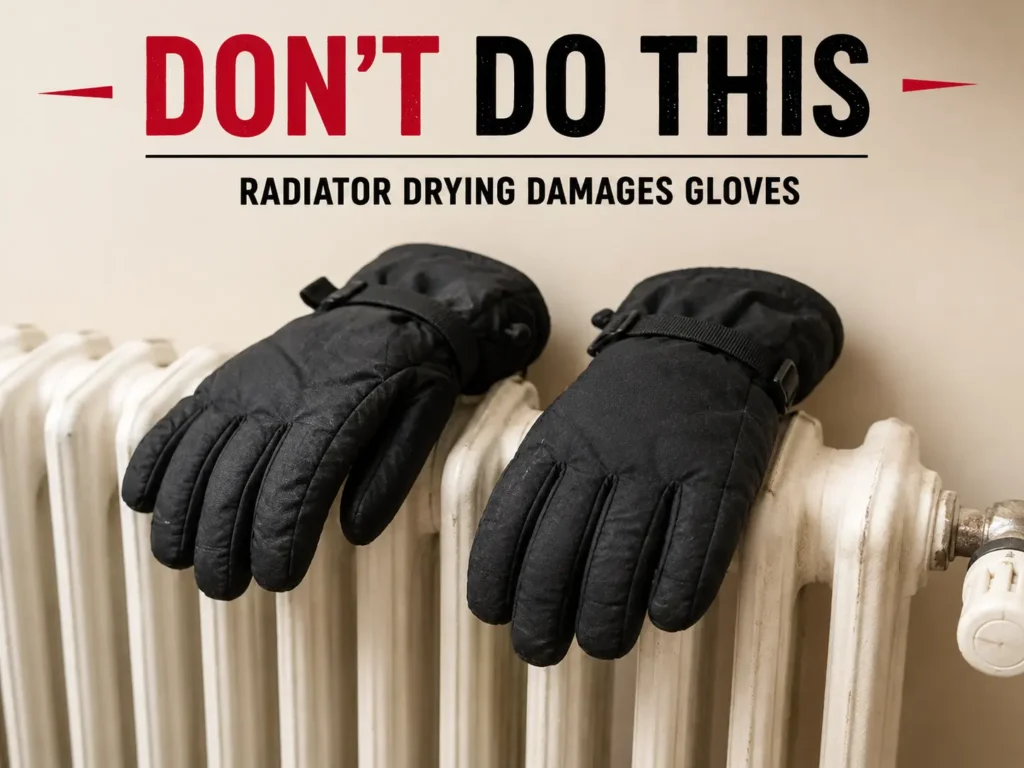
The reason direct-heat drying is such a common mistake is that it genuinely looks successful in the short term. The glove feels warm and dry to the touch within two or three hours, which reads as a win.
What’s actually happening is that heat drives moisture out of the outer layers fast, while pushing some of that moisture deeper into the insulation core before it can fully evaporate. The surface dries quickly under direct heat; the interior doesn’t dry at the same rate, and the compression damage described above is happening at the exact same time the surface is drying — so the visible result (a warm, dry-feeling glove) and the invisible result (compressed, damaged insulation) occur simultaneously, with only one of them noticeable that night.
This is why a simple surface touch-test is unreliable. Pressing firmly at the back-of-hand zone and feeling for a springy rebound is a better check than judging by surface dryness alone — insulation that’s still slightly damp or has been compressed feels flatter and denser under pressure, even when the fabric surface itself feels bone dry.
How to Dry Ski Gloves — Step by Step
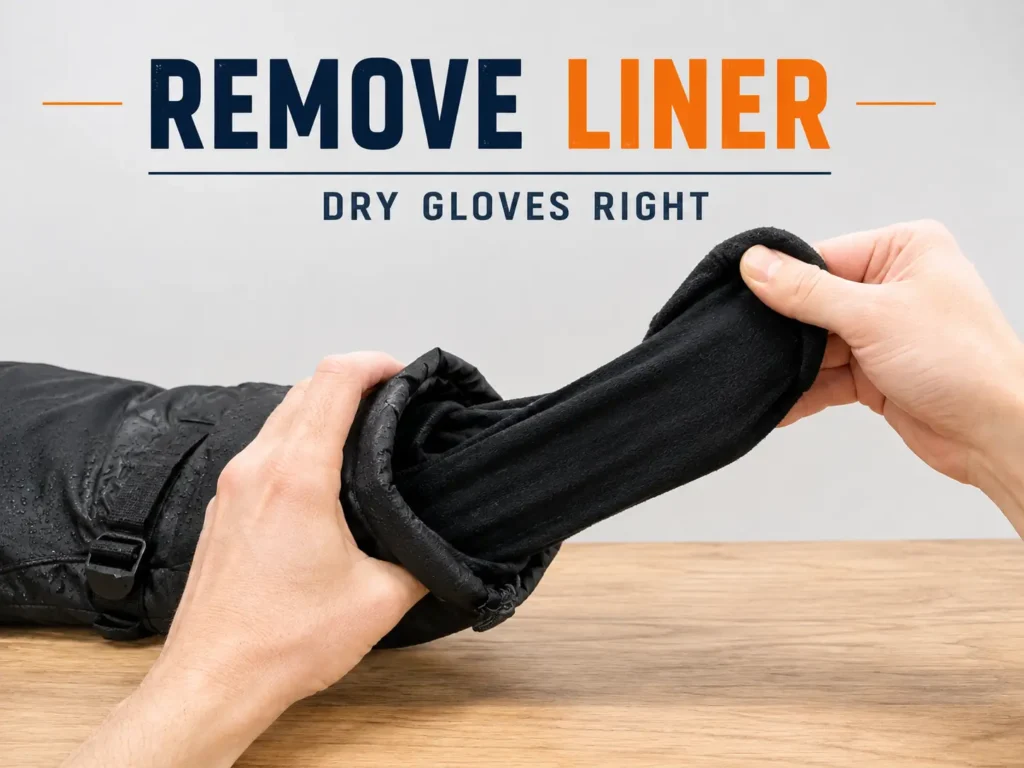
Remove the liner immediately after skiing
Don’t wait until the next morning — liner moisture migrates into the outer shell’s insulation during storage, and the longer it sits, the deeper that moisture penetrates. Detach any wrist loop or liner attachment before hanging it separately.
Shake out visible moisture from both pieces
Hold the shell by the cuff and shake firmly a few times to dislodge pooled water in the finger zones, then do the same for the liner. This removes surface moisture that would otherwise need to evaporate and adds unnecessary time to the whole process.
Open the cuff fully on the shell
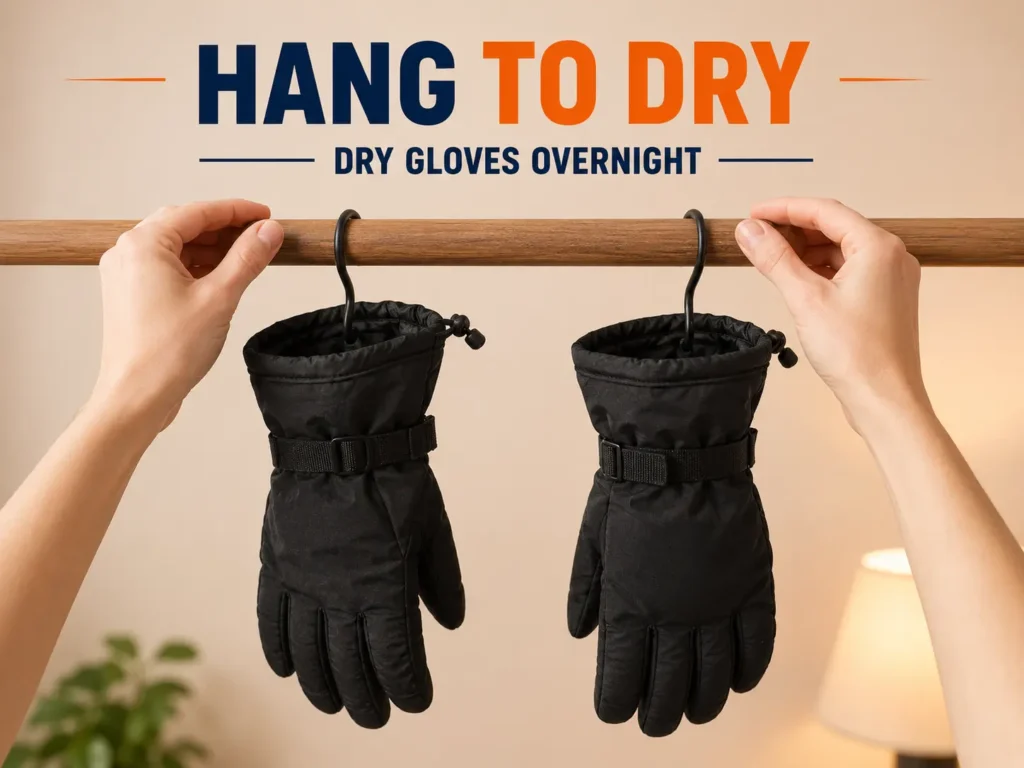
The cuff opening is the only real ventilation path for moisture escaping the glove’s interior. A partially closed cuff traps humid air inside and measurably slows drying. If there’s a drawcord, release it completely; if it’s hook-and-loop, open it wide.
Hang the shell fingers-down in a warm room
Moisture drains toward the lowest point, so fingers-down means it drains toward the open cuff and can escape. Hung fingers-up, moisture pools in the fingertip zone — the narrowest part of the glove with the least insulation volume, and the part most vulnerable to loft damage from prolonged dampness.
Hang the liner separately, unfolded
The liner needs airflow across every surface. Draped over a hanger or hook works; folded in half roughly doubles the drying time for the inner face, since moisture can’t escape from the contact zone between the two folded surfaces.
Position both pieces near — never on — a heat source
The target is warm room air, not direct heat. Warm room air around 68–72°F lets insulation dry while keeping its structure intact. Direct contact with a radiator running far hotter compresses and bonds insulation fibers before they’ve finished drying. Keeping at least 18 inches of clearance from any direct heat source is a reasonable working rule.
Check dryness by feel in the morning, not by looking
Press the back-of-hand zone firmly between both palms. Residual moisture in the insulation shows up as a slightly cool, dense feeling rather than the springy warmth of fully dry insulation — the surface can look and feel dry while the layers underneath are still holding moisture.
If it’s not fully dry, extend the hang time rather than adding heat
A glove that fails the press test needs more time, not more heat. Cranking up the heat to rush an incomplete drying cycle is the single decision most likely to cause the compression damage described earlier. If the gloves genuinely won’t be dry in time, use a backup pair or a low-heat glove dryer with airflow, not a radiator.
Drying Method Comparison
| Drying Method | What It Does to Insulation Over Time |
| Open-hang in warm room, fingers down | Correct — dries without compression; loft retained across a full season |
| Glove dryer with low-heat airflow | Correct — circulates warm air without direct heat contact; typically fastest safe method |
| Near radiator, 18+ inches away | Acceptable — warm air circulation without direct contact; keep distance consistent |
| Direct radiator contact | Damaging — direct heat compresses insulation on every use; cumulative, permanent loft loss |
| Flat on a surface, fingers up | Poor — moisture pools in the fingertip zone; slow, uneven drying |
| Sealed inside a closed bag | Damaging — no airflow, moisture can’t escape, elevated mold risk |
| Liner left inside the shell | Damaging — liner moisture transfers into shell insulation; roughly doubles shell drying time |
| Hair dryer, held at a distance and kept moving | Acceptable for spot-drying; holding it still in one spot applies concentrated heat damage to that zone |
What Situation-Specific Drying Actually Requires
A single ski day with no consecutive use gives you the least urgency — a full overnight hang time is available, so there’s no reason to rush it with extra heat. Take the time to hit full dryness rather than judging by surface feel.
A multi-day trip using the same gloves puts real pressure on the timeline, and a six-hour turnaround becomes the practical target. Start drying within thirty minutes of coming in, and run the press test before putting gloves on each morning — if they fail it, they need more hang time, not more heat.
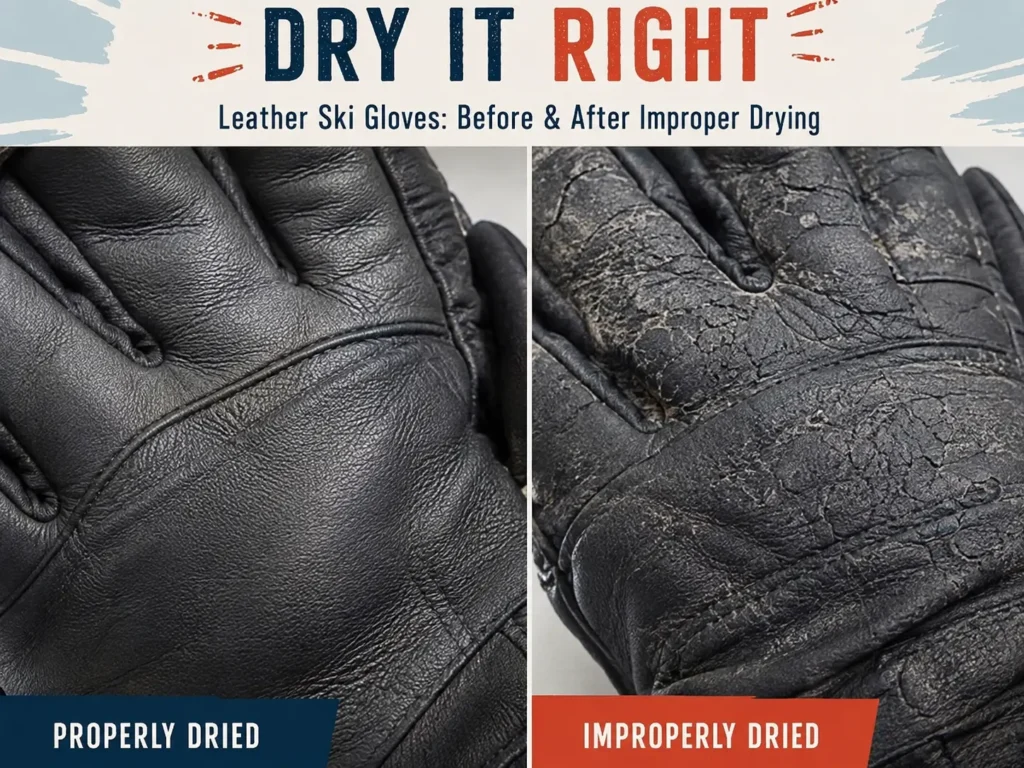
Leather gloves dry more slowly than synthetic shells and need more distance from any heat source, because leather’s natural oils evaporate faster than moisture does when heat is applied. If leather dries out before the trapped moisture has fully escaped, the leather stiffens and becomes prone to cracking at flex points — the damage comes from how it dries, not from getting wet in the first place. Leather should dry at room temperature only, with no supplemental heat even at a distance, and generally needs eight to ten hours rather than six.
No drying equipment available — a road trip, camping, a remote lodge without a proper mudroom — still has a workable option. Paper stuffed into the glove’s interior draws moisture out of the insulation through absorption. It’s slower than airflow drying, replacing the paper every two to three hours, but it genuinely works when nothing else is available. Skip plastic bags or compressed storage, since both trap rather than release moisture.
High-humidity environments — a wet coastal resort, a humid mountain town — work against you because humid room air carries moisture right back into gloves that are trying to dry. A room with a dehumidifier running, or near an active exhaust vent, outperforms open-air hang drying in these conditions.
The Mistakes That Cause Permanent Damage
Direct radiator contact is the single most common and most damaging mistake on this list. Heat at direct-contact temperatures compresses insulation fibers before moisture has escaped, bonding them into that compressed shape. Every session on a radiator reduces loft a little more, and the damage stays invisible until the glove is noticeably colder than it used to be.
Leaving the liner inside the shell turns the liner into a moisture reservoir sitting directly against the shell’s insulation. Shell drying time roughly doubles, and the insulation stays exposed to moisture for far longer than it needs to.
Laying gloves flat with fingers pointing up lets moisture pool in the fingertip zone — the section with the least insulation volume — and slows drying there specifically, even while the rest of the glove looks dry.
Holding a hair dryer still at close range applies the same category of concentrated heat damage as a radiator, just localized to whatever single spot it’s aimed at. Moved continuously at a foot or more of distance, it’s a reasonable supplemental method; held still at a few inches, it isn’t.
Stuffing damp gloves into a sealed ski bag or boot bag cuts off airflow entirely, so there’s no path for moisture to leave. It redistributes inside the bag overnight rather than evaporating, and the gloves can come out just as wet — or worse — the next morning. Materials that stay damp for more than roughly 24 to 48 hours are past the window in which mold growth is reliably preventable, according to EPA guidance on moisture and mold — which is exactly the timeframe a glove left sealed in a bag over a multi-day trip can hit without anyone noticing until there’s a musty smell.
Signs Your Gloves Were Dried Incorrectly
| Warning Sign | What It Indicates |
| Back-of-hand zone feels flat, returns slowly after squeezing | Insulation loft has been compressed by heat drying — cumulative, not reversible |
| Gloves feel colder than they did earlier in the season, with no other change | Progressive insulation compression from repeated incorrect drying |
| Musty smell that persists after drying | Mold beginning in the lining — gloves were stored before fully dry; needs a hand wash |
| Surface feels dry but interior is cool and dense under the press test | Insulation still holds moisture and needs more hang time, not more heat |
| Leather feels stiff and inflexible despite looking dry | Heat was applied too close; leather oils evaporated before moisture fully cleared |
| Liner feels bunched or matted inside the shell | Liner was repeatedly dried inside the shell; lining has compressed and shifted, affecting fit |
Pre-Session Dryness Checklist
Before putting gloves on for the next session, press the back-of-hand zone firmly — it should rebound quickly rather than feeling dense. Press the fingertip zones specifically, since that’s the last area to dry and the first to still feel damp if the overall process was cut short. Check the liner at the fingertip for any lingering coolness, since a damp liner on a cold day produces cold hands within the first hour regardless of how dry the shell feels.
Smell the interior of the shell for any musty odor — that’s a sign of mold starting in the lining rather than ordinary dampness, and it means a wash is needed before the next use, not just more drying time. Confirm the cuff opens fully for tonight’s drying session, since a cuff that won’t open all the way cuts ventilation and roughly doubles drying time on its own. If any of these checks fail, the right move is a backup pair rather than extra heat on wet gloves — heat applied to insulation that’s still wet is precisely when the compression damage described earlier happens.
Frequently Asked Questions
How long does it actually take to dry ski gloves properly?
Six to eight hours for a typical synthetic-insulated glove hung correctly in a warm room, and eight to ten hours for leather, which needs to dry more slowly to avoid stiffening. A glove dryer with low-heat airflow can cut synthetic drying time to three or four hours without the compression risk of direct heat.
Can I speed up drying without damaging the insulation?
Airflow speeds drying without the risk heat carries — a fan pointed at hung gloves, a dehumidifier in the room, or simply choosing a drier room in the house all shorten drying time safely. Heat is the variable that causes damage, not warmth or airflow on their own.
Is it fine to dry gloves in front of a fireplace instead of a radiator?
No — a fireplace produces the same direct, intense heat exposure as a radiator, sometimes with less consistency, and carries the same compression and leather-stiffening risks described above. Treat it the same as any other direct heat source and keep gloves at a real distance.
What if my gloves still smell musty after a full drying cycle?
That’s usually mold or mildew starting in the lining rather than ordinary dampness, and more hang time won’t fix it. A hand wash with a technical cleaner suited to the glove’s material, followed by a full correct drying cycle, is the right next step before wearing them again.
Does this apply the same way to mittens?
Yes — the shared mechanism (heat compresses insulation, moisture left inside a liner or shell causes the same damage) applies identically to mittens. The only practical difference is that a mitten’s single interior chamber holds more total insulation volume in one space, so it can take slightly longer to fully dry through than a glove with the same total insulation weight spread across separated fingers.
Once your gloves are properly dry and you’re keeping up with the rest of what protects them over a full season — DWR renewal, leather conditioning, seam care, off-season storage — Ski Glove Care Tips That Actually Work covers those broader habits in detail. And if repeated drying damage has finally caught up with a pair that’s lost real warmth, a range of replacement options across budgets is a more productive next step than continuing to fight insulation that’s already been compressed past the point of recovery.