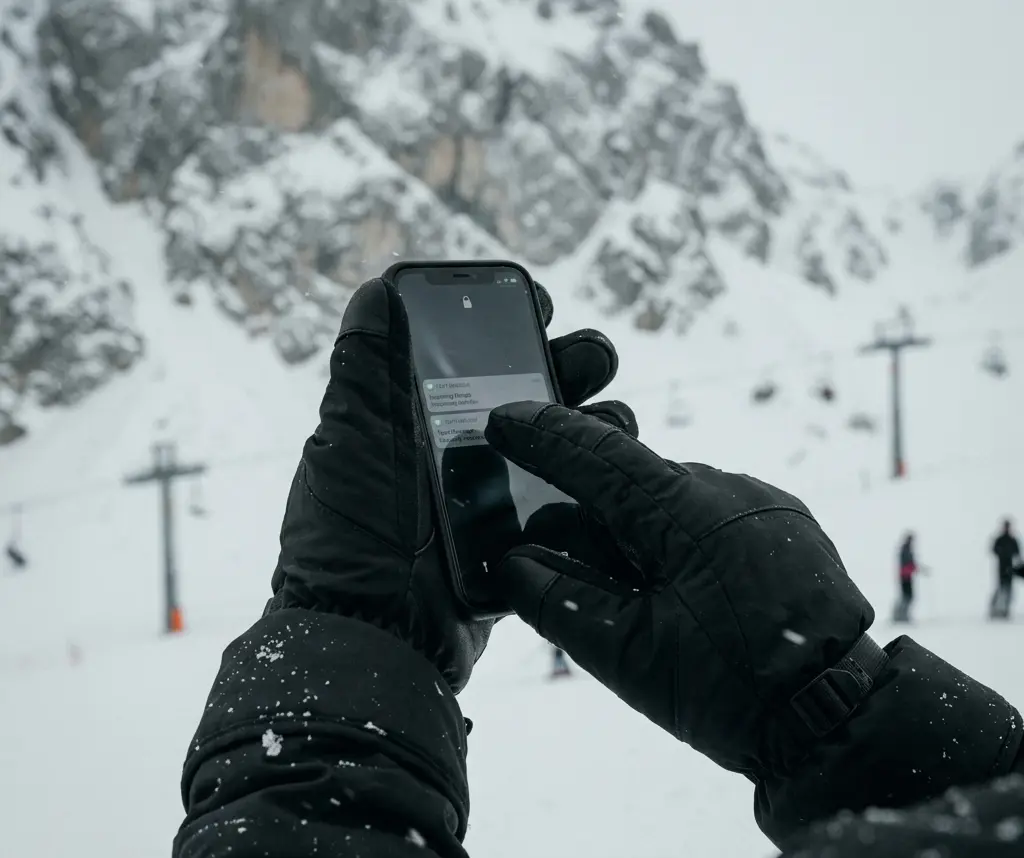
So there you are, halfway down the slope, and you feel it — that sharp bite of icy wind sneaking through your glove. You look down and yep… a hole. Tiny or not, it might as well be a canyon when snow starts working its way in.
And here’s the thing: once gloves have holes, they don’t just let in air. They let in snow, water, and misery. One little tear can ruin a whole ski day.
I’ve been there. More than once. I once ripped a glove on a rope tow in New Hampshire and spent the rest of the day with duct tape wrapped around my palm like some kind of budget superhero. Functional? Yes. Comfortable? Not even close.
So how do you actually fix holes in ski gloves — properly, quickly, and in a way that won’t peel off halfway through your next run?
Why Ski Gloves Get Holes
Gloves take a beating. Ski poles grind into palms, chairlifts pinch seams, Velcro chews on threads, and sharp ski edges cut fabric without mercy. Add in falls, branches, or even catching your glove in a car door, and it’s a miracle they last at all.
Different materials wear in different ways:
- Leather palms crack, split, or wear thin.
- Synthetic nylon shells snag and tear.
- Seams burst under constant pulling and pressure.
Bottom line: gloves work harder than almost any other piece of gear you own.
Core Fixing Methods
Repairing ski gloves usually comes down to one of these approaches. Which you choose depends on the size of the hole, its location, and whether you’re after a quick patch or a longer-term repair.
- Fabric patches (nylon or Gore-Tex)
- Sewing repairs (with strong thread or even dental floss)
- Seam Grip or gear glue
- Iron-on patches
- Duct tape (mountain emergency only)
- Professional repairs
Let’s break each one down.
Method 1: Fabric Patches
For holes in the outer shell, fabric patches are your best bet. Outdoor repair brands even sell patches made specifically for nylon and Gore-Tex.
How to do it:
- Cut the patch at least ½ inch larger than the hole.
- Round the corners (sharp corners peel faster).
- Clean the glove surface.
- Stick the patch firmly, press it flat, and let it cure.
This works best on the back of the hand or cuff. Less effective on high-flex areas like fingers.
From my experience, Tenacious Tape is a lifesaver. It bonds strong, lasts through washes, and holds even in freezing weather.
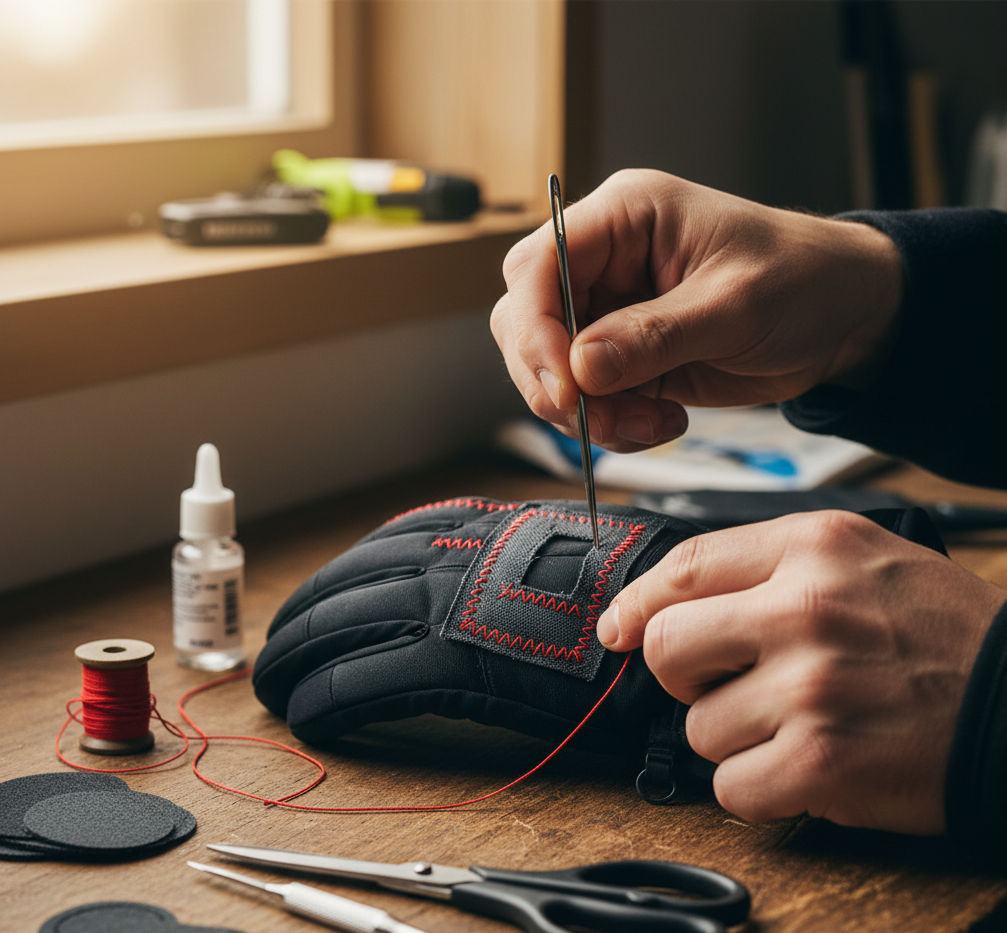
Method 2: Sewing Repairs
If the hole is along a seam or in fabric, sewing is the classic fix.
What you’ll need: a heavy-duty needle and polyester thread (or dental floss if you’re improvising).
Steps:
- Thread the needle with 12–18 inches of thread.
- Knot one end.
- Use a whipstitch or backstitch to close the hole.
- Seal the stitches with Seam Grip or gear glue for waterproofing.
For leather palms, use a leather needle and waxed thread. It’s tougher but works.
(I once stitched a glove with neon-green floss at a lodge. Looked ridiculous, worked perfectly.)
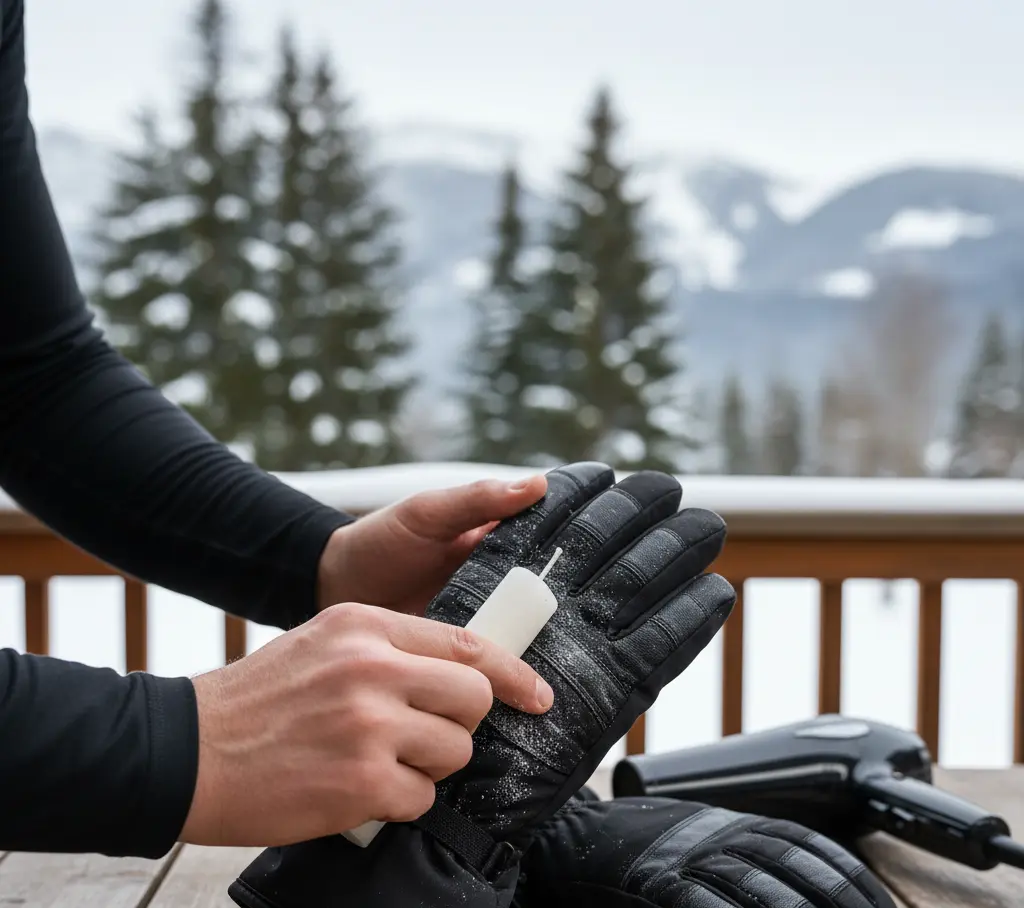
Method 3: Seam Grip or Gear Glue
For tiny punctures or pinholes, Seam Grip is magic. Think of it as liquid stitches.
- Clean the area.
- Squeeze a small bead directly into/over the hole.
- Let it cure overnight.
You’ll end up with a waterproof, flexible seal that often lasts longer than the glove itself.
Method 4: Iron-On Patches
Iron-on patches for nylon work well at home before a trip. Just note:
- They require heat, which you usually won’t have at a lodge.
- They’re best for flat areas like cuffs, not curved fingers.
Method 5: Duct Tape
Would any ski repair guide be complete without duct tape?
The emergency fix is simple: slap a strip over the hole, smooth it down, and get back out there. It won’t last long in wet snow, but it buys you a few runs.
I once wrapped my whole palm in silver tape and spent the afternoon explaining to strangers that no, it wasn’t a new Burton prototype.
Method 6: Professional Repairs
For expensive gloves (Hestra, Black Diamond, etc.), sending them in is often worth it. Some brands even offer repair services. Cobblers or outdoor gear shops can do clean, long-lasting fixes too.
Costs less than replacing and usually looks much better than DIY.
Special Case: Leather Gloves
Leather needs special care. If your glove’s palm has cracked or torn:
- Clean the area.
- Use leather repair glue or a patch kit.
- Condition the leather afterward with balm.
Don’t sew leather unless you’re comfortable — it’s tough, and mistakes can make the damage worse.
Preventing Future Holes
Repairs are fine, but prevention is better. A few habits make gloves last much longer:
- Use ski pole guards to protect palms.
- Keep gloves dry — wet fabric weakens faster.
- Condition leather regularly.
- Rotate between two pairs if you ski a lot.
Gloves aren’t immortal, but a little care stretches their life significantly.
Story Time: The Duct Tape Hero
Back in 2010, I was broke on a ski trip in Colorado. Day three, holes in both palms. New gloves weren’t an option.
A buddy tossed me a roll of Gorilla Tape. I patched both palms, crisscrossed the tape, and somehow those gloves lasted the rest of the season. Ugly, sticky, but unforgettable.
Sometimes survival trumps style.
FAQs
Q: Can I use super glue on glove holes?
Not a good idea. It dries stiff, cracks, and doesn’t flex. Use Seam Grip instead.
Q: How big of a hole is too big to fix?
If it’s bigger than two inches or in a high-stress area, replacement is usually smarter.
Q: Will sewing holes make gloves waterproof again?
Not by itself. Always seal stitches with Seam Grip or fabric glue.
Q: Should I repair or replace my gloves?
Depends on quality. Cheap $20 kids’ gloves? Replace. High-end Hestras? Repair.
Final Thoughts
Fixing holes in ski gloves is just part of ski life. Sometimes you’re sewing with floss in a lodge, sometimes patching with Tenacious Tape at home, and sometimes wrapping your palm in duct tape like a mountain MacGyver.
But the bigger question is — are you patching gloves just to survive another season, or are those patches badges of honor, proof of every mile and fall you’ve taken on the mountain?
Either way, a hole doesn’t have to end your day. With the right trick, your gloves can fight another battle.