Quick answer: Age is really the only thing that decides which method works best for your kid — not which one sounds fanciest. A mitten string threaded through both sleeves works for toddlers and young kids because it needs no cooperation once it’s set up. Spring clips at the cuff suit kids around four to eight who are gaining independence. A wrist leash under the glove suits kids six and up who take gloves on and off constantly. Sewn loops on the cuff work at any age as a permanent attachment point for whichever method you choose. None of these keep a glove on a kid’s hand — they keep it from disappearing once it comes off. If glove fit or sizing is part of the problem too, ski glove finder can help sort that out separately.
- Why Kids Lose Gloves — The Three Real Patterns
- Why Chairlifts Are the Single Biggest Risk
- Method 1: The Mitten String Through the Sleeves
- Method 2: Spring Clips at the Cuff
- Method 3: The Wrist Leash Under the Glove
- Method 4: Sewn Loops on the Jacket Cuff
- The Safety Detail Most Guides Skip
- Method Comparison
- Common Mistakes That Cause Attachment to Fail
- Managing Multiple Kids on the Same Trip
- When Attachment Isn't the Real Problem
- FAQ
Why Kids Lose Gloves — The Three Real Patterns
Understanding how gloves actually get lost tells you which attachment method solves the problem you actually have. There are three real patterns, and they’re different enough that a fix for one doesn’t automatically fix the others.
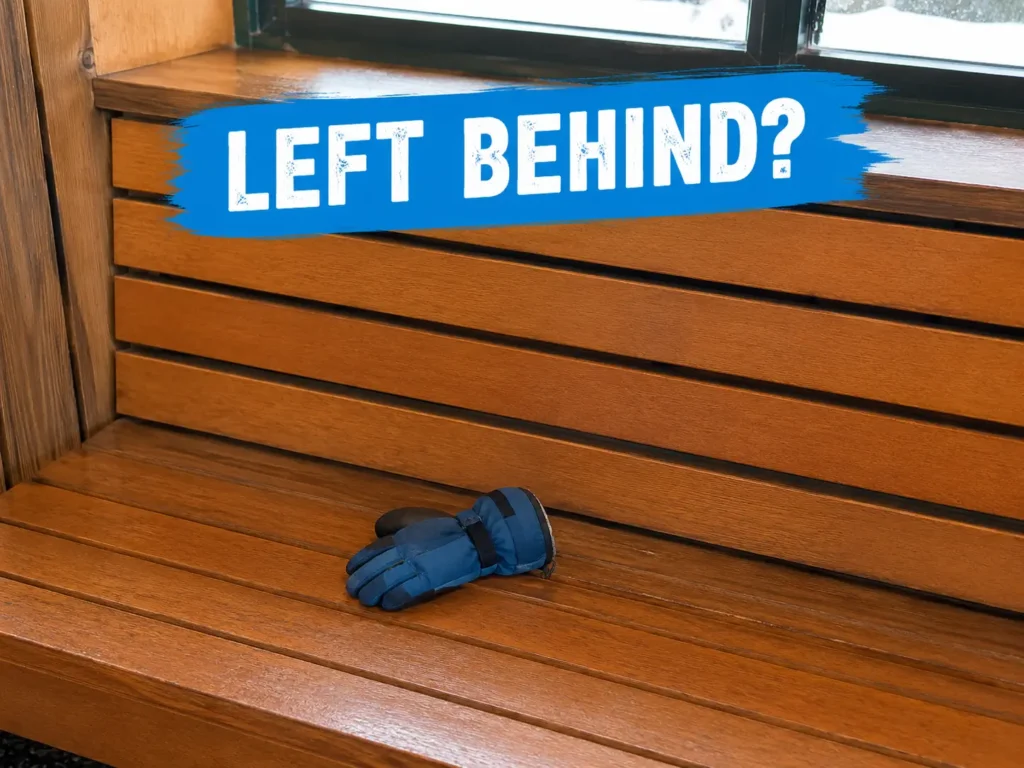
The first is removal and set-down — a child takes a glove off to eat a snack, sets it on a table or bench, and walks away without it. This is the most common pattern for kids old enough to remove gloves on their own, generally four and up. Any method that keeps the glove physically tethered to the child or their jacket prevents this outright, since there’s nowhere for a “set down and forget” moment to happen.
The second is removal and drop — the glove comes off and falls immediately, most dangerously from a chairlift, where it drops a considerable distance into deep snow and is very rarely recovered. A tethered glove falls to the end of its tether and hangs instead of hitting the ground.
The third is drift from a loose pocket — a glove stuffed into an open jacket pocket during a break can work its way out as the child moves around. This is the most avoidable pattern, since any method that clips the glove to the jacket exterior rather than relying on a pocket closure eliminates it entirely.
These three patterns share one thing in common that’s worth understanding before choosing a method: none of them are about a glove failing to stay on the hand. A child taking a glove off on purpose — for a zipper, a snack, a runny nose — is normal and not a problem to solve. The actual problem only starts in the ten or so seconds after removal, when the glove has nowhere fixed to go. Every method below solves that specific window, not the removal itself.
Why Chairlifts Are the Single Biggest Risk
Of the three loss patterns, the chairlift drop deserves particular attention because the odds of recovery are so different from every other scenario. A glove set down on a lodge table or dropped in a parking lot stays roughly where it fell, and there’s a real chance of finding it later. A glove that falls from a moving chairlift drops a considerable distance onto terrain that’s actively being skied over, often into snow deep enough to bury it within minutes, and the chair keeps moving the child away from the spot the whole time.
This is exactly why attachment matters more on a chairlift specifically than it might seem worth the effort elsewhere. A glove that’s tethered during that specific ten-second window — reaching for a phone, adjusting a helmet, wiping a nose — never has the chance to become a chairlift loss in the first place, regardless of which method is doing the tethering.
Method 1: The Mitten String Through the Sleeves
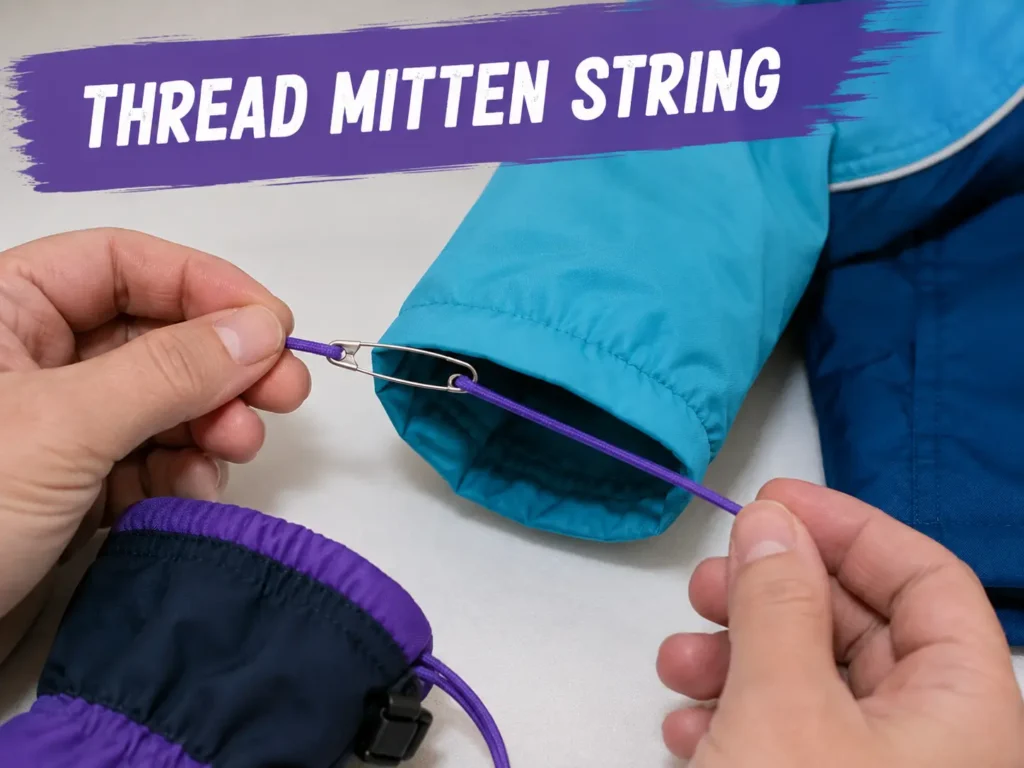
This is the oldest method for a reason — it needs zero ongoing cooperation from the child. A cord runs through one jacket sleeve, across the inside of the jacket, and out the other sleeve, with a glove attached to each end. When a glove comes off, it slides along the cord into the sleeve instead of falling anywhere.
To set it up, measure a cord from cuff to cuff across the child’s back at shoulder height and add about four inches for movement slack. Thread it through using a safety pin attached to one end, pushed through the sleeve lining from the cuff, working slowly to avoid the pin folding back on itself inside the lining. Tie the cord to each glove’s wrist loop, or directly around the cuff strap if there’s no loop, then have the child extend both arms fully to check the cord doesn’t pull tight at any position — if it does, re-thread with two more inches of cord.
This method suits ages roughly two to five best, since it works identically whether or not the child cooperates with the process — an adult threads it once at the start of the season, and it functions every time after that with no child involvement required. The trade-off is that the cord lives inside one specific jacket’s sleeve lining, so a second jacket needs its own cord threaded separately.
One detail worth getting right: use flat or round elastic cord rather than rigid cord if you can find it. Elastic gives slightly under a sudden pull rather than yanking the glove straight off the child’s hand when their arm is fully extended, which matters more than it sounds like it would during normal skiing arm movement.
Method 2: Spring Clips at the Cuff
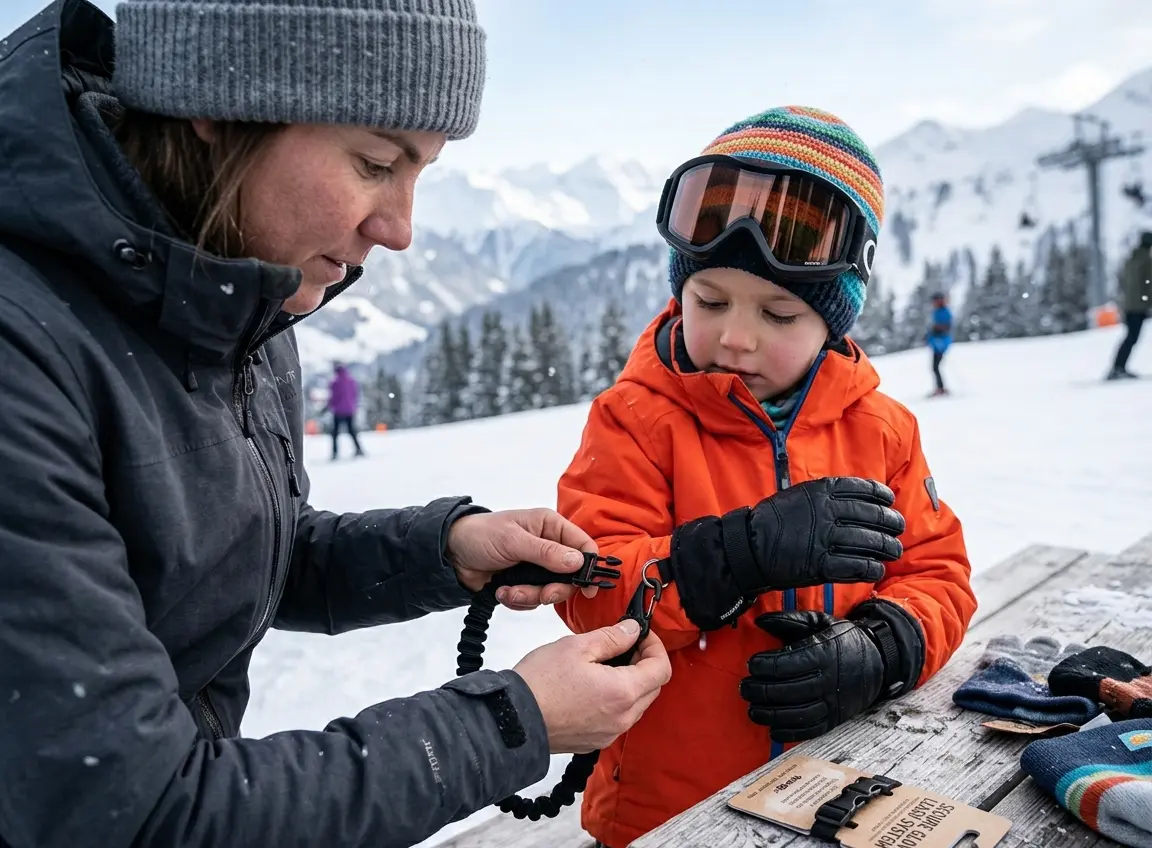
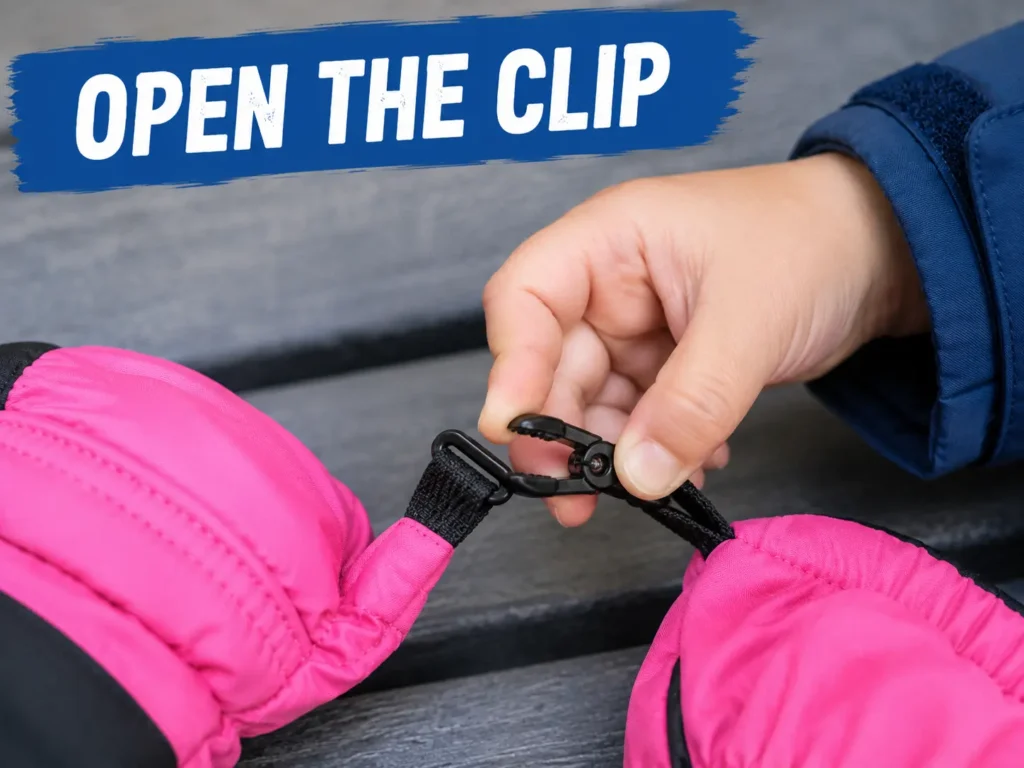
A spring-loaded clip attaches to a fixed point on the jacket cuff on one end and to the glove’s wrist loop or cuff strap on the other. When the glove comes off, it hangs from the cuff rather than needing to be caught or set down anywhere.
Clips work better than relying on a pocket because a pocket needs three things to go right — being open, the glove going fully inside, and the pocket staying closed — and any one of those failing loses the glove. A clip’s spring tension does its job passively the instant the glove is removed, with nothing needing to be closed afterward.
Choose a clip with a genuinely firm spring — testing it by hanging a wet glove and shaking it before relying on it is worth the thirty seconds, since a clip too light for wet, heavy fabric will release under that weight. Attach the clip to a fixed loop, tab, or D-ring on the cuff rather than around loose fabric, which lets the clip slide and eventually fall off. This method genuinely suits ages four and up rather than younger, and that’s not arbitrary — general fine motor development research shows kids typically gain the dexterity for small fasteners like buttons and clips around this age, which is exactly the skill needed to open and close a spring clip independently.
Cold weather is worth knowing about here too. Spring steel genuinely does perform differently in the cold — materials engineering resources on spring performance note that low temperatures can reduce a spring’s flexibility and its ability to deform and return to shape as designed. A clip that grips confidently at room temperature is worth a quick check on an actually cold morning before trusting it for a full day, since its real-world grip can differ from how it felt indoors.
It’s also worth matching clip weight to the glove’s wrist loop rather than grabbing the sturdiest-looking clip available. A heavy carabiner-style clip on a thin fabric loop can pull the loop out of alignment over a season and eventually tear the stitching, where a lighter purpose-made glove clip puts less ongoing strain on that same small loop.
Method 3: The Wrist Leash Under the Glove
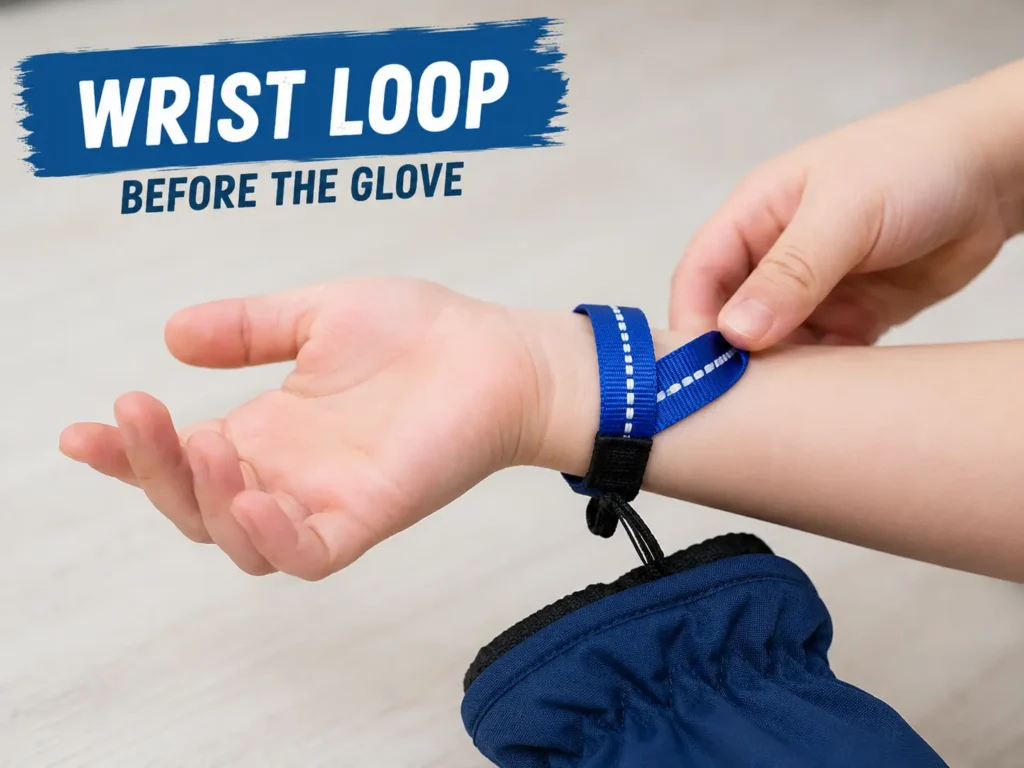
A wrist leash is a soft loop worn on the bare wrist, connected by a short cord to the jacket cuff. Unlike the other methods, this one attaches the glove to the child’s body rather than to the jacket — the glove follows the hand wherever it goes, even off the mountain entirely.
The loop goes on before the glove, sized to slide over the hand but not loose enough to work its way off the wrist during normal movement — for most kids aged five to ten, a loop about 18 to 22 centimeters in circumference, measured as wrist size plus roughly six centimeters, fits this range. The order matters: loop on the bare wrist first, then the glove goes on over both the hand and the loop, so the loop is captured inside rather than sitting exposed and able to slip off.
This suits kids roughly six to ten, since it requires the child to actually cooperate with wearing the loop under the glove — younger kids often resist an extra step at the wrist, while older kids generally accept it once they understand what it prevents, especially after hearing about someone else’s chairlift glove loss.
This method has one advantage the other two don’t: it survives a jacket change completely intact, since the leash lives on the child’s wrist rather than being built into a specific jacket. A family switching jackets between resort trips, or handing a jacket down to a younger sibling, keeps the leash working without re-threading or re-sewing anything.
Method 4: Sewn Loops on the Jacket Cuff
This is less a standalone method and more a foundation that makes the other methods work reliably. A small loop of half-inch nylon or polyester webbing, sewn onto the jacket cuff with a box stitch, gives a clip or cord a genuinely fixed, purpose-built attachment point instead of relying on whatever tab the jacket manufacturer happened to include, or on loose fabric that lets a clip slide off.
This works at any age precisely because it’s passive — it doesn’t require the child to do anything differently, it just makes whichever active method you choose (clip or leash) actually hold. If a jacket has no built-in attachment point at all, this fifteen-minute sewing job, or a quick trip to a tailor for about five to ten dollars, is the more durable fix than working around the jacket’s limitations every single ski day.
The Safety Detail Most Guides Skip
Any method involving a cord near a child deserves one real safety consideration that’s easy to overlook in the rush to solve the losing-gloves problem: cord entanglement risk. This isn’t a hypothetical concern — federal guidance on children’s outerwear cords exists specifically because cords around children’s necks and hoods have caused real entanglement injuries on equipment like playground slides and bus doors — the exact mechanism that makes a loose cord dangerous near moving parts.
The mitten string and clip methods described here don’t route anywhere near the neck, which is the specific hazard that guidance addresses, but the underlying principle still applies to a chairlift setting: keep any cord short, keep it routed sleeve-to-sleeve or cuff-to-glove rather than loose across the body, and avoid anything that could form a loop able to snag on a chairlift restraint bar or loading equipment. A cord sized correctly for its job, as described in each method above, naturally avoids creating that kind of loose loop in the first place.
Method Comparison
| Method | Best Age | Requires Cooperation | Main Trade-off |
| Mitten string | 2–5 | No | Tied to one specific jacket’s lining |
| Spring clips | 4–8 | Some (opening the clip) | Hangs outside jacket, can snag in tight terrain |
| Wrist leash | 6–10 | Yes (wearing the loop) | Some kids resist the extra step |
| Sewn loops | Any | No | Requires sewing or a tailor visit upfront |
Common Mistakes That Cause Attachment to Fail
Clipping to loose jacket fabric instead of a fixed loop or tab is the most common failure — a clip can slide along fabric to an edge and drop off entirely, so the attachment point needs to be a genuinely fixed feature, not just wherever the cuff happens to bunch.
Using a mitten string cord that’s too long is a close second. A cord long enough to let the glove reach the ground drags in snow as the child moves, which is uncomfortable and eventually pulls the whole setup off-center.
Putting a wrist leash over the glove instead of under it defeats the entire method — the leash needs to be on bare skin, captured inside the glove cuff, or it simply slides off with the glove when it’s removed instead of staying on the wrist.
Assuming one method has to work for every child in a family is a less obvious mistake. A three-year-old and an eight-year-old in the same family often need genuinely different methods, since the younger one needs something requiring zero cooperation while the older one may actively want the independence a clip or leash provides. Mixing methods across siblings based on actual age and temperament works better than standardizing on whichever method is easiest for a parent to set up once.
Managing Multiple Kids on the Same Trip
Families with more than one child often default to using the same method for everyone, mostly for simplicity, but this usually creates more failures than it prevents. A toddler forced into a leash they’ll fight all day, or a responsible eight-year-old stuck with a mitten string that feels babyish to them, both end up with worse compliance than if each child had the method suited to their actual age and personality.
A practical approach for multi-kid families: standardize on sewn loops across every jacket at the start of the season, since that part is genuinely universal, then let the active method — string, clip, or leash — vary by child. The one-time sewing effort pays off across every kid and every season the jacket gets used, while the attachment method itself stays flexible to whoever is wearing it that day.
When Attachment Isn’t the Real Problem
If a child keeps removing gloves because their hands are overheating or the fit is genuinely wrong, no attachment method fixes that — it just keeps the uncomfortable glove nearby instead of solving why they’re taking it off in the first place. That’s a glove selection problem, and it’s worth checking fit and warmth separately, including how it interacts with keeping small hands dry through a full day, which is covered in more depth in the guide on toddler glove dryness on this site.
If you’re shopping for gloves for a young skier and attachment features are one factor among several — sizing, warmth, ease of independent use — the broader picture is worth comparing across a few options for kids rather than optimizing attachment alone on a glove that’s otherwise a poor fit.
It’s also worth revisiting the method choice partway through a season rather than assuming whatever worked in December still fits in March. Kids gain fine motor coordination and patience quickly at this age, and a child who resisted a wrist leash at the start of the season may well be ready for it — or ready to move past a mitten string that now feels unnecessary — a few months later.
FAQ
At what age can kids manage their own glove clips?
Most kids develop fine motor control for small clips and fasteners around age four, though this varies by child. If a younger child struggles with a clip, a mitten string requiring no independent action is the more reliable choice.
Do wrist leashes bother kids’ skin?
Some kids find a round cord uncomfortable against bare wrist skin after several hours. A soft, flat ribbon instead of a cord eliminates most of that discomfort while functioning the same way.
Is it worth sewing loops onto a jacket a child will outgrow soon?
If the jacket has at least one more season of use left, yes — the fifteen-minute sewing investment pays off across every ski day that season, and a sewn loop is a small, low-cost addition compared to buying a new jacket with built-in attachment points.