There is a specific, cringeworthy moment every skier knows: you pull your gloves out of your gear bag on a cold January morning, slide your hands inside, and a smell hits you like a middle-school locker room. It’s a mix of old sweat, dried salt, and dampness. Beyond the smell, dirty gloves actually stop performing. Salt from your sweat clogs the pores of waterproof membranes, and dirt acts like sandpaper on leather palms, grinding down the fibers until they rip.
I’ve spent 15 years skiing everywhere from the damp fog of the Pacific Northwest to the sub-zero wind chills of the Canadian Rockies. I have ruined $160 Hestra mitts by being lazy and saved $40 cheapies by being smart. Knowing how to wash ski gloves correctly is the difference between having warm, dry hands for five seasons or buying a new pair every December because yours became stiff, stinky, or leaky.
In this guide, I’ll show you exactly how I clean my gear using methods I’ve refined through trial, error, and a few expensive mistakes.
Quick Decision: Does Your Glove Need a Full Wash?
Before you dunk them, use this table to determine the best path. Over-washing is just as bad as never washing.
| If the Problem is… | The Solution | Why? |
| External Mud/Dirt | Spot Clean with a damp cloth | Keeps the DWR (water repellent) intact. |
| Smelly Interior | Wash the Liner only (if removable) | Most stink lives in the liner, not the shell. |
| Stiff Leather | Leather Balm/Conditioner | Leather doesn’t usually need washing; it needs oil. |
| Total Funk/Deep Grime | Full Hand Wash | Resets the glove’s breathability and hygiene. |
My Personal “Field-Tested” Washing Method
I’ve experimented with everything. I once tried the “freezer method” (total myth—it doesn’t kill bacteria, it just makes them go dormant). I’ve tried machine washing on “heavy duty” (ruined the internal stitching). After years of testing, here is the only method I trust for my own gear.
1. The Prep: Don’t Skip This
Before water touches the glove, I do three things:
- The Crumb Shake: Turn the gloves upside down and shake them. You’d be surprised how many trail mix raisins and bits of wax end up inside.
- Remove Liners: If your gloves have a “Heli” style removable liner, take it out. This is the “engine” of the glove’s warmth—treat it separately.
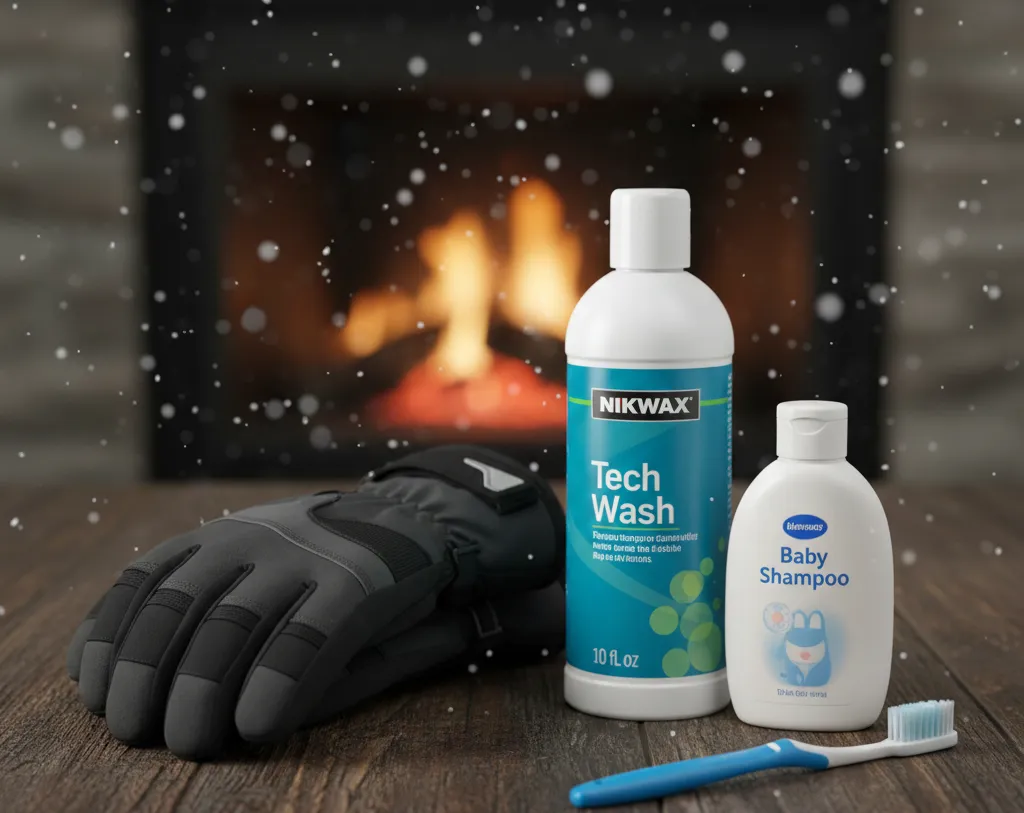
- Surface Brush: Use a soft-bristled brush (an old toothbrush is perfect) to knock off dried mud or salt.
2. The Sink Experiment: Lukewarm Only
I fill a clean sink with lukewarm water. Never use hot water. High heat can delaminate the glue that holds the waterproof membrane (like Gore-Tex) to the outer fabric.
I use a tech-wash (like Nikwax) or a very mild, fragrance-free baby shampoo. Why? Standard laundry detergents are designed to break down oils. Your glove has a Durable Water Repellent (DWR) coating that is essentially a “good” oil/polymer. Standard Tide or Ariel will strip that coating instantly, leaving your gloves to “wet out” the next time it snows.
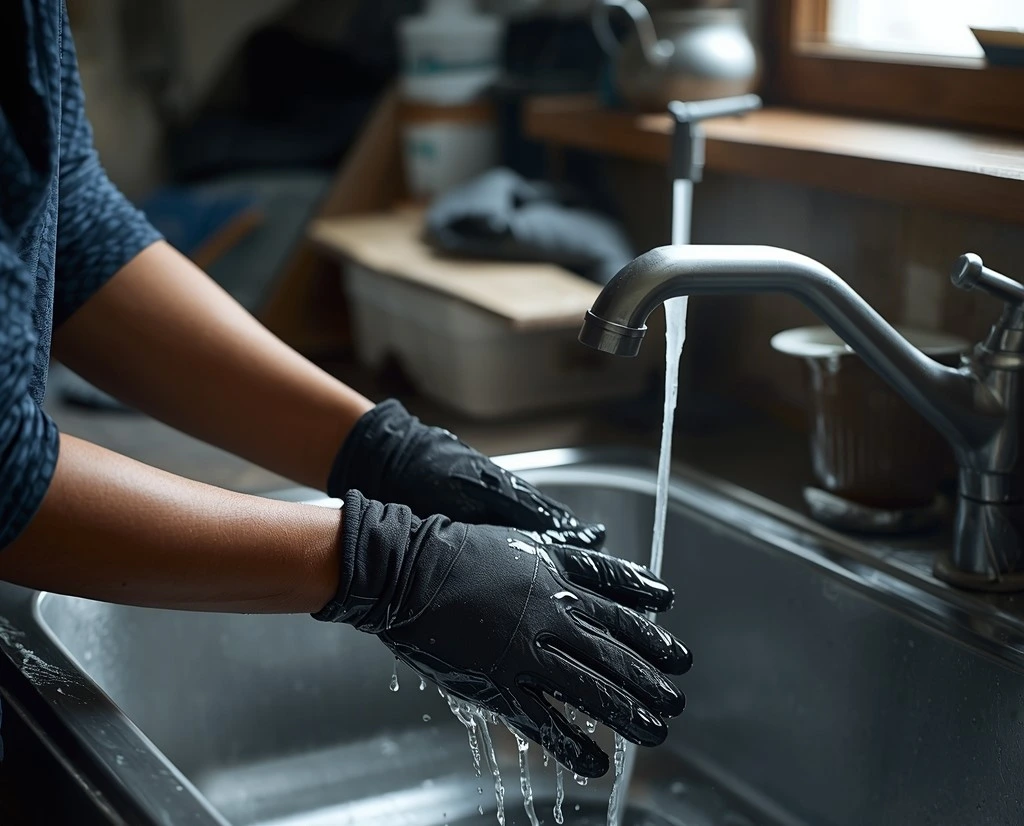
3. The “Massage” Technique
Submerge the gloves. Don’t scrub. I gently massage the fabric with my fingertips, focusing on the knuckles and fingertips where grime builds up. I leave them to soak for no more than 10 minutes.
Personal Test Note: I once left a pair of leather-palmed gloves to soak for an hour. The leather absorbed so much water that it took three days to dry and became as stiff as a board. Soak time matters—keep it short.
4. The Rinse and the “No-Wring” Rule
Rinse under cool, running water until the bubbles stop. Crucial: Never wring or twist your ski gloves. Twisting snaps the internal stitching and can tear the delicate waterproof insert.
My trick: Lay the glove flat on a dry towel, fold the towel over it, and press down with your palms. The towel sucks the moisture out without stressing the glove’s structure.

How I Wash My Ski Gloves (Leather vs. Synthetic)
The material of your glove dictates the rules. If you treat leather like nylon, you’ll be buying new gloves by February.
Leather Ski Gloves (Hestra, Kinco, Black Diamond)
Leather is skin. When you wash it, you remove the natural oils.
- Suggestion: I almost never fully submerge leather. Instead, I put the gloves on, “wash my hands” with a damp cloth and a tiny bit of leather-safe soap, and then rinse the cloth to wipe away the suds.
- Advantage: Keeps the leather’s structural integrity.
- Disadvantage: Doesn’t get the deep “stink” out of the fingertips.
Synthetic / GORE-TEX Gloves
These are built for moisture, but the “pores” get clogged.
- Suggestion: These benefit most from a full soak because it flushes the salt out of the GORE-TEX membrane, which actually restores breathability.
- Advantage: Restores that “like-new” feel.
- Disadvantage: Requires a re-application of waterproof spray afterward.
The Most Important Step: The Drying Phase
This is where 90% of people ruin their gear. They get home, realize their gloves are wet, and put them on a hot radiator or in a tumble dryer. Heat is the primary killer of ski gloves. It shrinks leather and melts the waterproof membrane.
The “Safe Dry” Routine:
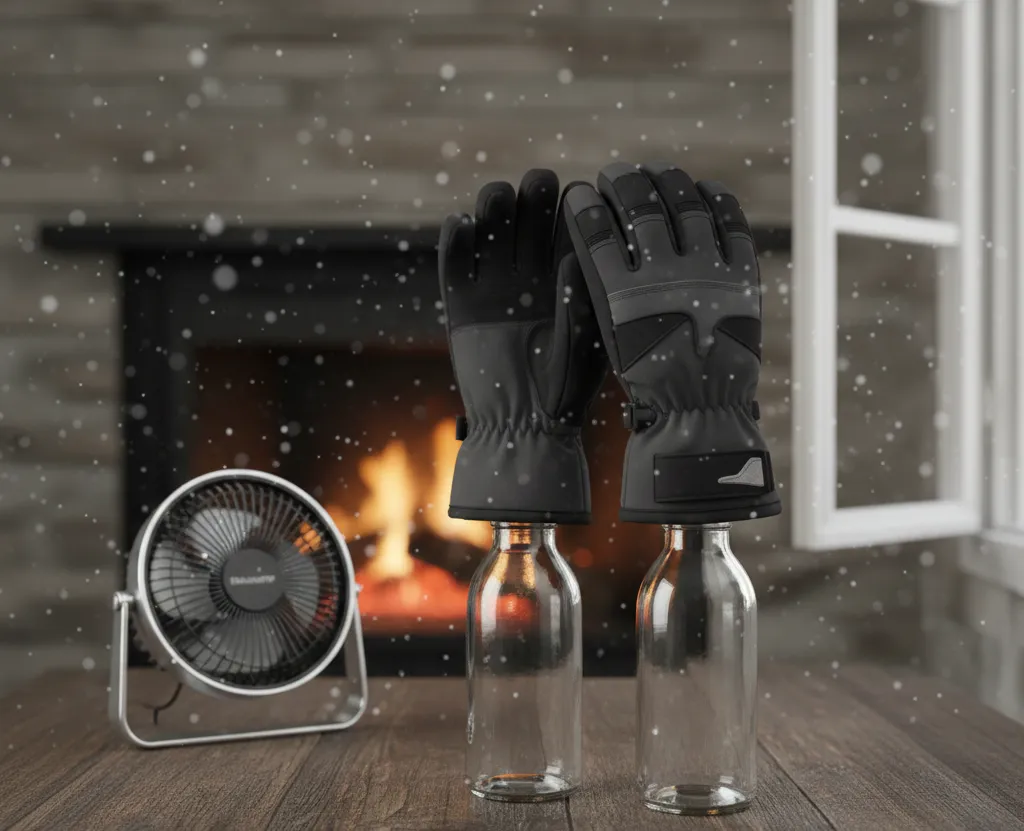
- Air Flow is King: Stand them up in a place with good airflow. I use a boot dryer that blows room temperature air. If you don’t have one, prop them up with a piece of PVC pipe or a tall glass so air can get inside.
- The Fan Trick: I place my gloves about three feet away from a standard floor fan. The moving air speeds up evaporation without the risks of heat.
- Newspaper Wicking: If the insides are soaking, stuff them with crumpled newspaper. Change the paper every 4 hours. It pulls moisture out of the deep insulation where air can’t reach.
Common Mistakes Beginners Make (And How to Avoid Them)
Even if you follow the steps, a few small errors can still ruin a pair of $100 gloves. Here are the most common traps I see people fall into:
- Trusting the “Delicate Cycle”: Many skiers think a front-loading washer on “delicate” is safe. It’s not. The mechanical agitation can still shift the insulation or stretch the seams. The Tip: If you absolutely must use a machine, put your gloves in a mesh laundry bag first to prevent them from tangling.
- The “Radiator Trap”: It is tempting to put wet gloves on a heater or radiator to dry them overnight. Do not do this. Extreme heat makes leather brittle and can actually melt the internal glue used in technical gloves. The Tip: If you want them to dry faster, use a fan to blow room-temperature air onto them. Moving air is safer than hot air.
- Using Liquid Fabric Softener: Never use softener. It leaves a waxy coating on the fabric that kills the “breathability” of the GORE-TEX and makes the outer shell soak up water instead of repelling it. The Tip: Stick to specialized tech-wash or basic, clear baby shampoo.
- Washing Too Often: You don’t need to wash your gloves after every weekend. Every time you wash them, you slightly degrade the DWR coating. The Tip: Only do a full wash if they smell or if you can see salt stains on the palms. For everything else, a simple damp-cloth wipe is enough.
Maintenance: Restoring the Armor
Washing is only half the job. Once they are dry, they will feel “naked.”
- Condition the Leather: While the leather is still slightly damp (about 90% dry), rub in a leather balm. I use Hestra’s balm or Nikwax Waterproofing Wax for Leather. The slight dampness helps the leather “pull” the oils deeper into the fibers.
- Re-Proof the Fabric: If your gloves are synthetic, water should bead off them. If the water soaks in and turns the fabric dark, the DWR is gone. Spray them with a waterproof restorer while they are clean.
Decision Checklist: Is It Time to Wash?
Run through this before you start:
- [ ] Smell Check: Does it smell like a locker room? (Wash it)
- [ ] Water Check: Does water soak into the fabric instead of beading? (Wash and re-proof)
- [ ] Stiffness Check: Does the leather feel crunchy or dry? (Condition only)
- [ ] Visual Check: Are there salt white lines on the fabric? (Wash it—that salt is eating the membrane)
Quick Problem-Diagnosis (Troubleshooting)
Problem: Gloves are stiff as a board after drying.
- Diagnosis: You washed away the oils or dried them with too much heat.
- The Fix: Apply a heavy coat of leather conditioner, let it sit for 24 hours, then wipe away the excess.
Problem: The liner is still damp after 24 hours.
- Diagnosis: No airflow.
- The Fix: Use a fan or a non-heated boot dryer. Do not put them in the dryer.
Problem: My hands get wet even though the glove looks fine.
- Diagnosis: The “sandwich” layers are dirty. Dirt is pulling water through the fabric via “capillary action.”
- The Fix: A deep wash with tech-wash to clear the membrane pores.
When This is NOT the Right Choice
- Heated Gloves: If your gloves have integrated heating elements and batteries, never submerge them. Even if they claim to be waterproof, the risk of a short circuit or corroding the charging port is too high. Spot clean the exterior only.
- Ancient Gear: If your gloves are 10+ years old and the “leather” is flaking off, washing will accelerate the disintegration. These are beyond help.
- Down-Filled Gloves: Down requires a specific “Down Wash” detergent. If you use regular soap, the feathers will clump together into hard little balls, and your gloves will lose all warmth.
Summary of Advantages vs. Disadvantages
Hand Washing (The Pro Way)
- Advantages: Extends glove life by 2-3 seasons; restores breathability; maintains the fit.
- Disadvantages: Takes 24-48 hours to dry; requires specific tech-wash soap.
Machine Washing (The Risky Way)
- Advantages: Fast; low effort.
- Disadvantages: High risk of tearing seams; often ruins leather; can melt internal membranes if the water is too hot.
The Bottom Line
Treat your gloves like survival gear, not laundry. They are the only thing standing between you and frostbite when the wind picks up at 10,000 feet. A slow, careful hand wash twice a season is all it takes to keep your hands warm and your carpool buddies happy.
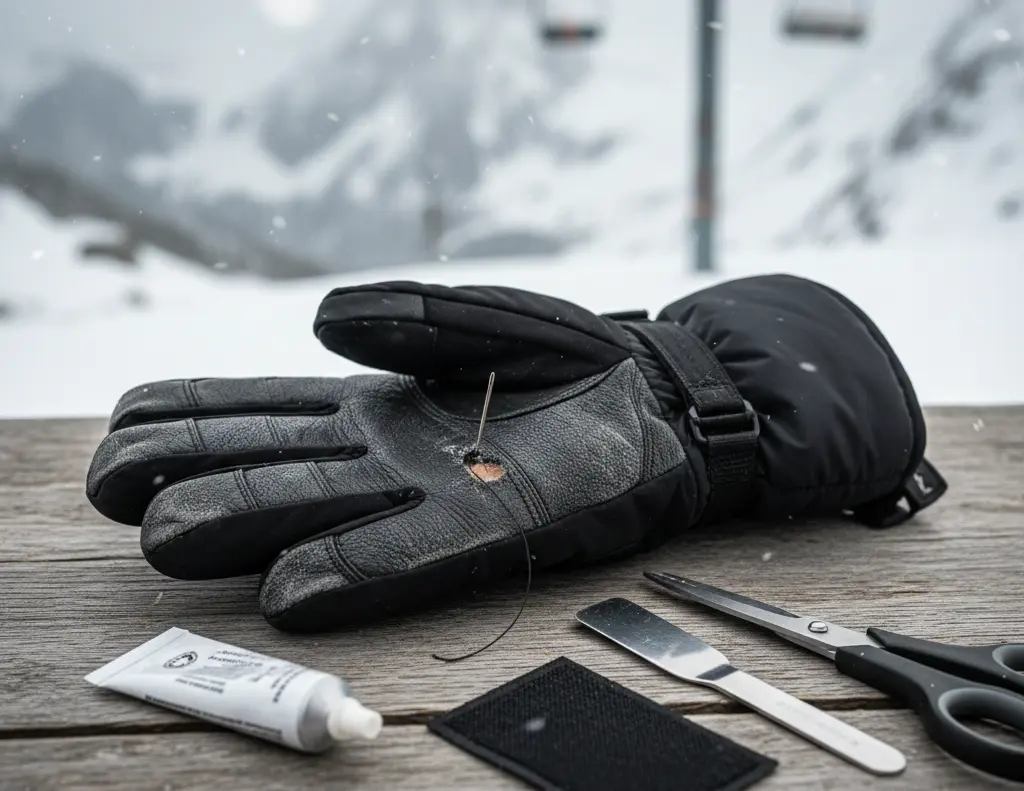
Cleaning your gear is usually the time you notice small tears or split seams that were hidden by dirt. Don’t let a small hole turn into a ruined trip. If you noticed a seam starting to fail while you were cleaning them today, check out our professional guide on how to sew ski gloves by hand to fix it before your next mountain day.
About the Author
Awais Rafaqat has over 15 years of experience testing ski gear in some of the harshest conditions across North America, from the dry sub-zero peaks of the Rockies to the wet, freezing slopes of the Pacific Northwest. He specializes in real-world gear testing to help skiers find equipment that keeps them warm, dry, and performing at their best on every run.