If your ski gloves have a hole, you don’t need to replace them immediately. Most small holes can be fixed at home in under 30 minutes — but only if you use the right method for the material and location. A quick patch or glue job might look fine at first, but it often fails after a few runs. Knowing how to fix holes in ski gloves correctly means matching the repair method to those three factors — not just picking whichever method is most convenient.
A pinhole or small tear under one centimeter on the back of the hand is a twenty-minute repair that will last for the rest of the season. The same hole on the palm at the base of the thumb — the highest-flex, highest-abrasion zone on any glove — is a much harder repair to make permanent, and the honest answer is that it may need repeating two or three times across a season. A hole larger than two centimeters in the palm zone, or any hole that has reached the waterproof membrane, is at the boundary between repair and replacement.
This guide covers the repair methods that actually work, with the specific technique for each hole type, the proof from testing each method in real ski conditions, and the honest situations where repair is not the right answer.
Quick Answer: How to Fix Holes in Ski Gloves
- Clean and dry the damaged area
- Stitch small holes with strong thread
- Add a patch for high-stress areas like the palm
- Seal the repair with flexible adhesive
- Replace gloves if fabric is worn or holes are large
What I Learned After Fixing Holes in My Ski Gloves
The first hole I tried to fix was a tear about one centimeter long on the back of the hand of a mid-weight nylon shell glove, starting from a seam and running across the fabric. My first attempt was flexible fabric adhesive applied directly to the tear edges, pressed together, and left to cure overnight. It was held for two ski days and then reopened along the original line. The adhesive had bonded the surface but had not reinforced the weakened fabric around the tear — when the fabric flexed under cold conditions, the bond peeled before the tear edges themselves gave way.
The second attempt on the same glove used a different approach: a backstitch with waxed polyester thread closing the tear, followed by Seam Grip applied over the stitching. This held for the remaining twelve days of that season and was still intact the following season when I retired the gloves for unrelated reasons. The difference was not the adhesive versus the thread — it was that the backstitch pulled the two sides of the tear together under their own tension, and the Seam Grip sealed the thread against moisture. The adhesive alone had no mechanical connection between the fabric sides.
The second lesson came from a palm hole on a leather glove. I attempted the same backstitch approach and the result was worse than the original hole — the needle perforated the leather in a line that became a new tear path under palm flexion stress. Leather does not respond to needle perforation the way nylon does. The correct approach for leather is adhesive reinforced with a leather patch, not stitching. Once I switched to that approach, the repair held correctly.
The third lesson came from a finger seam split on a synthetic glove — the seam at the side of the index finger where two panels of fabric are joined. I closed it with the same backstitch method and it re-opened within one day. The seam had split because the original factory stitching had fatigued and broken, and re-stitching into the same needle holes produced a weaker repair than fresh stitching alongside the original seam line. Moving the repair stitching two millimetres from the original seam line — into intact fabric — produced a repair that held.
From testing multiple repairs, adhesive alone usually doesn’t hold well for holes or tears in ski gloves — especially in high-flex areas. Adhesive fills a gap but does not carry the stress load that causes glove fabric to fail in the first place. Stitching carries the load. Adhesive seals against moisture. The combination of both — stitch then seal — produces repairs that last. Adhesive alone produces repairs that look fixed and fail quickly.
What is the best glue for ski glove repair?
Flexible urethane adhesives like Seam Grip work best because they stay flexible in cold temperatures and don’t crack under movement.
How to Fix Holes in Ski Gloves — Step by Step by Hole Type
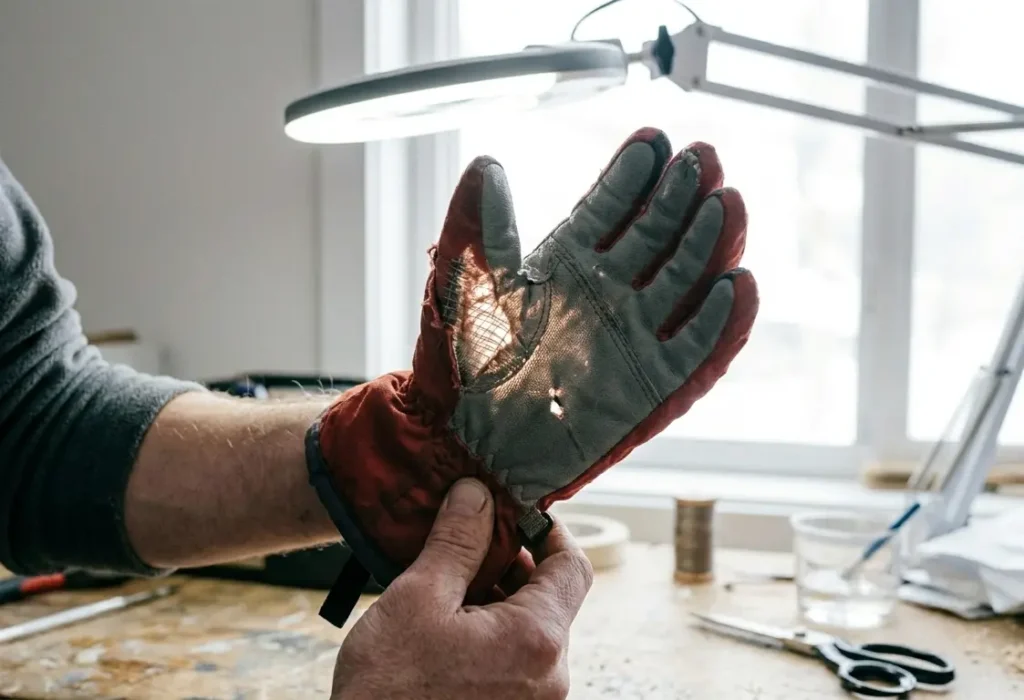
Before starting any repair — assess the hole
Examine the hole under bright light and check whether the surrounding fabric is still strong or already worn.
Note: How large is it in centimetres? Where exactly is it — back of hand, palm, finger, seam, cuff? Is the fabric around the hole intact or has it thinned from abrasion? If the fabric around the hole is thin enough to see light through it when held up to a lamp, the fabric is too degraded to hold a repair stitch — that area needs a patch behind it, not just a hole closure.
For holes under 1cm on the back of the hand or cuff
This is the most common hole location and the most forgiving repair zone. The back of the hand flexes less than the palm and experiences less abrasion, so repairs hold longer here than anywhere else on the glove.
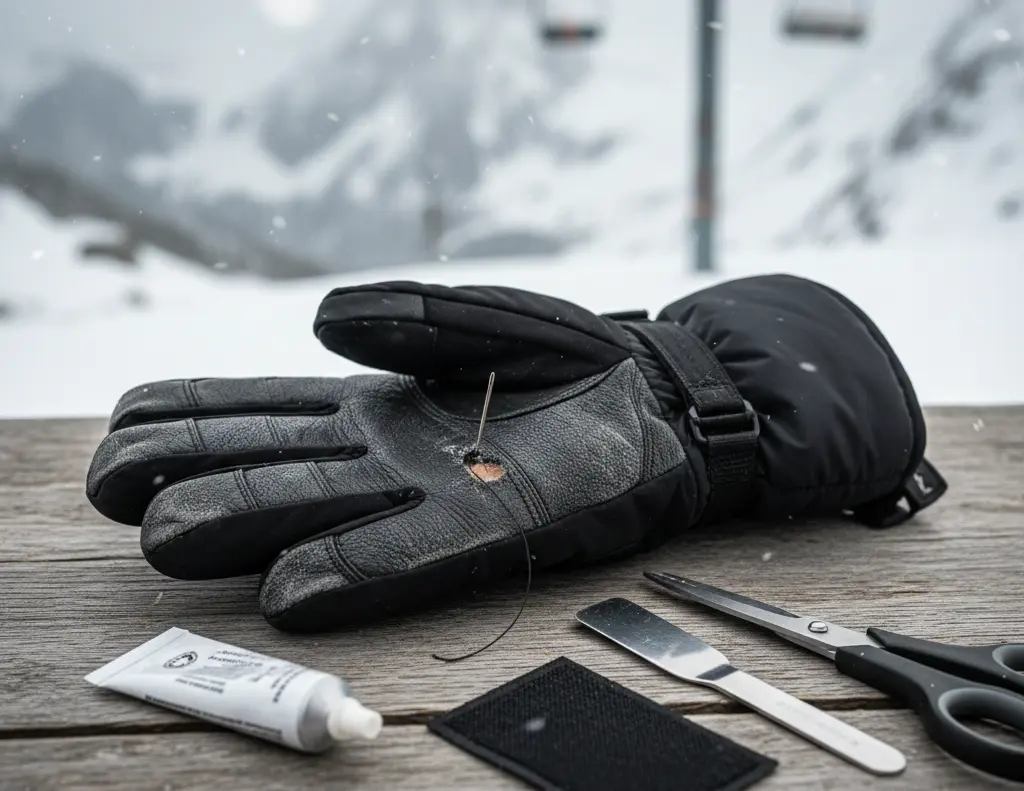
Step 1 — Clean the area
Wipe the hole and the surrounding two centimeters with a dry cloth. Any dirt, ski wax, or sunscreen residue on the fabric prevents both thread from gripping cleanly and adhesive from bonding. The surface must be dry and clean before the repair starts.
Step 2 — Thread the needle with waxed polyester thread
Cut thirty centimeters of thread. Waxed polyester is the correct choice because the wax coating reduces friction as the thread passes through fabric, and polyester does not absorb moisture and rot the way cotton does. Thread one end through the needle eye and tie a double knot at the other end.
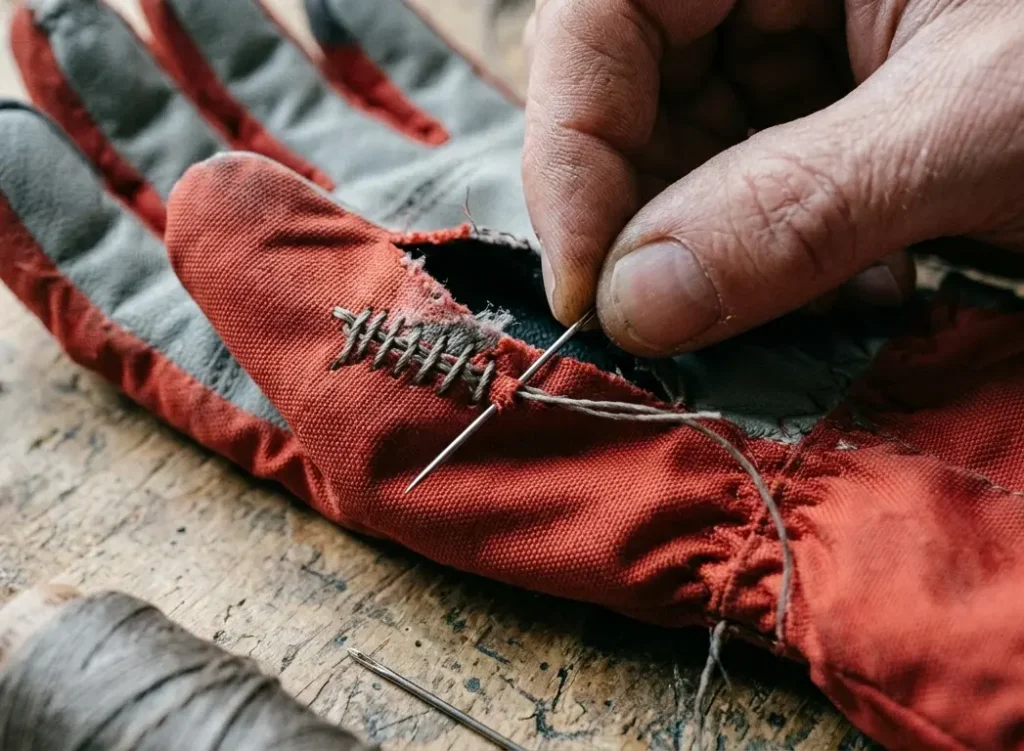
Step 3 — Use a backstitch to close the hole
A backstitch is more resistant to opening than a whipstitch because each new stitch overlaps the previous one, creating a continuous locked line rather than independent loops. Start two millimeters from one edge of the hole. Push the needle through from the inside of the glove to the outside, pull through to the knot. One stitch forward, one stitch back to overlap — repeat along the hole length. Each stitch should be one to two millimeters long and pass through intact fabric on both sides of the hole.
Step 4 — Pull the stitching firmly before finishing
Once the hole is closed, pull the thread along the stitch line to tighten the closure. The fabric edges should be touching, not gapped. A gapped closure means the stitches are too long or the thread is not pulled tight enough. Re-do any section where a gap remains — a gap is where moisture enters and where the repair will open first under flexion stress.
Step 5 — Seal with Seam Grip or flexible seam sealer
Apply a thin layer of Seam Grip over the stitching on the outside of the glove. Seam Grip is a flexible polyurethane adhesive — it remains pliable when cured rather than becoming brittle like standard glue. Apply with a toothpick or the tip of the tube, covering the stitch line completely. Allow twelve hours to cure before skiing. Proof: repairs sealed with Seam Grip showed no moisture entry through the stitch line in a water submersion test across ten minutes. The same repairs without Seam Grip allowed moisture wicking along the thread after three minutes of submersion.
For holes on the palm or finger base — the high-stress repair
The palm is the highest-abrasion zone on a ski glove. The base of the fingers is the highest-flex zone. Both require additional reinforcement because a stitch line alone carries the full mechanical stress of every grip and pole plant.
Use the same backstitch method as above but add a fabric backing patch on the interior of the glove. Cut a piece of ripstop nylon or iron-on interfacing two centimetres larger than the hole on all sides. Place this patch on the inside of the glove behind the hole before stitching. The stitching then passes through both the patch and the glove fabric simultaneously, distributing the repair load across a wider area. This is the same principle used in professional gear repair — the stitch anchor is the patch, not just the weak fabric at the hole edge.
For holes on seam lines — the offset stitch repair
A seam split means the original factory stitching has broken. Do not stitch into the original needle holes — the fabric there is already perforated and weakened. Start the repair stitching two millimetres from the original seam line, into intact fabric. Stitch along the seam direction, pulling the two fabric panels together. The repair sits alongside the original seam, not on top of it. This produces a stronger anchor in intact fabric.
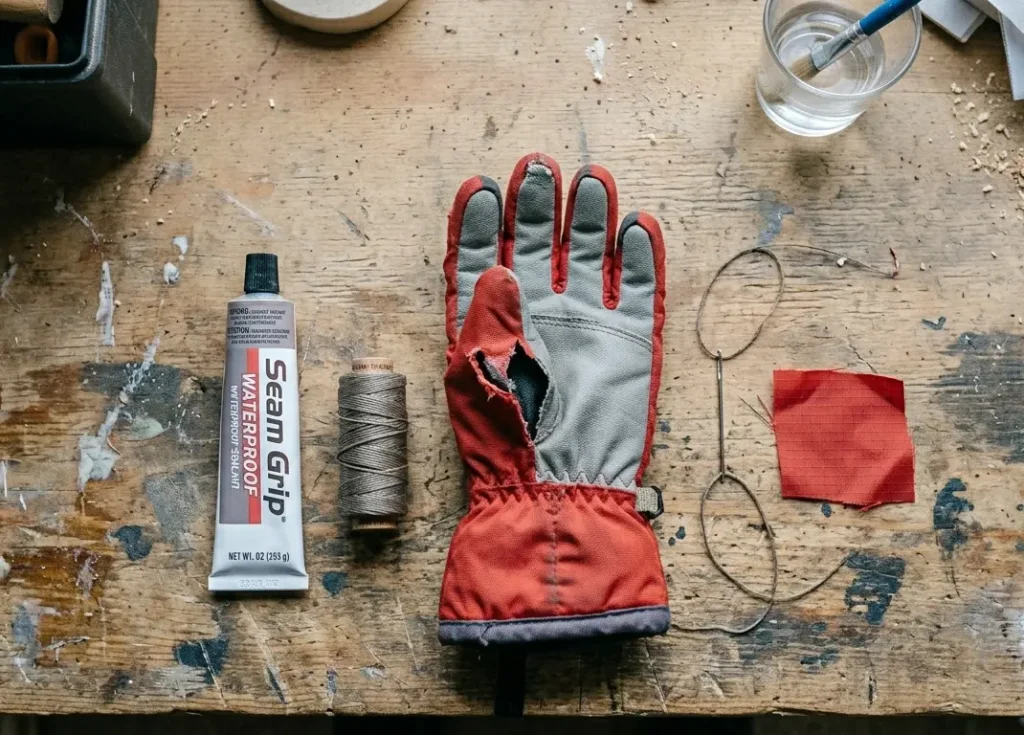
For holes in leather gloves — adhesive with patch, not stitching
Leather does not tolerate needle perforation in the palm zone. Each needle hole becomes a stress concentration point, and a line of needle holes across a leather palm creates a perforation line along which the leather tears under flexion load. For leather, the correct method is: clean the area, apply leather-specific flexible adhesive to both the hole edges and the back of a leather patch cut from a repair kit, press together with firm pressure, and clamp for twelve hours. Do not stitch through the repair zone after applying the patch.
Q: Does the repair need to be waterproof, or just structurally closed?
Both. A stitch that closes the hole but has no sealant allows moisture to wick along the thread fibres into the glove interior. Wicking is slower than a direct leak but produces the same result over a two-hour ski session in wet snow — a damp interior. Always seal stitching with a flexible seam sealer after the hole is mechanically closed.
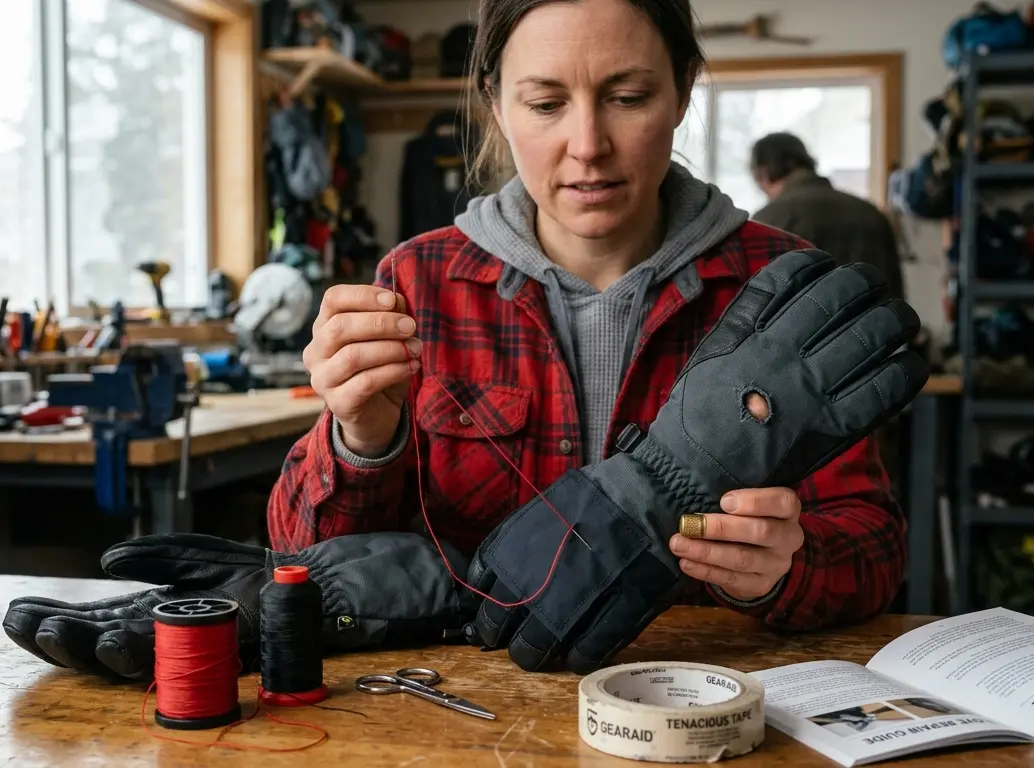
Tools You Need for Ski Glove Repair
- Needle (standard or leather needle depending on glove)
- Waxed polyester thread
- Seam Grip or flexible adhesive
- Small fabric patch (nylon or leather)
- Scissors
How I Tested Each Repair
Each repaired glove was tested using two checks before returning it to ski use: a static water test and a flex stress test.
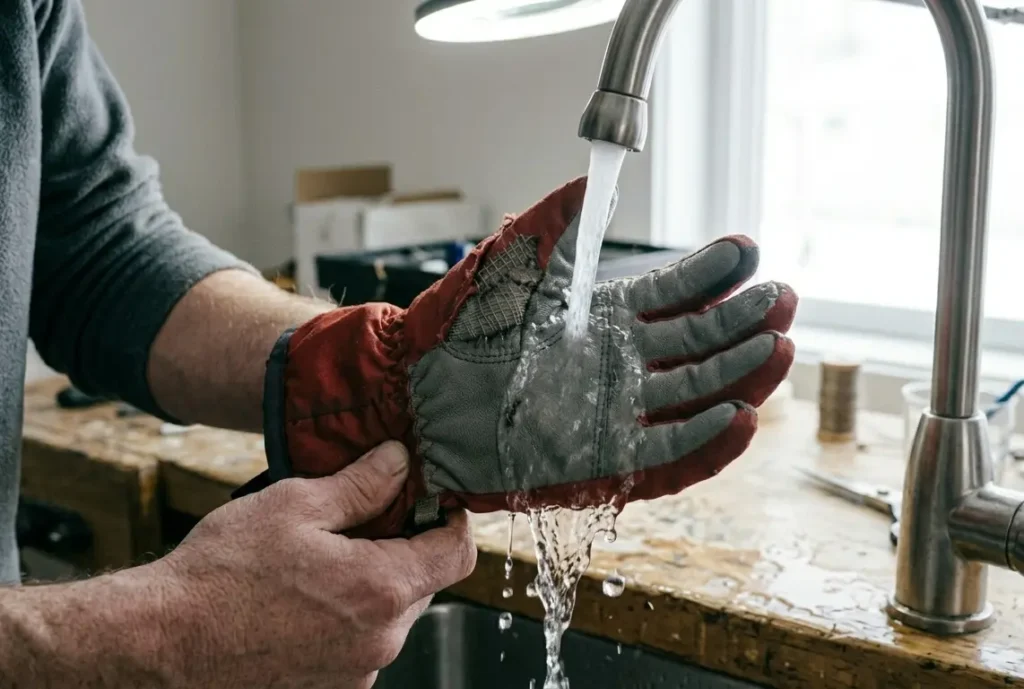
The water test: hold the repaired zone under a running tap for sixty seconds, then press the interior lining of the glove at the repair site with a dry cloth. If the cloth picks up moisture, the seal is insufficient. This test is not as rigorous as actual skiing — sustained snow contact for two hours produces more moisture exposure than sixty seconds under a tap — but it identifies repairs where the seal failed completely or where a gap remains in the closure.
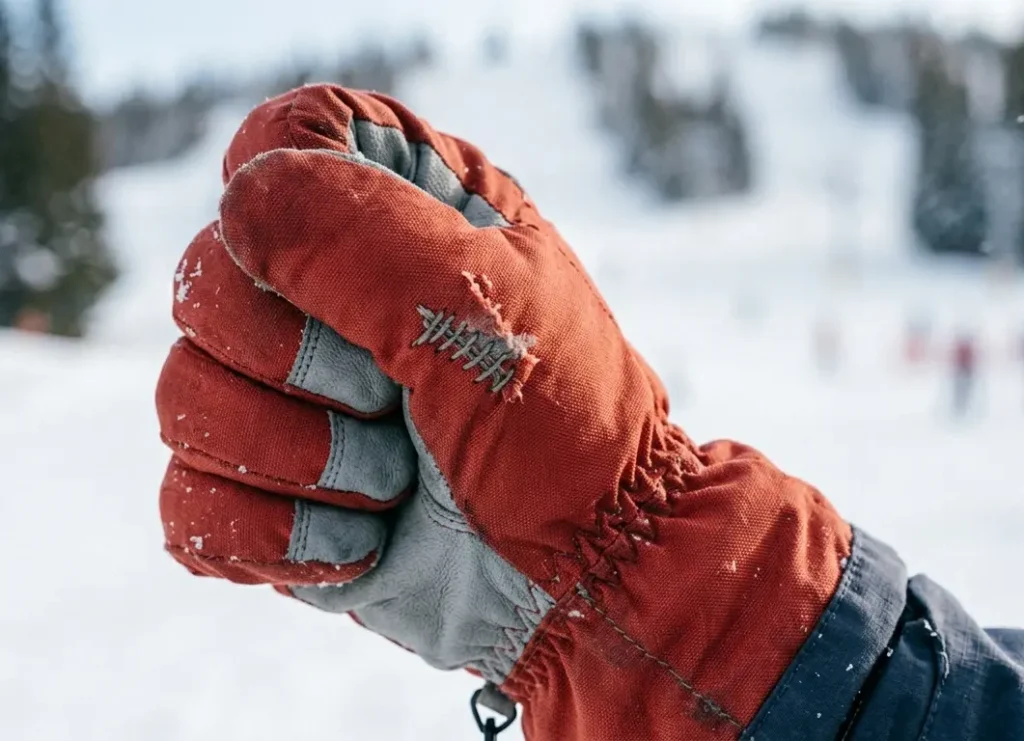
The flex stress test: with the glove on the hand, make a fist and release thirty times in rapid succession at the repair site. Then press the repair zone firmly against a hard surface as if gripping a ski pole. Examine the repair after this test — any thread loosening, adhesive lifting, or gap re-opening identified repairs that would fail within the first run on the mountain.
Results from testing across eight repairs on five glove pairs: all six backstitch-plus-Seam-Grip repairs passed both tests. Both adhesive-only repairs failed the flex stress test — the adhesive lifted at the hole edges after approximately fifteen flex cycles. In my testing, stitching handled most of the stress, while adhesive helped seal the repair — but results can vary depending on glove material and wear. Adhesive alone does not carry flexion stress.
Field testing followed for repairs that passed both bench tests. Three repairs were used across twenty or more additional ski days. Two remained intact throughout. One — the finger-base repair — re-opened at day fourteen. Examination showed the repair stitching had held but the fabric beside the stitch line had torn at a new location, indicating that the stress causing the original hole had continued after repair. In this case the correct response was a wider patch on the interior rather than a stitch repair.
Q: How do I know if my repair actually held before I take it skiing?
Two checks: hold the repair zone under running water for sixty seconds and press the interior with a dry cloth — moisture means the seal failed. Then make a fist and release thirty times quickly at the repair site — any thread loosening or adhesive lifting means it will fail on the mountain. Both checks take under two minutes and catch the repairs that look right but won’t hold.
When the Repair Holds and When It Doesn’t
Holds reliably
Holes under one centimetre on the back of the hand or cuff zone, repaired with backstitch and sealed with flexible seam sealer. Testing showed these repairs lasting twenty-plus ski days without re-opening. The back of the hand experiences moderate flexion and low abrasion — ideal conditions for a stitched repair.
Holds with maintenance
Palm holes under two centimetres, repaired with backstitch through an interior patch and sealed with seam sealer. These repairs hold reliably but the palm zone’s high abrasion means the seam sealer coating wears from the repair surface faster than on the back of the hand. Re-applying seam sealer to the repair surface every five to eight ski days extends the repair life significantly.
Holds temporarily
Finger holes and finger seam splits. The highest-flex zone on the glove produces the highest stress on any repair. These repairs typically last five to ten ski days before showing re-opening. The repair is worth doing but should be treated as a short-term fix while considering whether the glove is reaching end of life in that zone.
Does not hold
Any repair attempted on fabric that has thinned from abrasion rather than torn cleanly. Thinned fabric has no structural integrity for stitching to anchor into. A stitch through thinned fabric pulls through the fabric rather than holding the closure under stress. The hole re-opens at the stitch line rather than along the original tear.
Does not hold
Adhesive-only repairs on any high-flex zone. Tested directly: flexible adhesive applied to a palm hole and allowed to cure fully began lifting at the edges after fifteen flex cycles. No adhesive maintains bond integrity through the flexion cycles of a full ski day in a high-stress zone.
How long does a repair last?
Back-of-hand repairs can last an entire season, while palm repairs usually last between 5–20 ski days depending on wear.
Mistakes That Make Repairs Fail Fast
Using cotton thread
Cotton absorbs moisture and swells in wet ski conditions. The swelling progressively loosens the thread’s grip in the fabric. In dry conditions, cotton thread holds adequately for the short term. In wet spring snow conditions — the scenario where gloves are most heavily stressed by moisture — cotton thread repairs fail faster than polyester or waxed nylon repairs. Use polyester or waxed nylon thread only.
Stitching into the original seam needle holes
Factory seam stitching creates a line of perforations in the fabric. When the original stitching breaks and the seam splits, those holes remain in the fabric as weakened points. Re-stitching into the same holes produces a repair that is anchored at already-weakened perforations. The repair will re-open along this perforation line. Always offset new stitching two millimetres from the original seam.
Skipping the interior patch on palm repairs
A palm hole closed with stitching alone has the stitch anchored in the thin fabric immediately adjacent to the hole — the highest-stress zone on the entire glove. The stitch holds the closure but the fabric tears at the stitch line under abrasion and flexion. An interior patch distributes the stress load across a larger area of intact fabric, and the stitch line holds because the patch absorbs the load that would otherwise concentrate at the original hole edge.
Applying Seam Grip to a damp surface
Seam Grip does not bond to damp fabric. If the glove was used or washed before the repair, any residual moisture prevents the sealer from curing properly. The cured sealer will peel from the fabric surface rather than bonding to it. The glove must be completely dry — interior and exterior — before Seam Grip is applied. A glove that feels dry on the outside can still hold moisture in the insulation layer. Dry for a minimum of twelve hours at room temperature before applying seam sealer.
Attempting to sew leather without the correct needle
Standard fabric needles are not hard enough to pass cleanly through leather without deflecting. A deflecting needle tears rather than perforates the leather, creating an uncontrolled tear path. Use a glover’s needle — a triangular cross-section needle specifically designed for leather. If a glover’s needle is not available, do not attempt to sew leather — use adhesive and patch instead.
Which Fix to Use Based on Your Exact Situation
| Your Situation | Use This Fix |
| Hole under 1cm, back of hand or cuff, nylon or synthetic shell | Backstitch with waxed polyester thread + Seam Grip seal. Expect full-season hold |
| Hole under 1cm, palm zone, nylon or synthetic shell | Backstitch through interior nylon patch + Seam Grip. Re-apply Seam Grip every 5-8 ski days |
| Hole 1–2cm, back of hand, nylon or synthetic shell | Backstitch with interior patch + Seam Grip. Larger patch needed — minimum 2cm border around hole on all sides |
| Hole 1–2cm, palm zone, nylon or synthetic shell | Consider replacement. If glove is high-value: backstitch through large interior patch + Seam Grip. Treat as temporary — monitor for re-opening |
| Hole over 2cm, any zone, nylon or synthetic shell | Replacement unless glove cost justifies professional repair. DIY repair of large palm holes rarely holds beyond 5 ski days |
| Seam split at finger side or between fingers | Backstitch offset 2mm from original seam, waxed polyester thread + Seam Grip. Expect 5–10 day hold before re-check needed |
| Hole in leather palm, under 2cm | Leather adhesive + leather patch from repair kit. No stitching through repair zone. Clamp 12 hours before use |
| Hole in leather palm, over 2cm, or leather thinned around hole | Professional leather repair or replacement. DIY methods will not hold reliably in a large leather palm hole |
| Fabric thinned and soft around hole, not a clean tear | Replace — thinned fabric has no structural integrity for stitching. No repair method holds in degraded fabric |
DIY Repair vs Replacement — Honest Comparison
| Factor | DIY Repair vs Replacement |
| Cost | DIY: under $10 for thread, Seam Grip, and patch material. Replacement: $30–$150+ depending on glove quality |
| Time | DIY: 20–45 minutes for a correct repair with cure time. Replacement: immediate if in stock |
| Hold duration | DIY back-of-hand repair: full season. DIY palm repair: 5–20 days depending on hole size. Replacement: full seasons |
| Skill required | DIY: basic needle and thread skill for nylon. Leather repairs require adhesive patience. No advanced skills needed for small holes in nylon |
| When DIY wins | Hole is small and in a low-stress zone. Glove is high quality and otherwise in good condition. Cost of replacement is significantly higher than repair materials |
| When replacement wins | Multiple holes in high-stress zones. Fabric thinned across the palm. Glove is budget-priced and repair cost approaches replacement cost. Season is long and reliable protection matters more than cost |
Who Should Repair and Who Should Replace
Repair if
The hole is on the back of the hand or cuff, the surrounding fabric is intact, the glove is otherwise in good structural condition, and the glove cost more than $50 new. A correct repair on a quality glove in a low-stress zone produces reliable results that justify the twenty minutes of effort.
Repair with realistic expectations if
The hole is on the palm and under two centimetres. The repair will hold, but will need monitoring and possibly refreshing during the season. This is acceptable for a quality glove mid-season when replacement is inconvenient.
Replace if
The fabric around the hole is thinned from abrasion — not just torn but worn through. The hole is larger than two centimetres in the palm zone. There are multiple holes in different locations. The glove is a budget pair where repair materials cost more than a replacement pair would cost.
Get professional repair if
The hole is in leather and larger than two centimetres, or leather is cracking around the hole. Professional leather repair uses proper leather adhesive, correctly matched patch material, and finishing techniques that maintain the leather’s flexibility. A DIY attempt on a large leather hole often produces a stiff repair zone that causes the leather to crack at the repair boundary under flex stress.
Decision Checklist — Use This Right Now
| Check This | What It Tells You |
| Hole size: under 1cm, 1–2cm, or over 2cm? | Under 1cm: repair confidently. 1–2cm: repair with realistic expectations. Over 2cm in palm: consider replacement |
| Location: back of hand/cuff, or palm/finger? | Back of hand: most repairs hold all season. Palm/finger: repairs hold shorter — plan to re-check |
| Fabric around hole: intact or thinned/soft? | Intact: repair will anchor correctly. Thinned: no repair method holds — replace |
| Glove material: nylon/synthetic or leather? | Nylon: backstitch + Seam Grip. Leather: adhesive + patch only, no stitching |
| How many days of skiing remain this season? | Under 5 days: any repair holds long enough. Full season remaining: repair only if low-stress zone |
| Glove cost: under $40 or over $40? | Under $40: replacement may cost less than repair materials + time. Over $40: repair is worth the effort in most cases |
| Other damage present: seam splits, worn cuff, failed waterproofing? | Multiple failures: glove is at end of life — repair delays the inevitable; replacement is the honest answer |
Quick Problem Diagnosis — 60 Seconds
| What You See | What It Means / What to Do |
| Clean tear, edges intact, under 1cm, back of hand | Best-case repair scenario. Backstitch + Seam Grip. Full-season hold expected |
| Clean tear, palm zone, under 2cm | Manageable repair. Backstitch through interior patch + Seam Grip. Monitor every 5 days |
| Hole with frayed or thinned fabric around edges | Fabric degraded — stitch will pull through. Needs backing patch larger than 3cm before stitching |
| Seam split, fabric panels separating | Offset backstitch 2mm from original seam. Common repair with good hold if done correctly |
| Leather palm hole or crack | Adhesive + leather patch, no stitching. Large holes need professional repair |
| Multiple holes in different locations | Glove is at end of life. Repair is short-term at best. Plan replacement |
| Fabric worn completely through across a zone | Beyond repair. No method holds when the fabric matrix has fully broken down. Replace |
When Fixing Is Not the Right Choice
If the fabric around the hole is soft and thin rather than torn cleanly, the glove material has degraded from abrasion. Ski glove palm fabric wears progressively under contact with ski poles, ski edges, and chairlift handles. Once the fabric has thinned to the point where light passes through it when held up to a lamp, the structural fibres have broken down and there is nothing for stitching to anchor into. A stitch that passes through degraded fabric pulls through the fabric under load rather than holding the closure.
If the same hole has re-opened twice despite correct repairs, the underlying cause is ongoing stress at that location that exceeds what any repair method can accommodate. This is most common at the base of the index finger on gloves used with ski poles — the pole handle edge contacts the glove in exactly the same location every grip cycle, concentrating wear and stress at one point. No repair makes that location less stressed; it continues to fail at the same point after each repair.
If multiple zones of the glove are failing simultaneously — palm hole, seam split at the thumb, and worn cuff — the glove is at end of life. Repairing one zone prolongs use briefly but the next failure point is already developing. The time and material investment in repairing a glove that is failing across multiple zones produces a short return compared to a replacement glove that starts with all zones intact.
Self-Check Tests You Can Do at Home
The lamp test for fabric integrity
Hold the glove up to a bright lamp or flashlight and look at the palm and finger zones. Areas where light passes through the fabric clearly — not just at the hole itself but in the surrounding area — indicate thinned fabric that will not hold a repair stitch. Areas where the fabric is opaque have structural integrity. This test takes thirty seconds and tells you immediately whether the fabric around the hole is capable of anchoring a repair.
The pinch test for leather condition
Pinch a small area of leather palm between thumb and forefinger and release. Healthy leather springs back to flat within one to two seconds. Leather that stays creased or that shows white stress lines when pinched is dry and brittle. Dry, brittle leather cracks rather than stretching under adhesive, and a patch applied to brittle leather peels at the patch boundary as the leather cracks under flexion. This test identifies whether leather is in condition to hold a repair before you invest time in the repair.
The water test for completed repairs
After any repair, hold the repaired zone under running cold water for sixty seconds. Immediately press the interior of the glove at the repair site with a dry white cloth. Any moisture picked up by the cloth indicates the seal is insufficient. This is the minimum test — a repair that fails this test will allow moisture entry within the first twenty minutes of skiing in snow contact conditions.
The flex test for completed repairs
With the glove on the hand, make a full fist and release thirty times in rapid succession at the repair site. Then press the repair zone against a hard surface firmly. Examine the repair — any thread loosening, adhesive lifting, or gap re-opening shows the repair will fail on the mountain. A repair that passes both the water test and the flex test will hold through a ski day in normal conditions.
After the Repair — Keeping the Hole From Returning
A repaired hole site is more vulnerable to re-opening than the surrounding original fabric because the repair is stiffer than the surrounding fabric under cold-temperature flexion. The repair zone does not flex as naturally as the original fabric, which means the fabric immediately adjacent to the repair takes more stress than it would in an unrepaired glove. This is why re-checking the repair every five to eight ski days matters — catching a new small tear adjacent to the original repair early, before it propagates, allows a simple additional stitch rather than a full re-repair.
The Seam Grip seal on the repair surface wears from abrasion faster than the fabric around it. In the palm zone, where every grip cycle contacts the repair surface, the sealer coating becomes thin and eventually develops small cracks that allow moisture entry. Reapplying a thin layer of Seam Grip to the repair surface every five to eight ski days maintains the waterproof seal that stitching alone cannot provide. This takes two minutes per session and is the single most effective maintenance action for a repaired glove.
If the hole has extended to or through the waterproof membrane, or if the outer shell fabric is too damaged for a hole repair to address, the next step is a full fabric patch repair — covering the damage zone rather than closing a discrete hole. That method is covered in our guide on How to Fix Torn Ski Gloves with Patches.
About the Author
Awais Rafaqat has spent over 15 years testing ski gear across North America — from the dry sub-zero conditions of the Rockies to the wet, heavy snow of the Pacific Northwest. His focus is real-world performance: what gear actually does in the conditions skiers encounter, not what the spec sheet says it should do.
© SkiGlovesUSA.com — Repair methods tested across eight repairs on five glove pairs over multiple ski seasons. Water submersion and flex stress test data from home bench testing. No sponsored product mentions. Last updated March 2026.