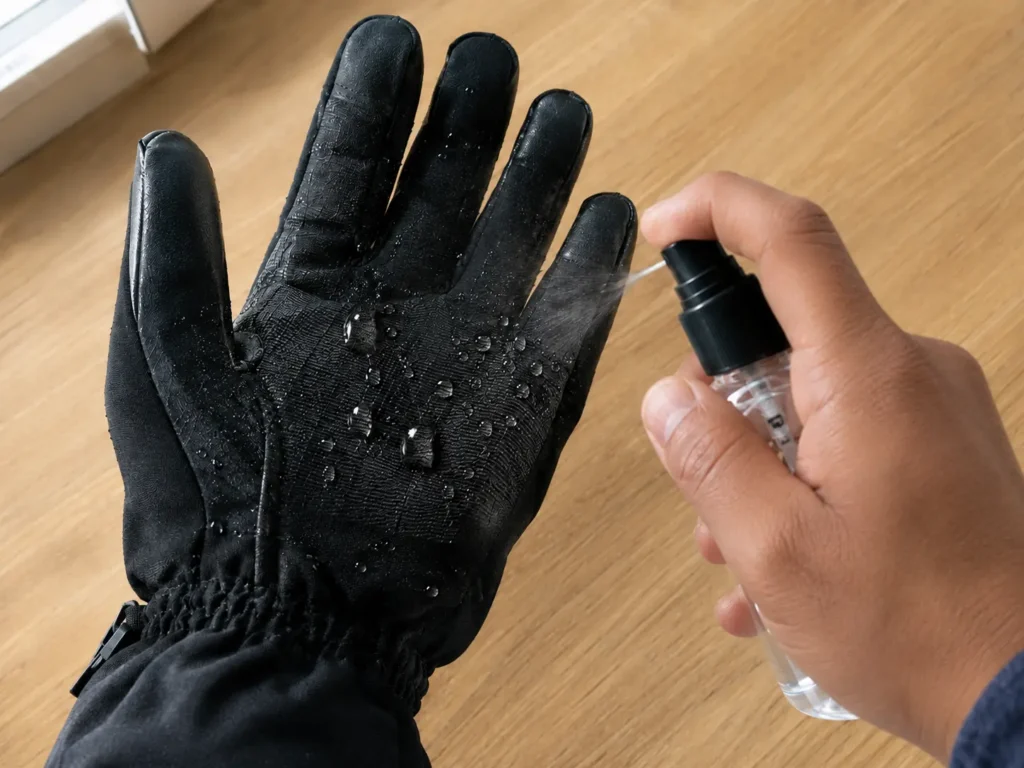
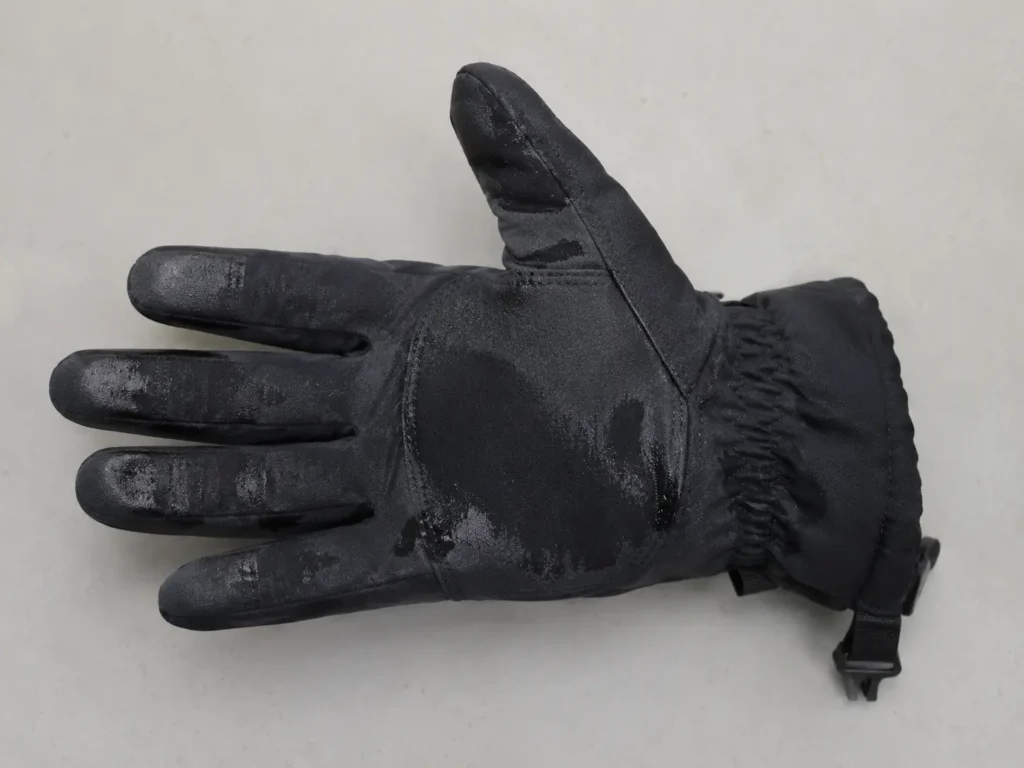
Quick answer: Spray water on the palm and watch what happens for 20 seconds. If it beads and rolls off, the outer surface is doing its job. If it darkens and soaks in, the surface treatment has failed — regardless of what the label claims. That’s the fastest check, but it only tells you about the surface, not the membrane underneath, which is why the tests below go a step further.
If you’d rather get matched to a glove that actually holds up in wet conditions, the Ski Glove Finder does that in under a minute.
- What "Waterproof" Actually Means Here
- Quick Tests You Can Run at Home
- Real-World Tests on the Mountain
- What the Numbers on the Label Actually Mean
- Signs Your Gloves Have Already Failed
- Why Gloves Leak Even When They're New
- If Your Gloves Fail These Tests
- When to Replace Instead of Reproof
- Common Mistakes When Judging Waterproofing
- Frequently Asked Questions
- The Bottom Line
What “Waterproof” Actually Means Here
Most people assume waterproof simply means snow can’t get in. The more precise definition matters: liquid water has to be blocked from entering while sweat vapor still has a way to escape. Miss that second half, and hands end up wet from the inside instead of the outside, which feels exactly as cold.
The actual barrier lives in a membrane layer sandwiched inside the glove, not in the outer fabric you can see and touch. That membrane is full of pores small enough to stop liquid water but large enough to let vapor pass through. The outer shell fabric and the membrane are two separate layers doing two separate jobs — a glove can have a perfectly intact membrane while the outer fabric is soaked and heavy, and those are two different problems with two different fixes.
For anyone shopping specifically with wet performance in mind rather than just warmth, our guide to the best waterproof ski gloves covers which models hold up best across a full wet season, not just on the shelf.
Quick Tests You Can Run at Home
These take a few minutes each and use things most people already have around the house. Together they tell you whether a problem is at the surface, the membrane, or somewhere in between.
Spray Bottle Test
Fill a spray bottle with clean water and spray the outer shell evenly. Watch for 10-20 seconds. Beading and rolling off means the surface treatment is intact. Darkening or a “wet” look means the fabric is absorbing moisture it shouldn’t be, which usually leads to faster soaking and cold hands once you’re actually skiing.
Sink Submersion Test
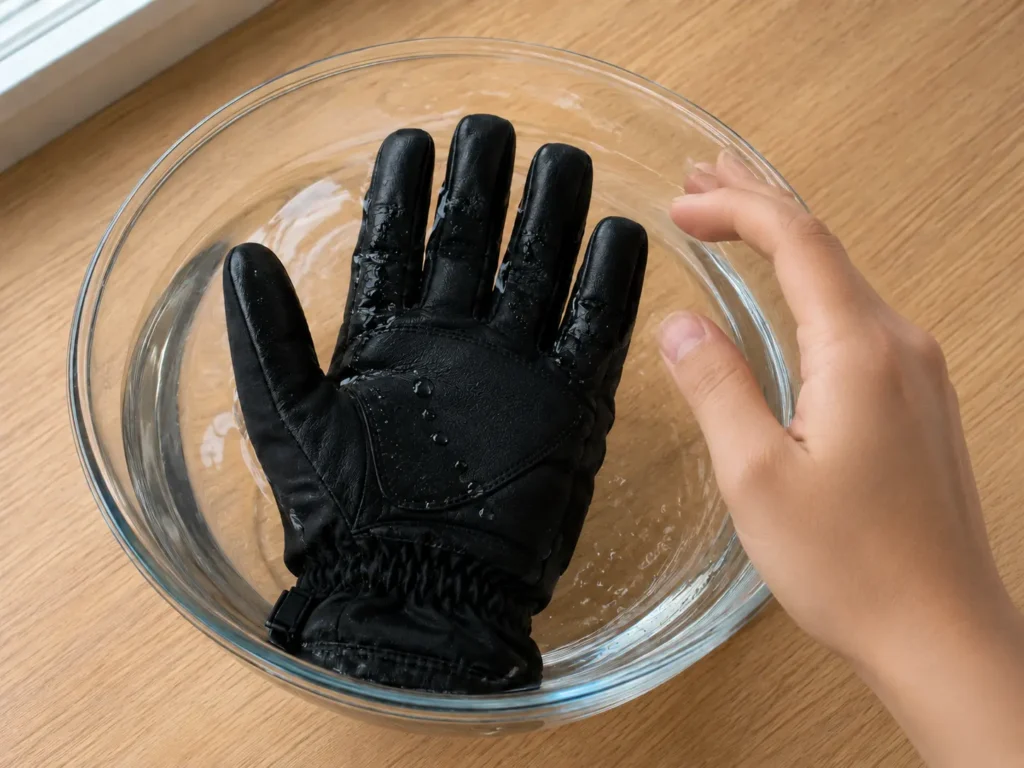
Fill a sink or bowl halfway with cold water and submerge the glove up to the knuckles, keeping the cuff above the waterline. Hold for 2-3 minutes. If the lining stays dry and the glove doesn’t gain noticeable weight, the membrane is intact. Cold spots forming inside, or dark patches rising through the shell, point to a membrane that’s no longer doing its job.
Paper Towel Confirmation Test
This one pinpoints exactly where a leak is happening. Place a dry paper towel or tissue inside each finger, then do a light spray or brief submersion test. Pull the tissues out after a minute or two. A dry tissue means the membrane is holding. A damp or blotchy one tells you water is getting in — often at seams, fingertips, or wherever stitching flexes most.
Real-World Tests on the Mountain
Home tests catch a lot, but some failures only show up under actual ski conditions — pressure, repeated contact, and temperature swings that a sink test can’t fully replicate.
Snow packing
Pack a handful of snow and squeeze it firmly for 15-20 seconds. Weaker gloves let that moisture soak into the fabric fast. Better-performing gloves push water back out rather than absorbing it.
Lift bar contact
Chairlift bars are reliably wet from melting snow, and a full ride means sustained contact. Cold patches forming on fingertips or palm during a ride are a clear signal, and this test tends to expose weak cuffs and seams more than it exposes fabric problems.
Warm-cold-warm cycling
Moisture doesn’t always announce itself immediately. Gloves that warm up in the lodge and then go back into the cold often reveal trapped water that wasn’t obvious before, since the temperature shift makes any dampness noticeably colder.
Moisture from these mountain tests frequently doesn’t show up for 20-40 minutes, not right away — which is part of why gloves can feel fine through the first couple of runs and only start failing by the third or fourth.

What the Numbers on the Label Actually Mean
Some manufacturers list a waterproof rating in millimeters — something like 5,000mm or 10,000mm. That number comes from a hydrostatic head test, where a fabric sample is clamped over a sealed tube and water pressure is gradually increased until it starts to seep through. SectionHiker’s breakdown of hydrostatic head testing explains the mechanics in more depth, and the same rating system used for jackets and tents applies directly to ski glove shells.
Higher numbers mean the fabric withstands more pressure before leaking, which matters for anything involving repeated snow contact, wet gear, or extended lift exposure. Not every glove brand publishes this number, and its absence doesn’t automatically mean a glove performs badly — but when it’s available, it’s a more concrete data point than a marketing claim alone.
Signs Your Gloves Have Already Failed
Some failures show up gradually enough that skiers don’t connect the dots until several symptoms have stacked up.
Damp fingertips early in the day
Usually the first sign, showing up at high-pressure contact points like where you grip poles.
A liner that stays soggy
The inside holds onto moisture instead of moving it out, which happens once the membrane stops breathing properly or starts leaking outright.
Cold spots that weren’t there before
Cold fingertips or knuckles specifically, rather than overall coldness, often point to moisture that’s entered and is now cooling through evaporation.
Darkened patches on leather
Leather visibly absorbs meltwater, and discoloration at the palm or fingertips is a direct sign of saturation.
Gloves that take much longer to dry
Slower drying overnight or in the lodge means more water is trapped in the layers than there should be.
Visible separation between layers
When the membrane starts pulling away from the fabric, water pools between the layers instead of being blocked, and this is usually a sign the glove is past simple treatment.
Why Gloves Leak Even When They’re New
A brand-new pair leaking in the first few days on snow feels like a defective product, but most early leaks trace back to construction choices, not damage.
Some gloves use a thin polyurethane surface coating instead of a genuine membrane. These coatings work when new but tend to crack once flexed repeatedly in the cold, which opens up slow seepage through the palm and fingertips over time.
Seams are a common failure point too, especially around the thumb and index finger where stress concentrates most. Unsealed or untaped seams let meltwater find its way through the needle holes themselves, and most beginner-reported “leaks” actually start here rather than through the fabric surface.
A missing or worn DWR coating on the outer shell matters more than people expect. The membrane can be completely intact while the fabric above it is soaked, because DWR failure and membrane failure are two separate problems that happen to produce a similar cold, wet feeling.
Untreated leather absorbs water essentially like a sponge, and dark patches on the palm or knuckles after a few runs are the visible result. And sometimes a glove isn’t leaking at all — a short cuff or a gap between jacket sleeve and glove simply lets snow in directly, which shows up most often after falls or digging in the snow.
If Your Gloves Fail These Tests
Once you’ve confirmed a problem, the fix depends on where the failure is. A surface-only issue — water soaking into the outer fabric while the inside stays dry — usually responds well to reproofing: a DWR spray for synthetic shells, or wax and conditioning for leather. Our full guide to waterproofing treatments for ski gloves walks through exactly which treatment fits which material and how often to reapply it, so there’s no need to duplicate those steps here.
A membrane-level failure — water reaching the liner despite an intact-looking shell — is a different situation, and treatment products won’t fix it. That’s a structural problem, not a maintenance one.
When to Replace Instead of Reproof
Not every wet glove needs replacing. Most gloves can get another full season out of basic reproofing if the underlying membrane is still sound.
Reproofing makes sense when: the outer fabric wets out but dries reasonably fast, leather has darkened but isn’t splitting, there are no visible seam gaps, and insulation still lofts and feels warm once dry. These issues typically show up after 20-40 days of use, especially on gloves that were never treated from the start.
Replacement is the better call when: the membrane is visibly cracked or delaminated, seams are leaking with exposed stitching, insulation has been soaked and stays compressed, leather is splitting or flaking rather than just darkening, or the liner holds moisture even on dry days.
A simple rule of thumb: reproof if the glove is leaking from the surface inward. Replace if it’s leaking from the inside out — meaning the membrane itself, the actual barrier, has failed, and no spray or wax reaches that layer.
Realistic lifespan expectations vary by build quality. Budget gloves with basic coatings typically hold up for one to two seasons of regular use. Mid-range gloves with real membranes generally last two to four seasons. Premium membrane gloves — well-known technologies like Gore-Tex fall in this tier — can reasonably last four to six seasons with proper care. Poor drying habits between sessions can cut any of these ranges significantly, since trapped moisture is what damages membranes and seams over time, more than the water exposure itself. REI’s glove buying guide covers how membrane quality and construction affect long-term performance if you’re weighing a replacement purchase.
Common Mistakes When Judging Waterproofing
Assuming a wet-feeling glove means the membrane failed. Sweat causes the same sensation as an external leak, and the two need different diagnostic approaches. The paper towel test above is the fastest way to tell them apart.
Testing only at home and assuming that’s the full picture. Home tests catch surface and membrane problems well, but seam and cuff issues sometimes only show up under real mountain pressure and movement.
Ignoring the DWR layer because “the membrane still works.” A soaked outer shell drags down real-world performance even with a perfectly intact membrane underneath — the two layers need to both be functioning for the glove to actually feel dry.
Judging waterproofing purely by initial price. Construction quality and membrane type matter more than price point alone, and mid-range gloves with genuine membranes often outperform expensive gloves that skipped a real waterproof layer in favor of brand name.
Frequently Asked Questions
How long should ski gloves stay waterproof?
Most gloves stay genuinely waterproof for one to three seasons depending on build quality, use frequency, and care. Regular reproofing and proper drying between sessions extend that range meaningfully.
Are leather gloves waterproof by default?
No. Leather is naturally water-resistant, not waterproof, and needs wax or oil treatment to perform well against sustained wet snow contact.
Does a Gore-Tex label guarantee full waterproofing?
Gore-Tex membranes block liquid water while letting sweat vapor escape, and they’re genuinely effective. That said, if seams or cuffs aren’t properly sealed, leaks can still happen around the membrane rather than through it.
Can cheap gloves be made waterproof with treatment?
DWR sprays and liners can meaningfully improve performance, but a glove built without a real membrane has a hard ceiling on how waterproof it can become regardless of treatment.
Do mittens perform better than gloves in wet conditions?
Mittens have fewer seams, which means fewer potential entry points, and they tend to run warmer. Waterproof performance still comes down to the membrane and shell quality either way, not the glove-versus-mitten format itself.
The Bottom Line
Whether gloves are actually waterproof isn’t something you have to guess about or trust to a label. A few minutes with a spray bottle, a sink, and a paper towel tells you more than any marketing claim, and running the mountain-condition tests catches the failures that only show up under real pressure and temperature swings.
Knowing which layer failed — surface, membrane, or seams — is what determines whether reproofing solves the problem or whether it’s genuinely time to replace the gloves. Guessing at that distinction usually means either wasting money on treatment that won’t fix a membrane failure, or replacing gloves that just needed a $15 spray-on fix.