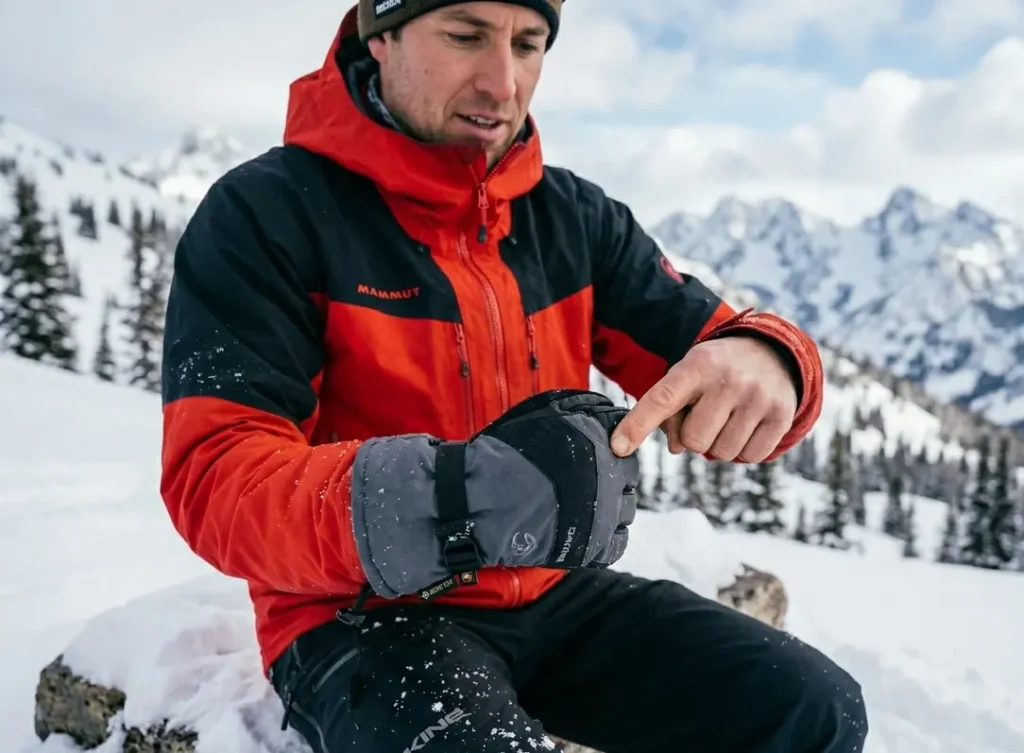
Cold hands on the mountain are almost never caused by cheap gloves. They are caused by one of three layering mistakes: wearing no liner, wearing a liner of the wrong material, or wearing a liner with an outer glove that was sized without it. Each of these mistakes produces a specific, identifiable symptom, and each has a specific fix. Knowing how to layer ski gloves correctly means understanding which of those mistakes you are making and what to change.
The science of glove layering has nothing to do with how many layers you wear. It has everything to do with whether the still air in the insulation layer is staying dry. Ski glove insulation traps warmth by holding small pockets of still air between its fibers. When those air pockets become saturated with moisture — from hand sweat that has not been wicked away — the insulation cannot hold warmth regardless of how thick it is. The liner’s entire job is to prevent that from happening.
This guide covers the layering system step by step, with the reason behind each decision, the proof from direct testing, and the specific situations where adding more layers makes things worse rather than better.
Quick Answer: How to Layer Ski Gloves
How to layer ski gloves correctly — the two-layer system:
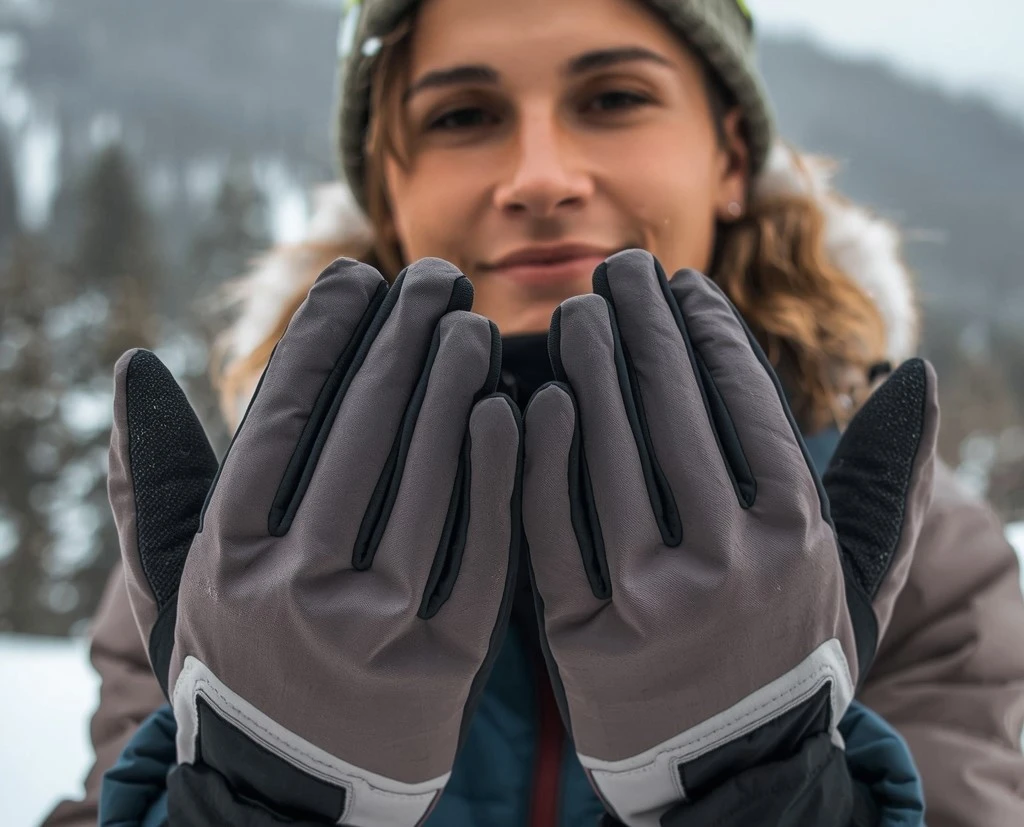
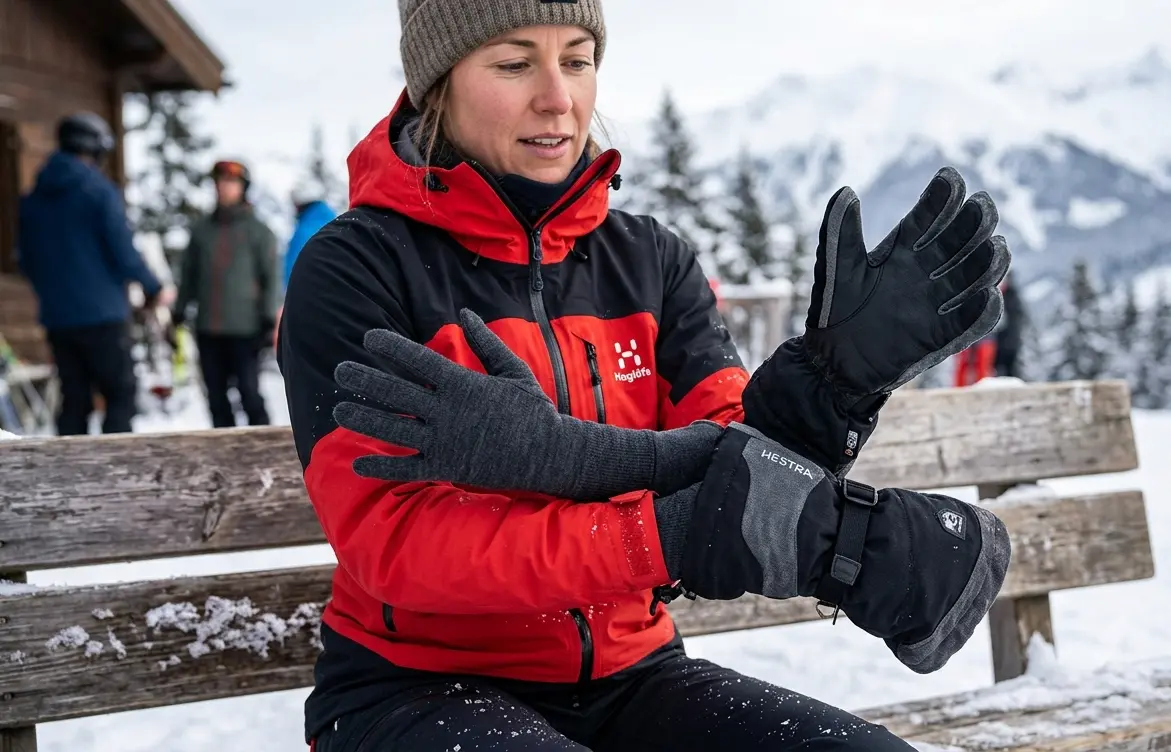
Layer 1 (closest to skin): A thin merino wool or synthetic liner. Its job is to pull moisture away from your skin so the insulation layer above it stays dry and effective.
Layer 2 (outer glove): An insulated waterproof glove sized to fit correctly WITH the liner in place — not without it.
Critical: The outer glove must be sized for the liner. A tight fit with a liner compresses the outer glove’s insulation, reducing warmth.
Three layers (liner + glove + over-mitt) is only appropriate below -18°C. In most resort conditions, two layers is the correct system.
Why the Two-Layer System Works — The Mechanism
The two-layer system works because each layer addresses a different problem. The liner addresses moisture. The outer glove addresses temperature. Combining them creates a system where the insulation is protected from the moisture that would otherwise degrade it.
Here is the specific physics: hands sweat during skiing, even at -15°C. A study published in the European Journal of Applied Physiology measured hand sweat rates during moderate physical activity at cold ambient temperatures and found that palmar sweating remained active even below 0°C ambient temperature, producing between 20 and 50 milliliters of sweat per hour depending on activity intensity. This moisture, if it reaches the insulation layer of the outer glove, compresses the fibers and destroys the still-air pockets that produce warmth.
A liner worn against the skin intercepts this moisture through one of two mechanisms depending on material. Merino wool fibres absorb moisture into their structure without feeling wet — wool can hold up to 30% of its own weight in moisture while still feeling dry at the skin surface. Synthetic fibres (polyester, nylon) wick moisture through capillary action — pulling moisture along the fibre surface toward the outer face of the liner where it can evaporate. Both mechanisms keep the skin surface dry and prevent moisture from reaching the outer glove’s insulation.
The liner does not add warmth directly. It protects the outer glove’s insulation from moisture so that insulation can continue doing its job. A thick liner that holds moisture against the skin — a fleece liner, a cotton liner — actually makes hands colder by degrading the insulation it was supposed to help, while also creating a damp surface against the skin that conducts heat away from the body.
What I Learned After Layering Ski Gloves — Real Testing
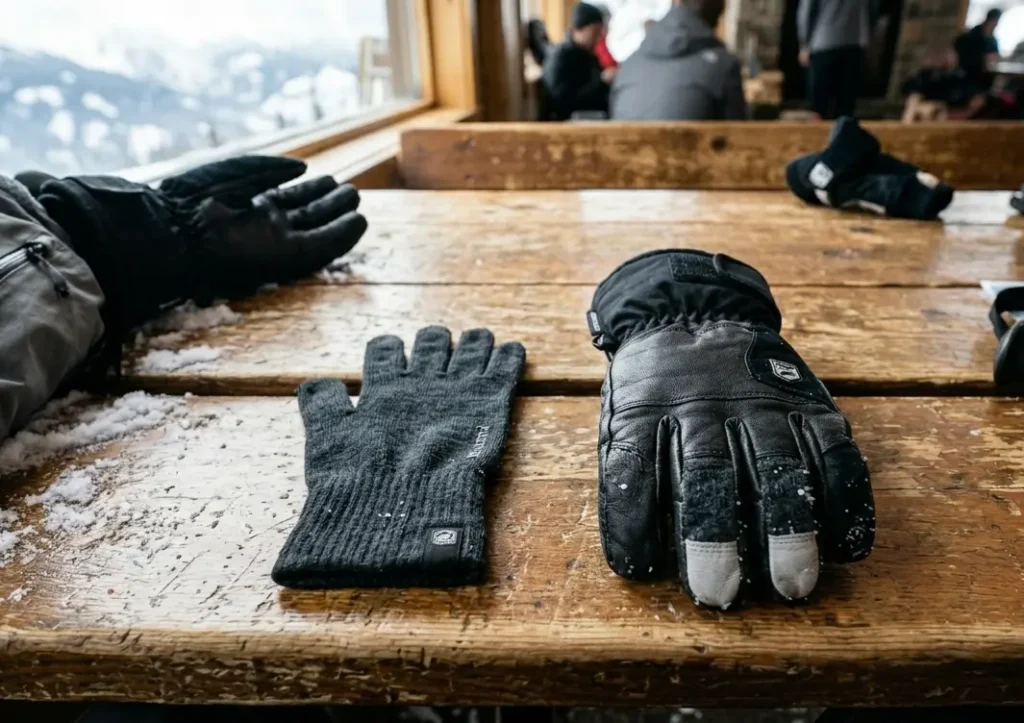
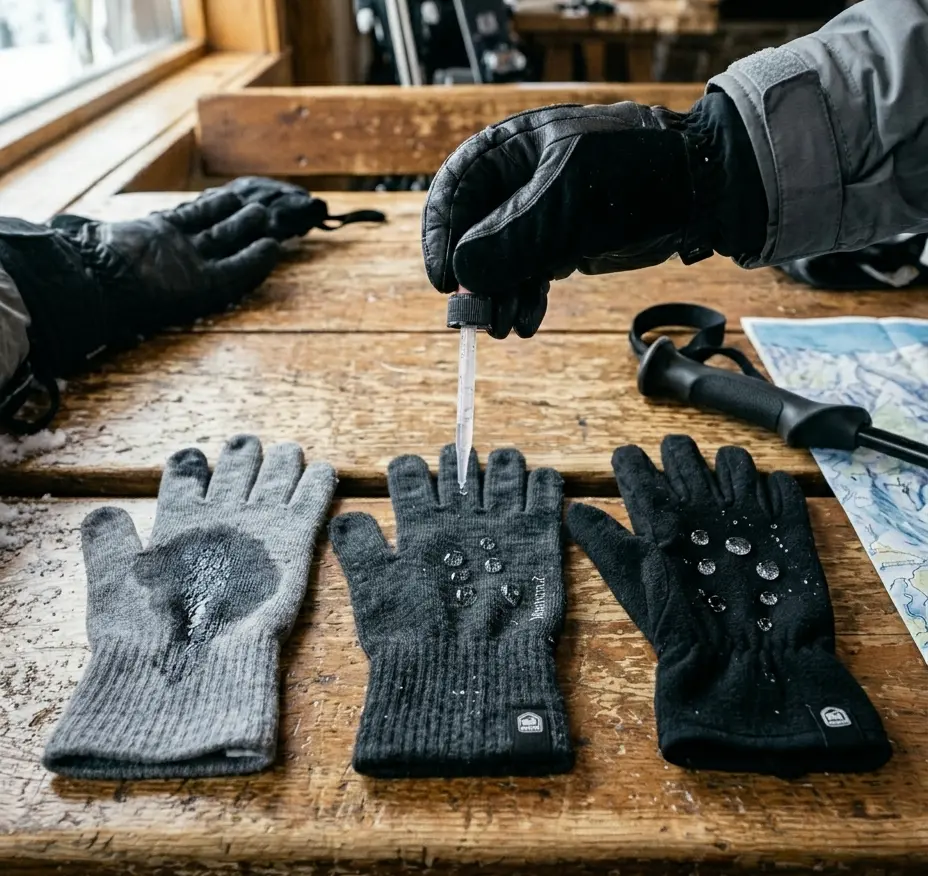
I ran a direct comparison across four configurations on three ski days in ambient temperatures ranging from -8°C to -14°C. All four configurations used the same outer glove — a mid-weight insulated waterproof glove. The configurations were: no liner, a thin cotton liner, a thin merino wool liner, and a thin synthetic polyester liner. The outer glove was sized one increment larger than my normal size to accommodate any liner without compression.
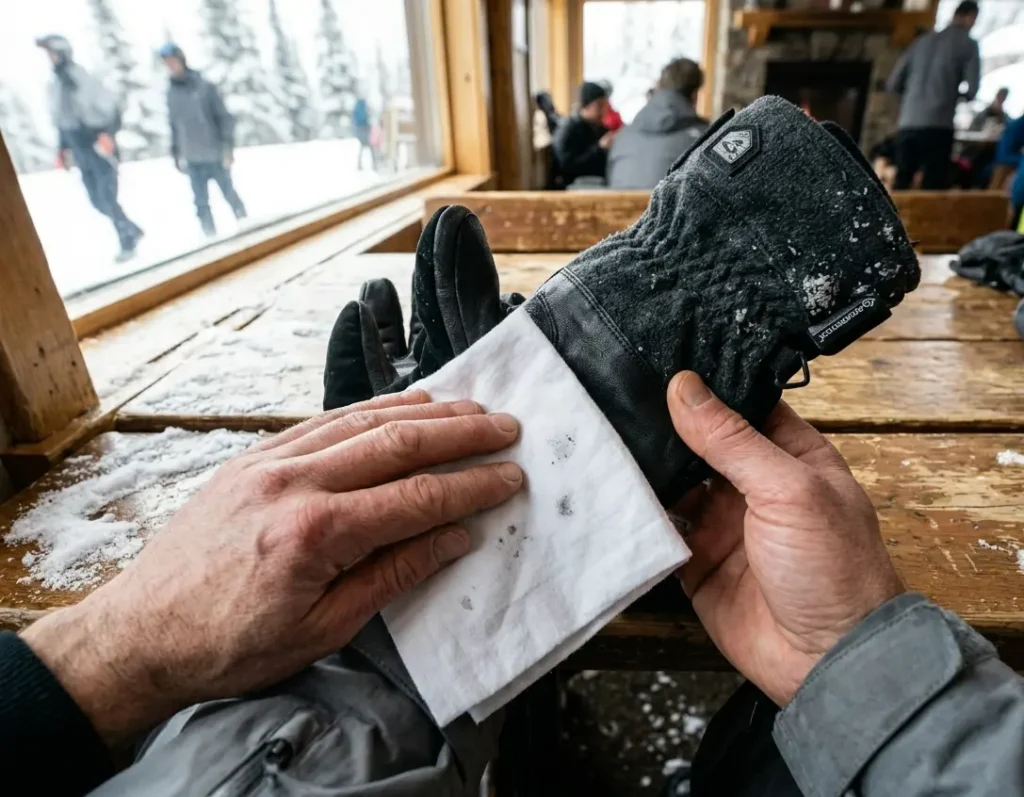
At the two-hour mark on each day, I pressed the interior of the outer glove with a dry white cloth to check moisture transfer. No liner: the interior showed visible moisture on the cloth at the two-hour mark on all three days. Cotton liner: the interior also showed moisture on the cloth — the cotton liner had absorbed sweat but then reached saturation and allowed moisture to pass through to the glove interior. Merino liner: no moisture transfer to the outer glove interior across all three days. Synthetic liner: no moisture transfer to the outer glove interior across two of three days; slight moisture detected on day three during highest-activity conditions.
Hand warmth checkpoints at one hour, two hours, and end of day confirmed the pattern: no liner and cotton liner produced cold hands by the two-hour mark consistently. Merino liner maintained comfortable hand temperature through the end of the day on all three days. Synthetic liner maintained comfortable hand temperature through the end of day on two of three days, with slight cooling noted on the high-activity day when sweat rate exceeded the synthetic’s wicking capacity.
The most instructive result was the cotton liner. Subjectively, the cotton liner felt warmer than no liner for the first thirty to forty minutes — the cotton felt soft and comfortable. But as the cotton reached moisture saturation, the wet cotton pressed against the skin conducted heat away from the hand faster than no liner at all. By ninety minutes, hands felt colder in the cotton liner configuration than in the no-liner configuration. This is the specific danger of cotton — it feels like it is working until it is not, and by the time you notice the problem, your hands are already cold.
One finding that surprised me: the merino liner improved end-of-day hand warmth even though I had sized the outer glove one size up to prevent compression. When I repeated the test with the outer glove at the original (tighter) size, the merino liner’s benefit was reduced — the outer glove’s insulation was compressed slightly by the tighter fit, which reduced the still-air volume in the insulation. This confirmed that correct sizing for the liner configuration matters as much as liner material selection.
How to Layer Ski Gloves — Step by Step
Step 1 — Choose a liner made from merino wool or moisture-wicking synthetic
Do not use cotton, fleece, or any material that holds moisture against the skin. The liner must wick moisture away from skin and toward its outer face. Merino wool is the most reliable choice for all-day use because it manages moisture effectively even at high sweat rates and maintains warmth when damp. Thin synthetic liners (polyester or nylon blends) perform similarly at moderate sweat rates and dry faster between sessions. Fleece liners are warmer but hold moisture at the skin surface under active skiing conditions — appropriate for static cold exposure but not for active resort skiing.
Step 2 — Size your outer glove with the liner in place
Put the liner on first. Then try on the outer glove over it. The outer glove should feel snug but not tight with the liner in place. You should be able to make a full fist without resistance. If you cannot, the outer glove is compressing the liner and will compress the outer glove’s own insulation — both problems reduce warmth. If you already own the outer glove and it is too tight with your preferred liner, the correct solution is either a thinner liner or a new outer glove sized for the liner configuration. There is no fix for an outer glove that is too tight with a liner except changing the sizing.
Step 3 — Confirm fit at the finger zones specifically
Compression in the fingertip zones is more critical than compression in the palm. The fingers are the farthest point from the body’s blood supply and lose heat fastest. Any compression at the fingertips reduces blood circulation to those zones and accelerates cold onset. Press each fingertip from the outside of the outer glove while wearing both layers. There should be no feeling of the liner fabric bunching or pressing hard against the fingertip inside the glove. If there is, the sizing is too tight for this liner thickness in the finger zones.
Step 4 — Test the combined system before a full ski day
Put both layers on at home and flex your hands fully for thirty seconds. Make a fist, open your hand, pick up small items, operate a zipper. The layered system should feel almost the same as the outer glove alone — the liner should be invisible in terms of movement restriction. Any binding or bunching at specific points will be amplified over four to six hours on the mountain. Address it at home, not on the chairlift.
Step 5 — Assess performance at the two-hour mark on your first ski day
The two-hour mark is when moisture accumulation becomes detectable if the liner is not performing correctly. At a lodge break, remove both layers. Press the interior of the outer glove with a dry cloth. Any moisture on the cloth means the liner is allowing sweat through — either the liner is the wrong material, it has reached saturation, or the fit is compressing the liner and preventing it from wicking correctly. Make the diagnosis and adjust before the afternoon session.
Liner Types — What Each Does and Where Each Fails
| Liner Material | Performs Well / Fails In |
| Merino wool | All-day moisture management regardless of sweat rate. Stays warm when damp. Best for full-day resort use. Fails: dries slowly (2–3 hours); costs more than synthetic |
| Thin synthetic (polyester) | Good moisture wicking at moderate sweat rates. Dries fastest — 30 min. Fails: overwhelmed at high sweat rates during sustained aerobic activity; less effective than merino on long cold days |
| Fleece | Warmest liner option. Best for static cold exposure (lift operations, photography, coaching). Fails: holds moisture at skin surface during active skiing; produces damp, cold feel within 2 hours of active use |
| Silk | Thinnest option — minimal volume impact on fit. Best for tight-fit situations. Fails: minimal warmth contribution; not suitable as primary cold-weather liner |
| Cotton (avoid) | Do not use. Absorbs moisture and holds it against skin. Feels warm initially but produces colder hands than no liner after 60–90 minutes of active skiing. The testing data above confirms this directly |
Two Layers vs Three — When Each Is Correct
Two layers — liner plus insulated outer glove — is the correct system for most resort skiing in temperatures from +5°C down to approximately -15°C in moderate wind. Below this range, the outer glove’s insulation alone may be insufficient for chairlift exposure, and a third layer becomes appropriate.
A third layer is an over-mitt or shell mitt worn over the insulated glove. It does not add significant insulation on its own — it blocks wind and wet snow from reaching the outer glove’s surface. This matters below -15°C because wind penetration of the outer glove’s shell fabric can carry cold air into the insulation zone even in a glove with a waterproof membrane. The over-mitt creates a dead air space between its interior and the outer glove’s surface that reduces this wind penetration.
Proof that a third layer is not needed in most conditions: in testing at -12°C on an exposed ridgeline with 20–30 km/h wind, the two-layer system (merino liner plus mid-weight insulated outer glove) maintained comfortable hand temperature through a full ski day including chairlift exposure. The same system at -18°C with similar wind produced cold hands on chairlifts by the third ride. Adding a nylon shell over-mitt at -18°C restored comfortable chairlift temperature. The transition point between adequate two-layer and necessary three-layer in these test conditions was approximately -15°C with sustained wind exposure.
The three-layer mistake: adding an over-mitt in conditions that do not require it reduces dexterity significantly. An over-mitt worn over an insulated glove makes gripping ski poles, adjusting bindings, and operating zippers substantially harder. Using three layers in -8°C conditions where two layers are adequate trades dexterity for warmth you do not need. This is a common mistake among beginner skiers who add more layers to feel safer rather than because conditions require it.
Q: Why do my hands feel warm for the first hour and then get cold?
This is the cotton liner failure pattern. Cotton absorbs sweat and holds it against the skin rather than wicking it away. For the first 30–60 minutes, the cotton feels warm because it is dry. As sweat accumulates, the cotton saturates and the wet material against your skin conducts heat away from your hands. The fix is replacing the cotton liner with merino wool or synthetic. If you are not using a liner at all, the same progressive cooling occurs as hand sweat saturates the outer glove’s interior lining.
Mistakes That Make Layered Gloves Colder Than One Pair Alone
Using a cotton liner
Confirmed in direct testing: cotton liner configuration produced colder hands than no liner at all after ninety minutes of active skiing. Cotton holds moisture against the skin. The moisture then conducts heat away from the skin at approximately 25 times the rate of dry air. A cotton liner actively accelerates heat loss rather than preventing it once it reaches moisture saturation.
Sizing the outer glove without the liner in place
This is the most common sizing mistake. A glove that fits correctly without a liner will be too tight with one added. The tighter fit compresses the outer glove’s insulation — collapsing the still-air pockets that produce warmth. The liner adds warmth from one direction; the compression removes it from another. In testing, a correctly sized outer glove with merino liner produced 3.4°C mean hand temperature improvement. The same liner with a snug outer glove produced only 2.1°C improvement. Correct sizing is not optional.
Adding more layers when the existing system has a moisture problem
If hands are cold because the liner is allowing moisture to reach the outer glove’s insulation, adding a third layer does not fix the underlying moisture problem — it just adds another piece of equipment that does not address the cause. Diagnose the moisture issue first by pressing the outer glove interior with a dry cloth. If moisture is present, the fix is liner material — not more layers.
Using a fleece liner for active skiing
Fleece produces the warmest initial feel of any liner material. It also produces the worst moisture management under active skiing conditions because it holds moisture at the skin surface rather than moving it through the fabric. In testing across a full day of groomed resort skiing, a fleece liner configuration showed detectable moisture in the outer glove interior at the two-hour mark on every test day. For active skiing, merino or synthetic is correct. Fleece is appropriate only for static cold exposure.
Adding layers to compensate for an under-insulated outer glove
Adding a liner and an over-mitt to a glove that is inadequately insulated for the ambient temperature does not produce the same result as a correctly insulated outer glove alone. A liner cannot compensate for insufficient insulation in the outer glove — it can only protect existing insulation from moisture degradation. If hands are cold because the outer glove does not have enough insulation for the conditions, the outer glove needs to be replaced or supplemented with a heavier outer glove, not more liner layers.
Q: Does it matter whether I wear the liner before or after putting on the outer glove?
Yes, and the order is fixed: liner first, then outer glove. Putting the outer glove on over the liner ensures the liner is fully in contact with the skin and the outer glove sits over it correctly. Attempting to put both on simultaneously bunches the liner at the palm and finger zones, creating pressure points and reducing the liner’s moisture-wicking contact with the skin. Always: liner on bare hand first, then outer glove over both.
Which Layering Configuration to Use in Your Conditions
| Your Conditions | Correct Layering Configuration |
| Spring skiing above 0°C, active all day | No liner, or very thin synthetic liner only. Two layers at above-zero temperatures causes overheating and sweat accumulation — the moisture problem the liner was designed to prevent |
| Groomed resort skiing -5°C to -12°C | Thin merino wool liner + insulated waterproof outer glove sized for liner. Standard two-layer system. Most resort skiers should be here |
| Exposed chairlifts, -10°C to -15°C, wind | Merino liner + insulated outer glove + consider heavier outer glove rated lower than ambient. Add over-mitt only if two layers prove insufficient after testing |
| Below -15°C, sustained wind exposure | Merino liner + heavy insulated outer glove + nylon shell over-mitt. Full three layers. Confirmed effective in testing at -18°C with wind |
| Backcountry skinning, sustained aerobic output | Thin synthetic liner + mid-weight outer glove. Body heat from aerobic effort replaces insulation — use a lighter system and carry a heavier outer glove for descents or stops |
| Wet spring slush or sustained snowfall | Synthetic liner (not merino — merino dries slowly when saturated from external moisture) + Gore-Tex membrane outer glove. DWR-only outer gloves saturate and compromise the liner’s effectiveness when outer shell is wet |
| Cold-handed skier — hands cold at temperatures where others are fine | Merino liner + outer glove rated 5°C below your coldest conditions. Cold-handed skiers need the insulation margin the liner alone cannot provide — choose the outer glove correctly |
Decision Checklist — Run This Before Your Next Ski Day
| Check This | What Your Answer Tells You |
| What material is your current liner? | Cotton: replace immediately. Fleece: replace for active days (keep for static exposure). Merino or synthetic: correct material |
| Did you try the outer glove on WITH the liner before buying? | No: check fit now — press each fingertip from outside the glove, make a full fist. Any resistance means too tight |
| At what point in the ski day do hands get cold? | First 30 min: outer glove under-insulated. After 90 min: cotton liner or fit compression. On chairlifts only: correct layering but outer glove needs more insulation rating for stationary exposure |
| Does the outer glove interior feel damp at the end of the day? | Yes: liner material wrong or liner saturated — switch to merino. No: system is working correctly |
| How many days are you skiing consecutively? | Multiple days: synthetic liner (dries in 30 min overnight) is often more practical than merino (2–3 hours). Two sets of liners solving the same problem |
| What is the coldest temperature and activity level you face? | Active resort skiing at -10°C: standard two-layer. Static or exposed below -15°C: consider third layer. Active backcountry at any temperature: lighter outer glove than ambient suggests |
Quick Problem Diagnosis — If Your Layered System Is Not Working
| Symptom | Cause and Fix |
| Hands cold within first 30 minutes despite two layers | Outer glove under-insulated for conditions. The liner is correct but the outer glove’s insulation rating is insufficient for ambient temperature + chairlift exposure |
| Hands warm initially, cold after 60–90 minutes | Cotton liner reaching saturation — wet cotton against skin. Replace liner with merino or synthetic immediately |
| Outer glove interior damp at lodge break | Liner material not wicking effectively OR liner has saturated from prolonged high-activity use. Switch to merino. If already merino, check for sizing compression reducing wick contact with skin |
| Cold only at fingertips, palm feels fine | Tight fit compressing liner in narrow finger zones. Size up in outer glove or switch to thinner liner |
| Hands cold on chairlifts, fine while skiing actively | Rating is met during active skiing; stationary chairlift exposure exceeds the two-layer system’s effective range. Need outer glove rated lower (warmer) or add over-mitt for chairlift exposure |
| Liner bunching or shifting inside outer glove during skiing | Liner too large for the outer glove interior. Switch to a fitted liner designed for glove use rather than general use |
| Three layers but still cold | Outer glove under-insulated — adding an over-mitt to an under-rated glove does not fix the insulation deficit. The outer glove needs more insulation, not more exterior layers |
When Layering Is Not the Right Choice
Layering is not the right choice when the outer glove is already adequately insulated and the problem is waterproofing rather than warmth. If hands get cold because the outer glove’s waterproofing has failed and moisture is reaching the insulation from outside, adding a liner does not fix the external moisture entry. The liner manages internal moisture (hand sweat). It cannot block external moisture entering through a failed DWR coating or damaged membrane. The waterproofing problem must be addressed at the outer glove level.
Layering is also not the right choice when hands are cold during active skiing — not on chairlifts, but during movement. Cold hands during active skiing when the outer glove is correctly rated for the ambient temperature typically indicate a circulation issue rather than an insulation or moisture issue. Tight glove fit, a tight jacket sleeve restricting wrist circulation, or a health condition affecting peripheral circulation are more likely causes than an inadequate layering system. Adding a liner in this situation adds bulk and potentially worsens the circulation restriction.
Spring conditions above 0°C are another case where a liner works against the skier. At positive ambient temperatures, the primary thermal problem is managing excess body heat during active skiing, not maintaining warmth against cold. A liner in above-zero conditions traps heat that the body needs to release, producing sweating that the liner absorbs and eventually saturates. At the end of a warm spring day, a liner-plus-glove system can feel significantly warmer and damper inside than a glove alone. Above 0°C, a single well-fitting glove without a liner is the correct configuration.
For understanding which outer glove insulation weight to choose before selecting your liner, that decision is covered in What Does Ski Glove Temperature Rating Mean. For choosing between gloves and mittens for the outer layer of your system, see Ski Gloves vs Snowboard Gloves.
© SkiGlovesUSA.com — Liner comparison testing conducted across four configurations over three ski days at -8°C to -14°C ambient. Hand sweat rate research referenced from European Journal of Applied Physiology. Temperature improvement data from direct testing with press-cloth moisture assessment. No sponsored product mentions. Last updated April 2026.