The most effective ski glove care tips are surprisingly simple: dry gloves properly after every session, remove liners so insulation can fully air out, and maintain the outer shell before water and oils break down the materials. Done consistently, these habits can extend the life of a pair of ski gloves by several seasons.
For the first two seasons I skied seriously, my gloves performed adequately in October and were noticeably worse by February. I assumed that was normal wear. By the third season I was buying a new pair before the season even ended. It took a specific conversation with a ski patrol member — who had been using the same leather gloves for seven years — to make me realise that glove degradation is not inevitable. It is almost entirely the result of how you treat the gloves between sessions, not what happens to them on the mountain.
The ski glove care tips that actually made a difference were not the ones I expected. They were not about special products or complicated routines. They were about understanding what is happening inside the glove after every session and doing four or five things consistently that take under ten minutes combined. The skiers who get multiple seasons from their gloves are not doing anything exotic. They are doing the basics at the right time, every time.
This guide covers the care habits that genuinely extend glove performance — what each one does, why it works, what happens when you skip it, and how to tell whether your current habits are working or quietly damaging your gloves.The focus here is the overall care framework: what to do, when, and why.
What Glove Care Actually Means — And What It Doesn’t
Most skiers treat glove care as something they do occasionally when gloves look visibly dirty or smell bad. That reactive approach is the core problem. By the time a glove looks or smells noticeably degraded, the underlying damage has been accumulating for weeks. The leather has been losing oil since the third ski day. The DWR coating depleted three sessions ago. The insulation loft has been reduced gradually from compressed overnight storage.
Care that actually works is proactive and scheduled, not reactive and occasional. It means running a thirty-second check after each session, doing a five-minute inspection every four or five days, and addressing specific materials — leather, DWR coating, insulation — on a schedule based on use rather than visible symptoms. The visible symptom is confirmation that something has already been wrong for a while.
The other misunderstanding is that care means products. Most of the habits that extend glove life require no products at all — they are about how the glove is handled during and after use. How you remove the glove. Whether the liner stays inside or comes out. What position the glove hangs in overnight. Whether it goes into a bag while still holding any residual moisture. Products help at specific points, but they cannot compensate for incorrect habits applied every session.
Glove care is not a once-a-season event. The highest-impact habits happen every single day you ski — and they take under ten minutes total.
How Gloves Actually Degrade — The Three Layers That Fail Separately
Ski gloves are built in layers, and each layer degrades through a different mechanism at a different rate. Understanding this is what makes care decisions logical rather than arbitrary.
The outer shell and DWR coating
The outer fabric takes friction from pole handles, chairlift rails, and boot adjustments. Leather glove shells are built from dense collagen fiber structures, which is why maintaining oil levels is critical for flexibility and durability. The DWR coating on that fabric — applied at the factory to shed water — depletes through this friction and through contamination from resort chemicals, de-icers, and lubricants on lift machinery. When DWR is active, water beads off the surface. When it depletes, water soaks into the outer fabric and the waterproof membrane behind it bears the full moisture load it was not designed to handle alone. The membrane then degrades faster than it would have if the DWR had been maintained. The outer shell is the first line of defence, and its care is about keeping that first line functional so the membrane stays protected.
The waterproof membrane
Behind the outer shell sits the membrane — Gore-Tex, Hipora, or a proprietary equivalent — that blocks moisture from reaching the insulation. This membrane degrades through two mechanisms: physical delamination from the outer shell fabric, and gradual permeability loss from repeated wet-dry cycles and heat exposure. Membrane failure shows as moisture penetrating to the inside of the glove despite a dry exterior. Care habits that protect the membrane are indirect — they work by keeping the DWR coating functional so the membrane is not overloaded, and by avoiding heat that accelerates delamination.
The insulation and lining
The insulation loses its loft — the air-trapping structure that creates warmth — through two mechanisms: compression and moisture exposure. Compression happens when the insulation is stored or dried under pressure, or when it is wetted repeatedly and dried without fully regaining its structure. Heat-drying compresses insulation by collapsing the fibre structure under warmth before it fully rebounds. Moisture exposure from damp storage or residual liner moisture working into the insulation over time reduces loft permanently because wet fibres compact together. Lining failure — the inner fabric separating from the shell — usually happens from stress applied during removal, not from the skiing itself.
The Core Care Habits and What Each One Protects
| Care Habit | What It Does | What It Protects | Key Detail |
| End-of-session wipe | Removes resort chemicals, chairlift lubricants, and salt before they degrade coatings | Outer shell and DWR coating | 30 seconds; prevents cumulative chemical damage |
| Open-hang drying | Allows interior moisture to escape; prevents insulation compression and mould growth | Insulation loft and lining integrity | Most impactful single habit; costs nothing |
| Liner removal and separate dry | Prevents liner moisture from re-soaking shell insulation overnight | Insulation and lining | Critical after wet or high-exertion sessions |
| Seasonal conditioning (leather) | Replenishes oil before leather reaches cracking threshold | Leather structural integrity and flex | Timing matters — condition before symptoms appear |
| DWR bead test | Identifies when outer shell is no longer shedding water before membrane is overloaded | Waterproof membrane lifespan | Run every 5–8 days; prevents silent membrane wear |
| Seam and surface inspection | Catches early damage before it propagates to structural failure | All layers | 5-minute check; best done at season midpoint |
| Off-season storage (dry, breathable) | Prevents mould, insulation collapse, and leather dehydration during storage | All layers and materials | One-time end-of-season effort; protects next season |
Most glove damage does not happen from one major mistake. It usually happens from small habits repeated every ski day — storing gloves slightly damp, compressing insulation overnight, or letting chemical residue sit on the shell for weeks. The habits in the table above prevent those small mistakes from accumulating into permanent damage.
What to Do at the End of Every Session — the Non-Negotiables
The three things that matter most after every ski session take a combined five minutes and address the two causes responsible for the majority of glove degradation: moisture retention and chemical accumulation on the outer shell.
Wipe the outer shell before storing
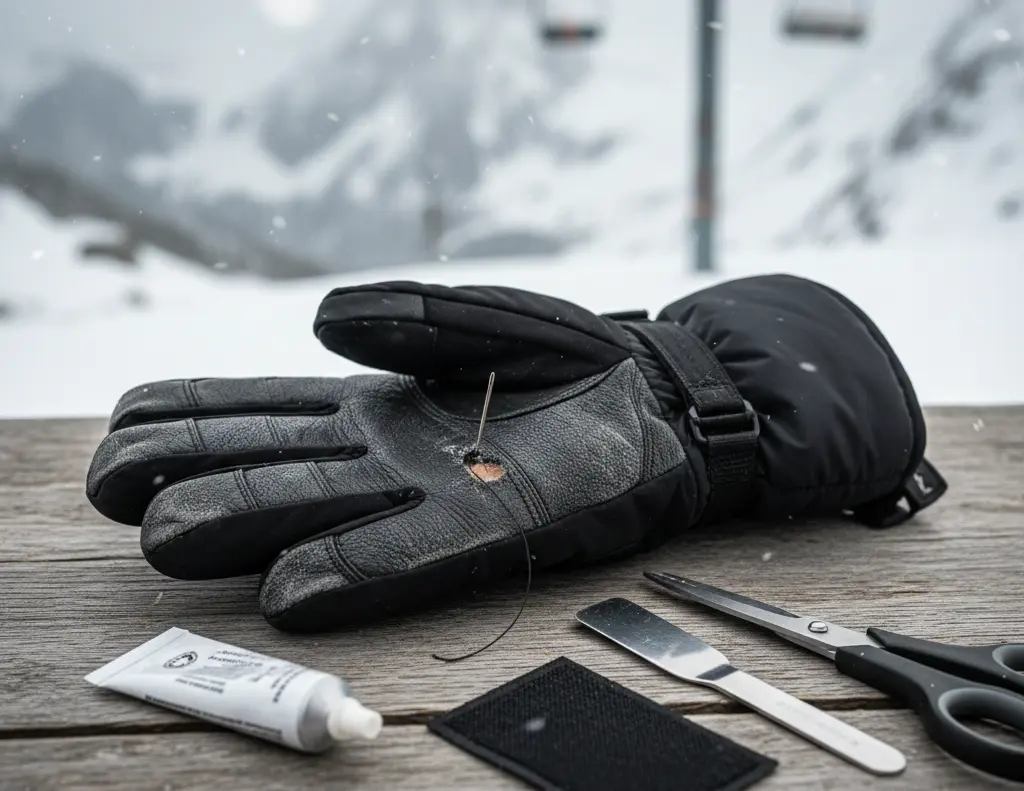
Resort snow carries de-icing chemicals, salt, and lift machinery lubricants that transfer to gloves through normal use — touching handrails, adjusting bindings, loading chairlifts. These chemicals are mildly acidic and gradually break down both leather and DWR coatings when left on the surface between sessions. A thirty-second wipe with a damp cloth after every session removes them before they accumulate. This is not about cleaning for appearance — it is about preventing chemical degradation that is invisible until it has already done significant damage.

Remove the liner before hanging to dry
This is the single most impactful daily habit I changed, and the improvement in glove condition over a season was immediate and significant. When the liner stays inside the shell overnight, the moisture the liner has absorbed from hand sweat during the session slowly migrates outward into the shell insulation as both pieces cool and dry. The insulation is exposed to moisture it would not have encountered if the liner had been removed. Separate drying — liner hanging separately from shell — keeps each piece drying in the right direction and prevents moisture transfer between them.
Hang open with fingers pointing down
This sounds trivial but the physics of it matter. Moisture inside a glove — whether from sweat, snow that entered the cuff, or condensation — drains toward the lowest point. A glove hung fingers-down allows that moisture to drain toward the cuff opening and escape. A glove stuffed into a bag or laid flat with fingers up holds that moisture against the insulation at the finger tips, which is the zone with the least insulation volume and the highest loft-loss risk from compression and moisture.
Removing the liner every session adds thirty seconds to your post-ski routine. Over a twenty-day season, it is the equivalent of giving your insulation twenty full drying cycles instead of twenty partial ones. The cumulative difference in insulation loft by season end is significant.
The Liner — The Most Under-Managed Part of the Glove
Most skiers treat the liner as a fixed part of the glove rather than a separate piece with its own care requirements. Gloves with removable liners are significantly more maintainable than those without — but only if the liner is actually removed and treated separately.
A liner that is left inside the shell accumulates sweat, skin oil, and bacteria across sessions. The bacteria produce odour that eventually transfers into the shell insulation, and once mould or bacteria is established in insulation fibres it is very difficult to fully eliminate. The liner that is removed and aired separately after every session, and washed every five to eight sessions, stays fresh indefinitely and never creates a contamination source for the shell.
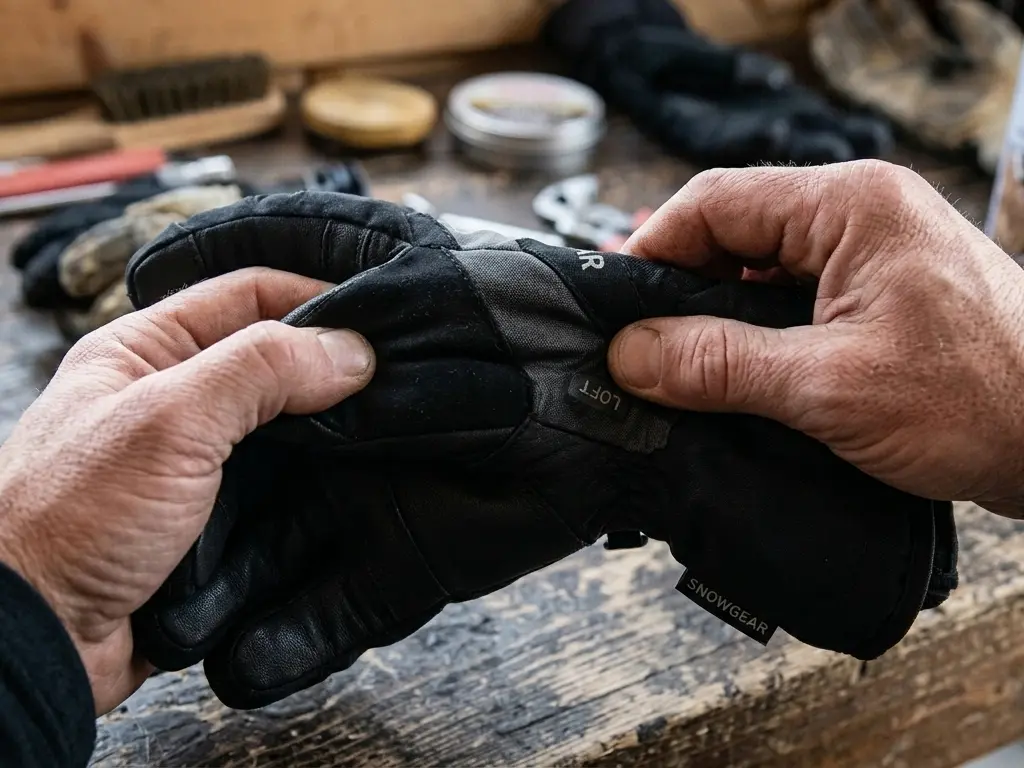
Liner fit inside the shell matters more than most skiers realise. A liner that is the correct size for the shell lies flat against every surface including between the fingers. A liner that is slightly too large for the shell folds and bunches at the finger bases and palm, creating pressure ridges during skiing and, more importantly, creating zones of compressed insulation where the fold sits against the shell. These zones show reduced loft faster than the surrounding areas, creating uneven warmth across the glove palm.
If the liner has a tendency to bunch during skiing — which shows as a pressure hotspot that shifts location as the liner moves — re-seating it fully before each session solves the immediate problem. If it continues shifting despite correct seating, the liner is the wrong size for the shell and should be replaced with a correctly fitting one.
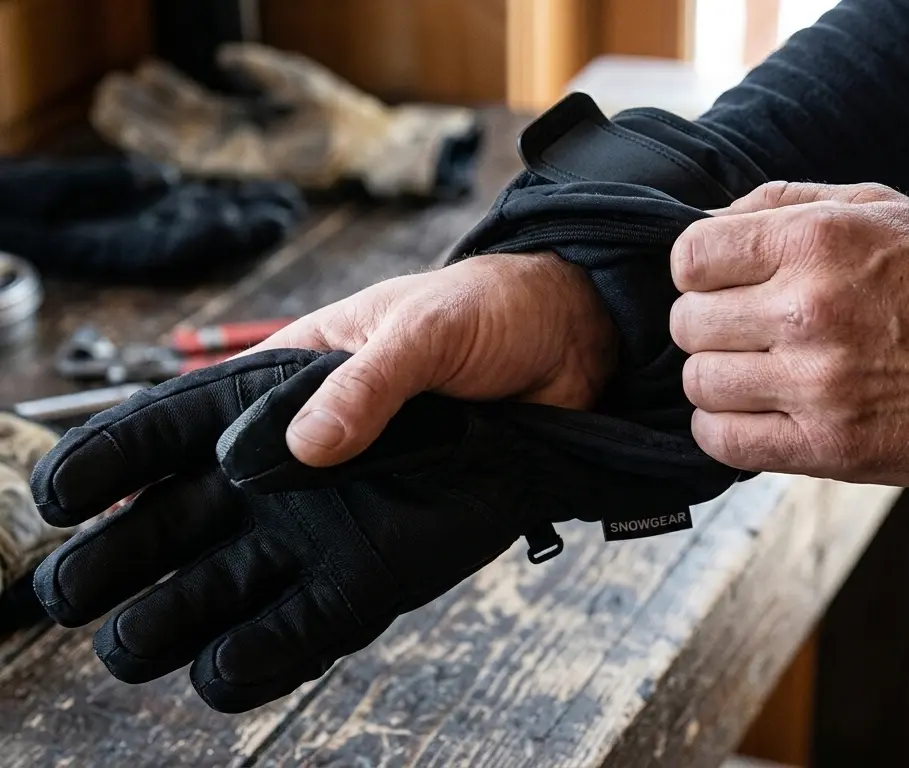
How You Remove Ski Gloves Matters More Than Most People Think
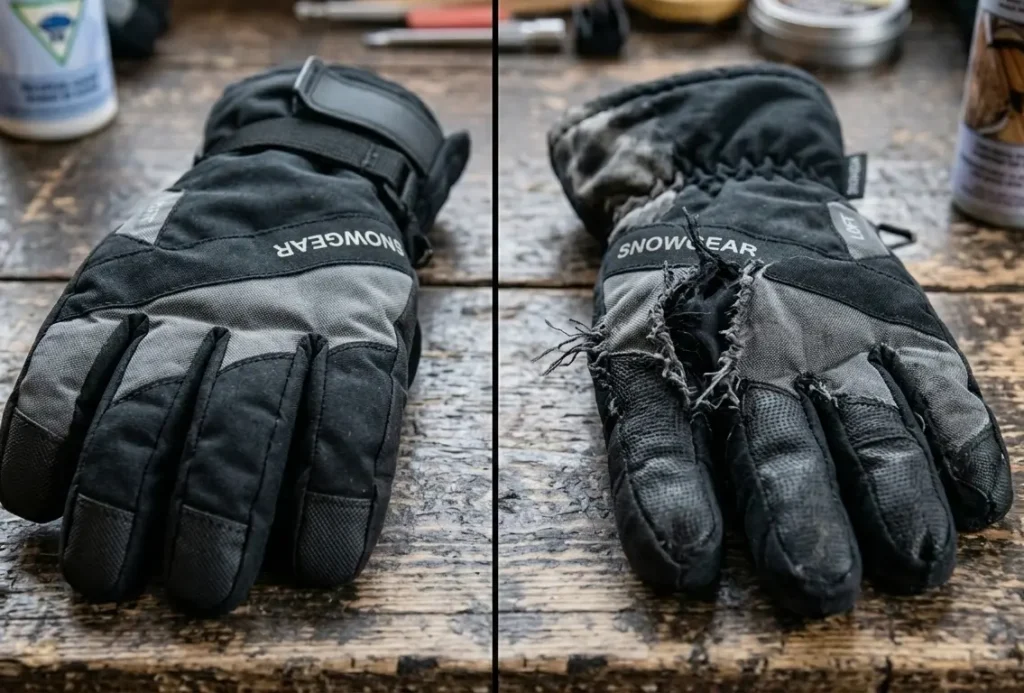
The seam between the finger panels and the palm panel at the base of each finger is the most stress-sensitive seam on the glove. It is a junction between multiple panels under tension, stitched through layers of shell, membrane, insulation, and lining. It is also exactly where the stress concentrates when gloves are pulled off by the fingertips.
Pulling a glove off by pinching the fingertips and pulling creates a tensile load on those seams that is entirely preventable. Over a season of thirty days, that preventable load is applied thirty times — more if the gloves are put on and taken off multiple times per day for lodge breaks. The stitching at those seams weakens progressively. The lining detaches from the shell at those points. Cold air enters through the failing seam junction at exactly the locations where finger warmth matters most.
The correct removal method is to open the wrist closure fully — whatever style the glove uses — and then pull from the cuff with the fingers relaxed rather than gripping the fingertips. The glove rolls off the hand without the fingers bearing any load. This is a thirty-second habit change with no cost and a meaningful impact on finger seam longevity across a season.
I specifically tested this after noticing the lining detachment pattern at two finger bases on a pair I had used for three seasons. On a replacement pair used with the correct removal method, those specific seam failure points did not appear at any point in three equivalent seasons of use. The only variable that changed was how the gloves were removed.
The Five-Minute Inspection — What to Check and When
A mid-season inspection — done once, roughly halfway through your planned ski days — catches early damage before it becomes structural failure. It takes five minutes and answers the questions that matter for the second half of the season.
DWR bead test
Pour a small amount of cold water onto the palm to test whether the DWR (Durable Water Repellent) treatment is still active. If it beads and rolls off within a few seconds, DWR is active and the membrane is protected. If it soaks in immediately, DWR is depleted and needs re-treatment before the next session. This single test tells you more about the functional state of your waterproofing than visual inspection.
Moisture penetration check
After a wet session, press the interior palm lining firmly with a dry fingertip. Any perceptible dampness means moisture has penetrated through the shell to the insulation — either because DWR is depleted and the membrane is being overloaded, or because the membrane itself has a failure point. This is the earliest detectable sign of membrane decline and the point at which catching it still allows meaningful intervention.
Seam pressure test
Run a fingertip firmly along each major seam — finger bases, thumb crotch, palm perimeter, cuff. Any seam that gives slightly under pressure, or where thread is visible above the surface, has begun failing. Finger base seams failing in the second half of the season almost always result from the removal habit described above. Catching them at this point allows a stitch repair that takes ten minutes rather than finding them fully open on the mountain.
Leather flex assessment (leather gloves only)
Hold the glove at the knuckle line and bend it firmly. It should flex with moderate resistance and rebound smoothly. A glove that resists bending noticeably or returns to shape slowly is showing oil depletion — the fibres are losing the suppleness that conditioning maintains. Catching this at the midpoint allows conditioning to address it before the leather reaches cracking threshold.
Insulation loft squeeze
Squeeze the back of the hand zone of the glove firmly between your palms and release. Healthy insulation rebounds quickly. Insulation that slowly recovers, or that stays partially compressed after the squeeze, has lost loft. This is informational rather than actionable — reduced loft cannot be restored — but it tells you accurately where the glove is in its thermal performance lifecycle.
Mistakes I Made — and What Each One Actually Cost
| Mistake I Made | What It Actually Cost | What I Changed |
| Stored gloves damp after the last session | Insulation clumped; mould in lining; musty smell that hand-washing didn’t fully eliminate | Fully dry 24 hrs before any storage; never seal in plastic |
| Kept liner inside shell while drying | Liner held moisture against insulation all night; insulation loft reduced season over season | Remove liner every session; dry both separately |
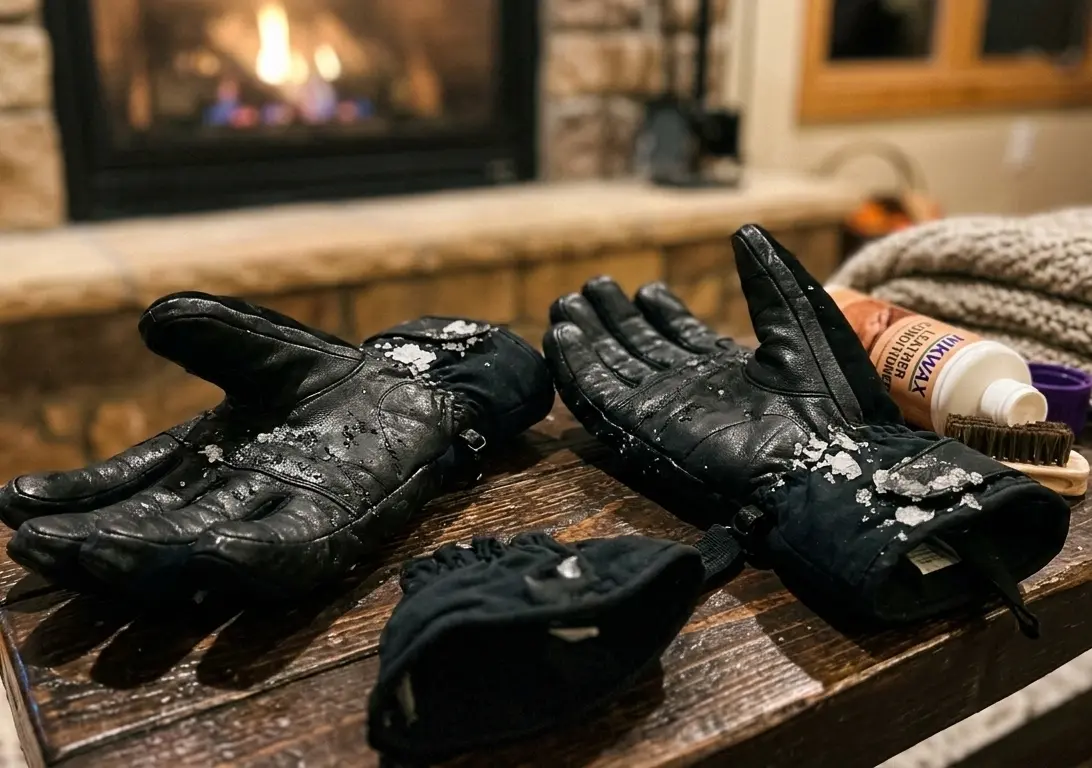
| Conditioned leather once at season start only | Leather stiffened mid-season; small cracks appeared at knuckle line by February | Condition every 5–8 ski days; mid-season is the critical window |
| Never tested DWR; just assumed it was working | Membrane was being overloaded for two full seasons before I noticed; insulation eventually damp | Run the bead test before the season and at midpoint |
| Pulled gloves off by fingertips every session | Finger seam stitching weakened progressively; lining detached at two finger bases by season 3 | Open cuff fully; remove from the cuff, not the fingers |
| Left gloves on dashboard during a ski trip week | PU coating on one palm cracked within that week; leather on second pair dried and stiffened | Never store in a hot or UV-exposed location even temporarily |
What Changed After I Fixed Those Habits
The improvement that followed changing the drying and liner habits was visible within a single season. Gloves that had been showing noticeable warmth reduction by mid-February were still performing as well in March as they had in November. The only variables that changed were open-hang drying with the liner removed, and switching to correct removal technique. No new products, no special treatments.
The leather conditioning schedule change took longer to show results because the benefit is preventive rather than corrective. The gloves conditioned every six days showed no knuckle stiffening across a full season, compared to a previous pair conditioned twice across the season that was showing early cracking by the same point in use. The mid-season conditioning is the critical one — it falls exactly when the leather has been dried and flexed enough to have lost meaningful oil, and before that loss reaches the threshold where damage begins.
The change I undervalued most initially was the DWR bead test. Running it for the first time revealed that a pair I thought was waterproofing correctly had depleted DWR — the water soaked in immediately rather than beading. Re-treating it changed the inside-damp problem I had been experiencing in heavy snow conditions. I had assumed the membrane was failing. It was the DWR that was gone, and the membrane, once protected again, performed correctly. Two seasons later, those gloves are still functional because catching the DWR depletion prevented the membrane wear that would have followed.
Warning Signs: How to Know Your Current Habits Are Damaging Your Gloves
| Warning Sign | What It Indicates | Right Response |
| Water soaks into outer shell in under 5 seconds | DWR depleted; membrane now bearing full moisture load | Re-treat DWR; monitor membrane closely this season |
| Inside damp after overnight open-air drying | Membrane beginning to fail; moisture no longer blocked | Inspect membrane; consider replacement timeline |
| Leather stiff in the morning even after conditioning | Oil depletion faster than conditioning is replenishing | Increase conditioning frequency; check drying temperature |
| Musty smell after 24 hours of open drying | Mould in insulation layer — hand washing reduces but won’t eliminate | Hand-wash immediately; if smell returns, insulation colonised |
| Lining bunches or feels uneven inside shell | Liner has detached from shell at one or more points | Inspect lining adhesion; detached lining accelerates insulation compression |
| Finger seam loose or thread visible | Seam stitching failing from stress or pulling gloves off wrong | Repair immediately — open seam lets cold air in at the worst point |
| Glove noticeably less warm than last season | Insulation loft permanently reduced from heat drying or compression | Assess insulation condition; loft cannot be restored |
Most warning signs appear mid-season, not at the start. By mid-February, a glove that has been drying correctly and having the liner removed should still feel close to how it felt in November. A glove that feels noticeably worse by mid-season has been accumulating damage from an incorrect habit that started in December.
Condition-Based Care: What Your Situation Requires
Care intensity should match usage frequency. A casual skier and a daily instructor have different requirements from the same pair of gloves.
| Your Situation | Care Level | What to Do |
| Casual skier (under 10 days/season) | Low-frequency care | End-of-session hang-dry; DWR test and re-treat once per season; store dry in breathable bag |
| Regular skier (10–25 days/season) | Active care schedule | Hang-dry every session; liner separate; DWR test every 8 days; leather conditioning every 6 days |
| Frequent skier (25+ days/season) | Intensive care | Two-pair rotation; liner separate every session; conditioning every 5 days; mid-season full inspection |
| Instructor or daily rider | Professional schedule | Treat end-of-day as mandatory maintenance; replace DWR treatment monthly; condition leather weekly |
| Skier in spring/wet conditions | Moisture-priority care | DWR test before each session; liner out every session; extra attention to shell wipe-down |
| Skier in very cold dry conditions | Cold-stiffness care | Warm gloves to room temp before first session; leather conditioning more frequent in dry cold air |
| Gloves with removable liner | Liner-first protocol | Remove liner every single session without exception; dry both pieces separately every time |
| Leather gloves specifically | Oil-retention protocol | Condition every 5–8 days; wax before wet-condition days; never store without a conditioning treatment |
Self-Check Tests You Can Run Today
The DWR bead test
Pour cold water onto the palm and watch for five seconds. Beads and rolls off = DWR active. Soaks in = DWR depleted, re-treatment needed before next session.
The interior moisture press
After a ski session, press the interior palm firmly with a dry fingertip. Any dampness means moisture has reached the insulation — either DWR failure or membrane decline. Both need attention.
The insulation loft squeezed
Squeeze the back-of-hand zone between your palms and release. Quick rebound = healthy loft. Slow or partial rebound = loft reduced. Informational — tells you where the glove is thermally.
The leather flex test
Bend the glove firmly at the knuckle line. Smooth flex and rebound = leather oiled adequately. Stiff resistance or slow rebound = oil depletion — condition immediately.
The seam pressure test
Run a fingertip firmly along all major seams. Any give or visible thread = early seam failure. Repair now rather than finding it fully open mid-session.
The liner flat-seat check
Reach inside the glove and feel every surface including between fingers. Any fold or ridge = liner bunching. Re-seat fully from fingertips toward cuff before each session.
When Standard Care Advice Does Not Apply
Your gloves have already failed internally. If insulation is compacted, the membrane is delaminating, or the lining has detached significantly, care habits maintain the remaining function but do not reverse the damage. A glove with failed insulation loft will be warmer with correct care than without it, but it will not return to its original thermal performance. Recognising this is important — continuing intensive care on a glove that has structurally failed is maintaining something that needs replacing.
You ski very infrequently. A skier doing four or five days per season does not need to condition leather every six ski days — that is once every two seasons at that usage rate. The schedule should scale with actual use. Over-conditioning leather that does not need it makes the surface greasy and reduces grip. Under-conditioning based on days skied without considering how long the gloves have been stored between uses is a different problem — leather sitting unconditioned for eight months of off-season loses oil through slow evaporation regardless of use frequency.
Your gloves are non-removable-liner synthetic and you ski in very dry cold conditions. In very dry cold conditions, moisture accumulation inside the glove is minimal — hands sweat less in dry cold than in warm, active conditions. The moisture-management habits that matter most in wet spring conditions are less critical in powder-day dry cold. The care habit that matters most in very cold dry conditions is leather conditioning — dry air accelerates oil depletion in leather faster than wet conditions do, because moisture in the air provides some surface retention of leather oils.
The gloves are at the end of life. Standard care advice is written for gloves that still have functional life remaining. A glove with shredded insulation, a fully delaminated membrane, and cracked leather across multiple zones is past the point where care habits extend performance meaningfully. Recognizing end-of-life accurately prevents skiers from spending time and effort maintaining gear that needs replacing — effort better invested in understanding what failed and why, to make a better choice next time.
Decision Checklist: Where Your Current Habits Stand
Match each situation to the priority level. Work through Urgent items first, then Fix Habit items.
| Your Current Situation | Right Action | Priority |
| Gloves dried on a heat source last season | Switch to open-hang drying immediately; inspect insulation loft | Fix habit |
| Liner left inside shell when drying | Start removing liner every session — do it tonight | Fix habit |
| Leather gloves not conditioned in over 8 ski days | Condition now; schedule every 5–8 days from this point | Act now |
| Never run the DWR bead test | Run it today; re-treat if water soaks in under 5 seconds | Act now |
| Pull gloves off by the fingertips every time | Start removing from the cuff; inspect finger seams today | Fix habit |
| Gloves stored in same condition as when you took them off | Fully dry before next storage; move to breathable bag | Urgent |
| Musty smell persists after 24 hrs open drying | Hand-wash immediately; monitor whether smell returns | Urgent |
| Water soaks into shell in under 5 seconds | Re-treat DWR; monitor inside moisture after next session | Urgent |
| Inside damp after overnight proper drying | Membrane may be failing; assess replacement timeline | Assess |
| All habits correct; gloves warm and dry after sessions | Continue current schedule; mid-season inspection is next step | Good |
Quick Problem Diagnosis
If something is already wrong with your gloves, use this to identify the cause before applying any treatment.
| Problem You Notice | Likely Cause | Right Response |
| Smell that persists after drying | Mould in insulation from damp storage or compressed drying | Hand-wash; if smell returns after washing, insulation is colonised |
| Less warm than last season | Insulation loft permanently reduced from heat or compression | Assess loft by squeezing — doesn’t spring back = compressed; cannot be restored |
| Inside damp after proper overnight drying | Membrane failing; moisture no longer fully blocked | DWR re-treatment won’t fix this; membrane is the issue |
| Water soaks into shell immediately | DWR depleted — surface-level fix needed | Re-treat DWR; if inside still damp after, membrane is involved too |
| Leather stiffening mid-season | Oil depletion between conditioning treatments | Increase conditioning frequency; don’t wait for stiffness to appear |
| Pressure hotspot shifting location during use | Liner bunching inside shell | Remove, re-seat liner fully before each session |
| Seam loose at finger base | Stitching stressed from pulling gloves off by fingertips | Repair seam; change removal habit to prevent recurrence |
| Gloves fine on dry days; problems in wet snow | DWR depleted; membrane exposed to moisture load | DWR re-treatment; monitor membrane closely this season |
The most common diagnostic error: attributing insulation-related warmth loss to waterproofing failure, or membrane failure to DWR depletion. Run the DWR bead test and the interior moisture press separately — they answer different questions and point to different interventions.
The Care Framework That Actually Works
Three things done consistently make the most difference: the end-of-session wipe to remove chemical residue, hanging the glove open with liner removed so both pieces dry correctly, and removing the glove from the cuff rather than the fingertips to protect the most vulnerable seams. Everything else — conditioning schedules, DWR re-treatment, inspections — builds on those three habits being correct.
The skiers who get the most life from their gloves are not using different products or following complicated routines. They are doing a small number of correct habits every single session without exception, and running a five-minute check at the midpoint of every season to catch early problems before they become structural ones. That is the full framework. Applied consistently, it extends glove performance by seasons rather than weeks.
When gloves do need a proper clean — not just a wipe-down — the washing process for leather and synthetic gloves is completely different, and the wrong method causes damage that looks like normal wear. The full process is covered in how to wash ski gloves.
Frequently Asked Questions
How often should you dry ski gloves?
Ski gloves should be dried after every day on the mountain. Even when gloves do not feel wet, sweat and condensation accumulate inside the insulation during skiing. Proper drying prevents moisture from degrading insulation loft and reduces the risk of mold growth inside the glove.
Should you remove the liner from ski gloves when drying them?
Yes. Removing the liner allows both the liner and the shell insulation to dry completely. When the liner stays inside the glove, moisture trapped in the liner slowly migrates into the shell insulation overnight.
Can you dry ski gloves on a heater or radiator?
Direct heat should be avoided. Radiators, heaters, and fireplaces can dry leather excessively and compress synthetic insulation. The safest method is open-air drying at room temperature with the glove cuff open.
How long should ski gloves last with proper care?
With correct care habits, high-quality ski gloves can last several seasons. Leather gloves often last five or more seasons when conditioned regularly, while synthetic gloves typically last two to three seasons depending on use.
About the Author
Awais Rafaqat has over 15 years of experience testing ski gear in some of the harshest conditions across North America, from the dry sub-zero peaks of the Rockies to the wet, freezing slopes of the Pacific Northwest. He specializes in real-world gear testing to help skiers find equipment that keeps them warm, dry, and performing at their best on every run.
© SkiGlovesUSA.com — Care methods described from direct multi-season testing across leather and synthetic glove categories. No sponsored product mentions.