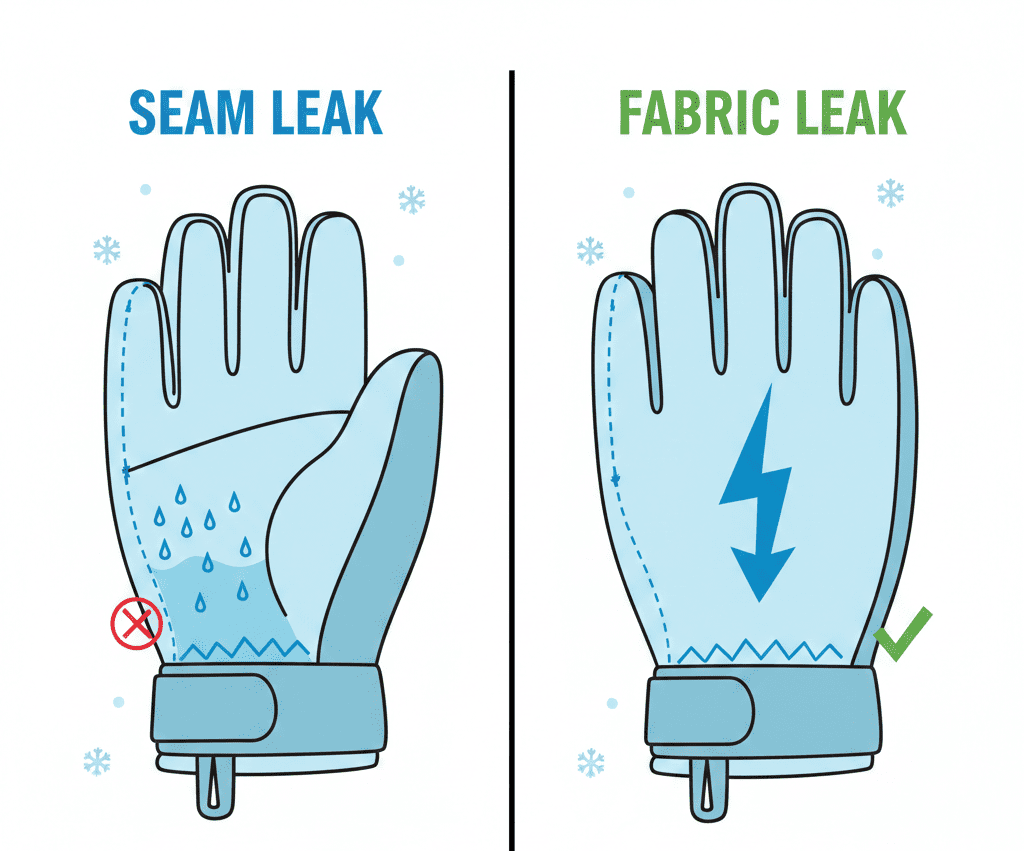
Quick answer: Seams leak because every stitch that holds a glove together also punches a tiny hole through the waterproof layer, and that hole only stays sealed as long as the tape or sealant covering it holds up. The membrane itself is rarely the problem — the seam is almost always where water actually gets in first, especially on gloves that have seen a full season or more of flexing, gripping, and temperature swings.
If seam leaks are a recurring problem across more than one pair, it’s worth checking whether the Ski Glove Finder can point you toward gloves built with fully taped seam construction from the start, rather than gambling on the same weak point again.
This post focuses specifically on why seams fail and how to catch it early — not on the repair process itself. If you’ve already confirmed a seam leak and need to fix it, our field-tested guide to repairing holes and seam leaks covers that step by step.
- Why the Seam, and Not the Fabric, Is Usually the Weak Point
- How Seam Tape Actually Fails
- The Difference Between a Manufacturing Defect and Wear-Related Failure
- How to Actually Check a Seam Before You're Relying on It Mid-Run
- What to Actually Check Before Buying, If Seam Leaks Are Why You're Replacing Gloves
- Why Some Gloves Hold Up Longer Than Others
- Maintaining Seam Tape Before It Becomes a Problem
- Common Mistakes That Speed Up Seam Failure
- Who Runs Into This More Than Average
- Frequently Asked Questions
- The Takeaway
Why the Seam, and Not the Fabric, Is Usually the Weak Point
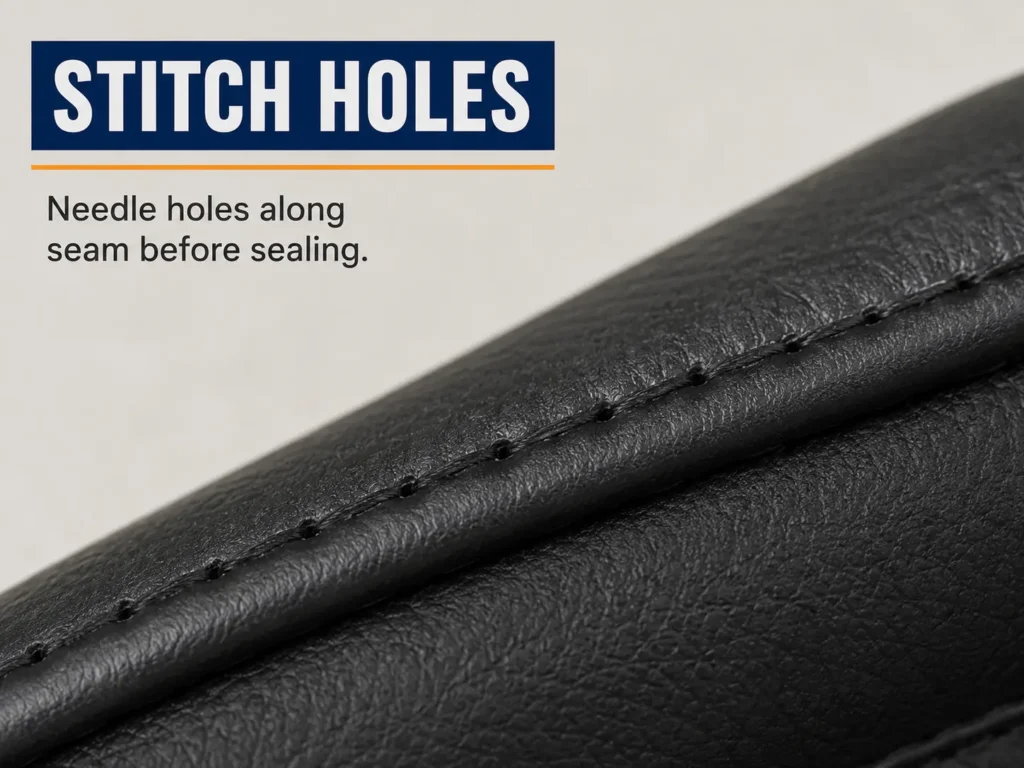
A waterproof glove shell relies on a membrane that blocks liquid water while still letting vapor escape. That membrane performs well across the flat panels of the glove — it’s the joints between panels that create the vulnerability. Every stitch that sews two panels together punctures straight through the waterproof layer, and a finger or palm section might have dozens of these puncture points along a single seam line.
Manufacturers address this by applying a layer of seam tape over the stitching from the inside, which physically covers the needle holes and restores the waterproof barrier at that specific line. This is why seam tape quality and application, not the membrane itself, is usually the actual point of failure when a “waterproof” glove starts letting water through.
Stitch density plays a role too, though it’s rarely discussed outside technical manufacturing circles. A tighter stitch — more punctures per inch — actually creates more total holes for the tape to seal, even though it often produces a stronger physical seam. Manufacturers balance this deliberately: enough stitches to hold the panels together under stress, few enough that the tape covering them has a continuous, reliable surface to bond to rather than a perforated line riddled with gaps. A rushed or lower-cost production run can get this balance wrong in either direction — too few stitches and the seam itself weakens under stress; too many and the tape has a harder time forming a fully continuous seal.
Material compatibility between the panel fabric, the thread, and the tape adhesive matters as well. Tape formulated for one fabric type doesn’t always bond as reliably to a different one, which is part of why mixing materials — a leather palm panel next to a synthetic backhand panel, for instance — can create a seam that’s more failure-prone than a glove built from a single consistent material, even when both individual materials are high quality on their own.
How Seam Tape Actually Fails
Seam tape doesn’t fail all at once — it degrades from a specific combination of stress and time, and understanding the mechanism explains why leaks tend to show up gradually rather than suddenly.
Repeated flexing
Every time a hand closes into a fist or grips a pole, the fabric at finger seams stretches and compresses. That’s thousands of small flex cycles across a season, and each one puts a small amount of stress on the tape’s adhesive bond. Over enough cycles, the bond weakens at the edges first, which is why seam tape typically starts lifting from the ends rather than failing in the middle all at once.
Thermal cycling
A glove goes from cold outside air to warm hand heat and back again constantly through a ski day, and that repeated expansion and contraction puts additional stress on an already-strained adhesive bond. Warmer, wetter conditions — like spring skiing — tend to accelerate this specifically because the temperature swings are often larger and more frequent than on a consistently cold day.
Interior moisture
Hand sweat sitting against the interior seam tape for hours at a time can also weaken adhesive bonds over repeated exposure, which is part of why seam leaks sometimes show up on the interior side of a glove that’s never been exposed to a single snowball.
The Difference Between a Manufacturing Defect and Wear-Related Failure
Not every seam leak has the same cause, and telling these apart changes what you should actually do about it.
A seam that leaks from day one, in the exact same spot every time, on a brand-new glove points to a manufacturing defect — the tape wasn’t applied correctly or fully during production. This is a warranty situation, not something to troubleshoot or accept as normal.
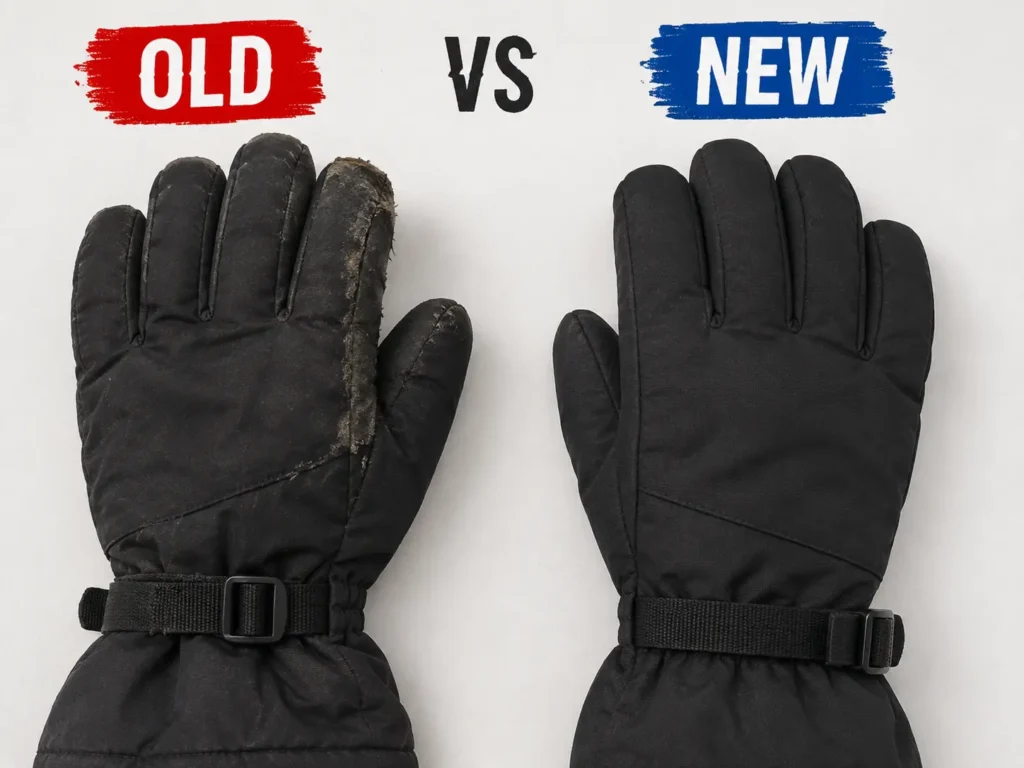
A seam that performed fine for a season or more and then gradually started leaking is wear-related failure — the tape has degraded through normal flexing and thermal cycling described above. This is expected aging, not a defect, and it happens to every taped seam eventually regardless of brand or price point.
How to Actually Check a Seam Before You’re Relying on It Mid-Run
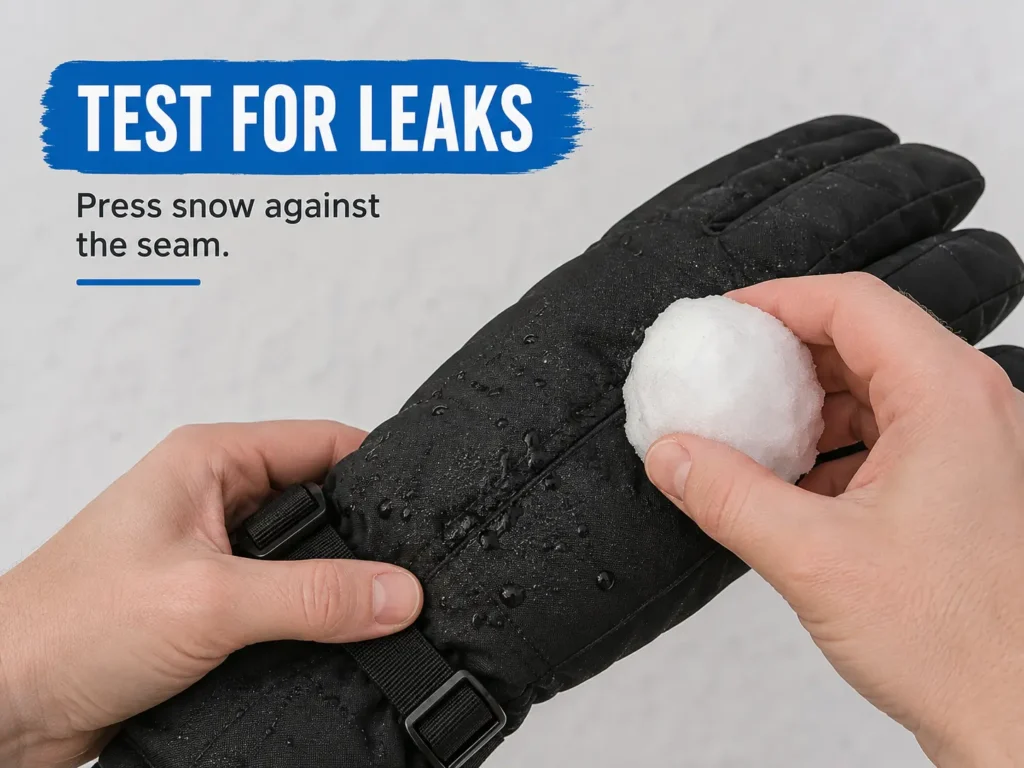
The squeeze test
Pack a small amount of snow against a suspected seam and squeeze firmly for fifteen to twenty seconds, the way sustained pressure would build up gripping a pole in wet snow. Dampness appearing on the interior afterward points to that specific seam, rather than the glove generally.
The visual check
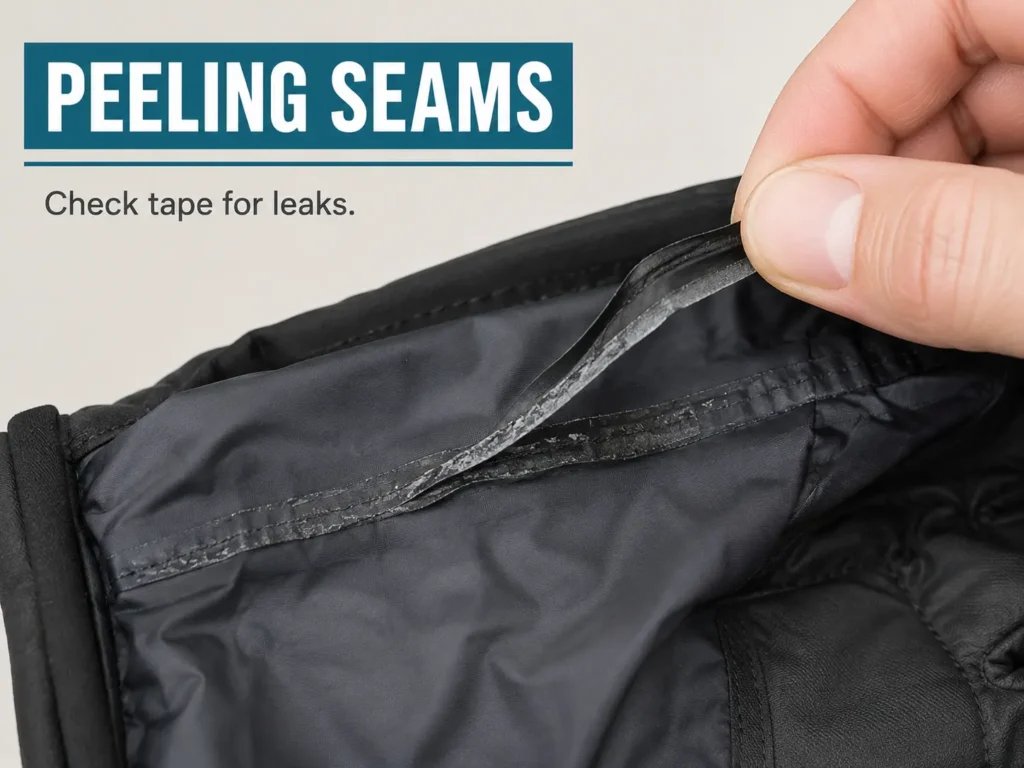
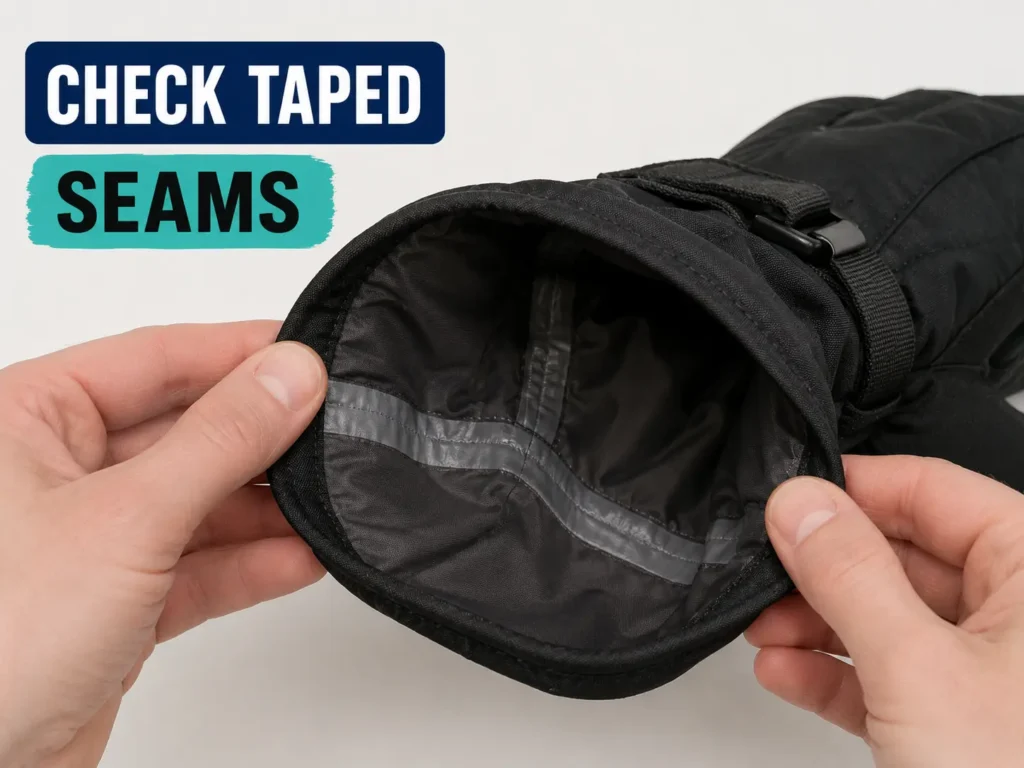
Turn the cuff inside out and look directly at the seam tape. A smooth, fully adhered strip means the seal is intact. Any lifted edge, visible gap, or bare thread showing through means that section is no longer doing its job, even if the rest of the seam still looks fine.
The pressure-point pattern
Seams around the thumb and index finger see more stress than seams elsewhere on the glove, simply because those areas flex the most during a normal pole grip. If you’re checking a glove for the first time, start there — it’s the most likely place for tape to have started separating first.
Running through a realistic scenario helps make this concrete. Take a skier doing full days on a mix of groomed and off-piste terrain, gripping poles firmly on steeper sections, in a glove that’s now on its second season. The thumb-index seam has taken the most repeated flex stress of any point on the glove by a wide margin — every pole plant, every firm grip through a bump field, every catch on a tree branch reaching for balance.
That’s the seam most likely to show the first signs of lifted tape, well before anywhere else on the glove shows any wear at all. Checking that specific spot first, rather than working through every seam evenly, finds the actual problem faster in the large majority of cases.
The same logic applies in reverse for gloves that see lighter use — a skier doing a handful of relaxed groomed runs a few times a season puts dramatically less cumulative flex stress on any seam, which is part of why some gloves genuinely last many seasons without ever developing a leak while an identical model sees failure within two seasons under harder use. Usage pattern, not just glove quality, meaningfully shapes how long seam tape actually holds.
What to Actually Check Before Buying, If Seam Leaks Are Why You’re Replacing Gloves
If you’re shopping for a replacement specifically because a previous pair failed at the seams, checking construction directly beats trusting marketing language like “waterproof” on its own — that word describes the membrane, not necessarily how thoroughly the seams were taped.
Fold the cuff back and look at the interior stitching the way you would on your current gloves. A continuous strip of tape covering every seam, including the less obvious interior joints near the wrist and thumb gusset, is the sign of construction built to last multiple seasons. Partial taping — covering only the most exposed panels — is a common way manufacturers cut cost on mid-range gloves, and it’s usually invisible on a store shelf unless you specifically check for it.
Price is a rough proxy here but not a reliable one on its own. Our buying guide across ski glove budget tiers breaks down which models use full seam taping at different price points, since paying more doesn’t automatically guarantee better seam construction unless the specific model has been checked.
Why Some Gloves Hold Up Longer Than Others
Construction quality genuinely varies here, and it shows up in details a spec sheet doesn’t capture. Fully taped seams — every seam covered, not just the ones most exposed to direct snow contact — hold up longer than gloves that only tape the most obvious high-exposure seams and leave interior joints unsealed. Fold the cuff back and check for yourself: a smooth strip of tape running the length of the visible stitching is the sign of a glove built to last, while bare thread means that seam was left to rely on the membrane and stitching alone.
Properly applied seam tape is manufactured and regulated specifically to maintain adhesion under the kind of repeated flexing and moisture exposure gloves see, which is part of why the same general technology performs differently depending on how carefully a specific manufacturer applies it. Not every brand using a similar membrane invests the same care into seam application, and that difference shows up years down the line, not on day one.
Maintaining Seam Tape Before It Becomes a Problem
Seam tape that’s starting to lift at the edges, but hasn’t fully separated yet, can often be caught and addressed before it becomes an active leak. Reattaching lifted seam tape involves cleaning the area and applying a fabric-specific adhesive before the tape fully separates — catching it at this stage is meaningfully easier than dealing with a fully failed seam that actively let water through for a session or more.
Checking seams at the start of each season, rather than waiting until a leak actually happens mid-run, is the single most effective habit here. It costs a few minutes and catches problems while they’re still cosmetic rather than functional.
Common Mistakes That Speed Up Seam Failure
Assuming a high price tag means the seams are fine forever. Premium gloves generally use better tape and more careful application, but no seam tape is permanent — even well-made gloves need the same periodic checking as budget ones, just on a longer timeline.
Ignoring a small leak because “it’s not that bad yet.” A seam leak rarely stays small. Once tape has started separating at one point along a seam, the same flexing and moisture exposure that caused the initial failure continues working on the rest of that seam line.
Drying gloves on direct heat. High heat from a radiator or heater vent can degrade adhesive bonds faster than normal use would on its own, which means an aggressive drying routine can actually accelerate the exact failure it’s trying to prevent for the next ski day.
Skiing hard in gloves you already know have a seam issue. Continuing to use a glove with a confirmed seam leak in wet, heavy snow conditions accelerates the interior moisture exposure that’s already stressing the remaining intact tape nearby.
Who Runs Into This More Than Average
Skiers who grip poles hard or for extended stretches — steep terrain, aggressive technique, long uninterrupted runs — put more repeated flex stress on finger seams than casual groomed-run skiers, and tend to see seam wear show up sooner as a result. Spring and wet-condition skiers also see this more often, since the combination of moisture and larger temperature swings accelerates adhesive degradation compared to consistently cold, dry conditions.
Anyone using gloves for multiple seasons without ever checking the interior seam tape is more likely to be caught off guard by a leak, simply because gradual tape lifting produces no external warning sign until water actually gets through.
Backcountry and multi-day skiers face a slightly different version of this problem than resort day-trippers. Gloves that never get a full drying cycle between uses — packed away damp inside a bag overnight during a multi-day tour, for instance — keep the interior seam tape under sustained moisture exposure for longer stretches, which compounds the adhesive degradation described earlier faster than a resort skier’s gloves that dry out fully at home between sessions. This doesn’t mean backcountry skiers need fundamentally different gloves, just that the seam-check habit matters more for that use pattern and is worth doing more frequently than once a season.
Frequently Asked Questions
Can a seam leak be fixed without buying new gloves?
Often, yes, for gloves with lifted-but-not-fully-separated tape or small localized leaks. Our guide to fixing holes and leaks in ski gloves covers the repair process directly. Widespread seam failure across multiple areas is a stronger signal that replacement makes more sense than repeated small repairs.
Does a higher waterproof rating prevent seam leaks?
Not directly. A waterproof rating describes the membrane’s resistance to water pressure, not the seam construction. A glove with an excellent membrane rating can still leak at the seams if the tape application was poor or has degraded with age.
How often should I actually check my seams?
At the start of each season is a reasonable baseline, with an additional check partway through a heavy-use season if you ski frequently or in wet conditions. It takes only a few minutes and catches most problems before they become an active leak mid-run.
Is it normal for new gloves to leak at the seams immediately?
No — that points to a manufacturing defect, not expected wear, and is worth pursuing as a warranty claim with the retailer or manufacturer rather than treating as a design limitation to work around.
Does washing gloves affect seam tape?
It can, depending on the method. Machine washing on a standard cycle exposes seam tape to more agitation and heat than it’s built for, which can accelerate the same adhesive breakdown that normal use causes gradually. Hand cleaning with a damp cloth, focused on the outer shell rather than aggressive scrubbing near seam lines, is gentler on the tape and a safer default unless the manufacturer’s care instructions specifically say otherwise.
The Takeaway
Seams leak because they’re mechanically the weakest point in an otherwise waterproof system — every stitch is a hole, and every hole depends entirely on tape that degrades gradually through flexing, temperature swings, and interior moisture. None of that is a sign of a bad glove on its own; it’s the expected lifecycle of taped seam construction, and it applies to premium and budget gloves alike, just on different timelines.
Catching it early is almost entirely about a habit, not a purchase — a couple of minutes checking the interior seam tape at the start of the season finds lifting tape while it’s still a quick fix, long before it becomes a soaked glove halfway through a powder day. The same handful of minutes spent once a year does more to prevent a ruined ski day than any single feature you could pay extra for when buying a new pair, and it’s a habit worth building into the same pre-season routine as checking bindings or waxing a base — gear maintenance that pays for itself the first time it catches a problem before the mountain does.