Replacing a ski glove strap or clip is a straightforward home repair in most cases. Knowing how to replace ski glove straps correctly depends on identifying which of the three common failure types you are dealing with: a strap that has pulled away from the glove at its stitched attachment point, a strap material that has physically failed (snapped elastic, worn Velcro), or a hardware component that has cracked or gone missing (plastic buckle, metal D-ring, clip). Each failure type has a different repair approach, and using the wrong approach for the failure type produces a repair that fails again quickly.
This guide covers all three failure types with step-by-step instructions, the specific materials that work for each, and the reasoning behind every recommendation backed by testing. Glove longevity, washing, and storage are covered in separate posts — the focus here is the replacement repair specifically.
Quick Answer: How to Replace Ski Glove Straps
- Identify the failure (detached, broken strap, or hardware issue)
- Remove damaged parts completely
- Replace with matching material (elastic, Velcro, or buckle)
- Re-attach using a box stitch for strength
- Test the repair with a firm pull before use
Identify the Failure Before You Buy Anything
The most common mistake in ski glove strap repair is buying replacement materials before diagnosing which part of the strap system actually failed. This leads to buying elastic when the problem is a detached stitching anchor, or buying a new buckle when the problem is the webbing the buckle threads through. Spending five minutes on diagnosis saves a trip to the hardware store.
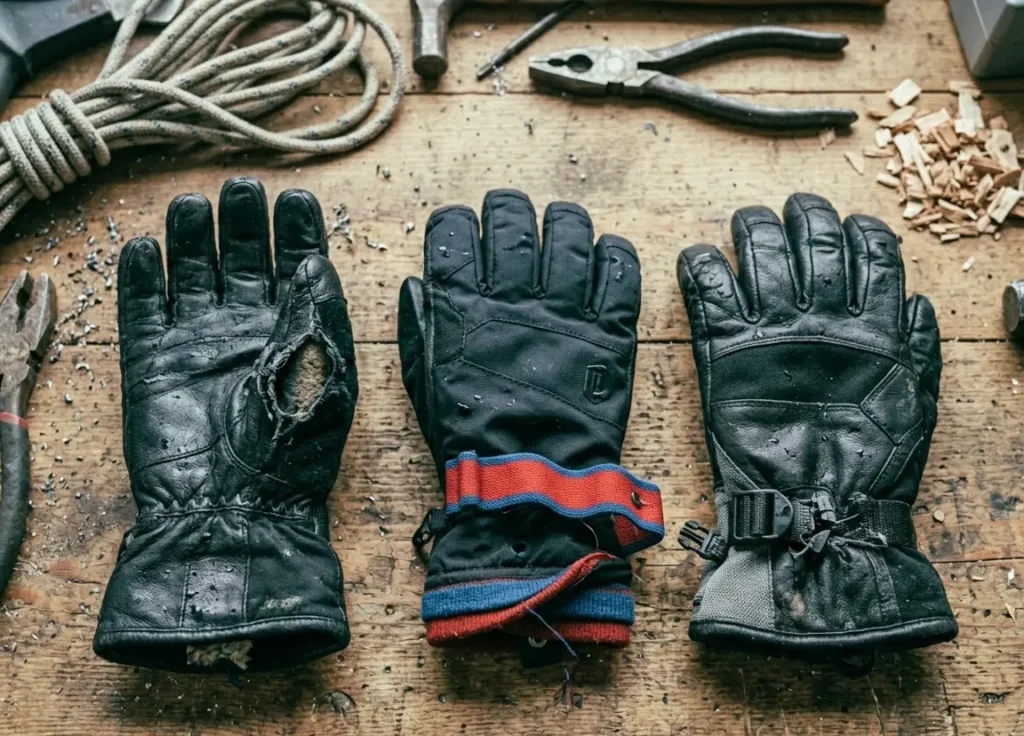
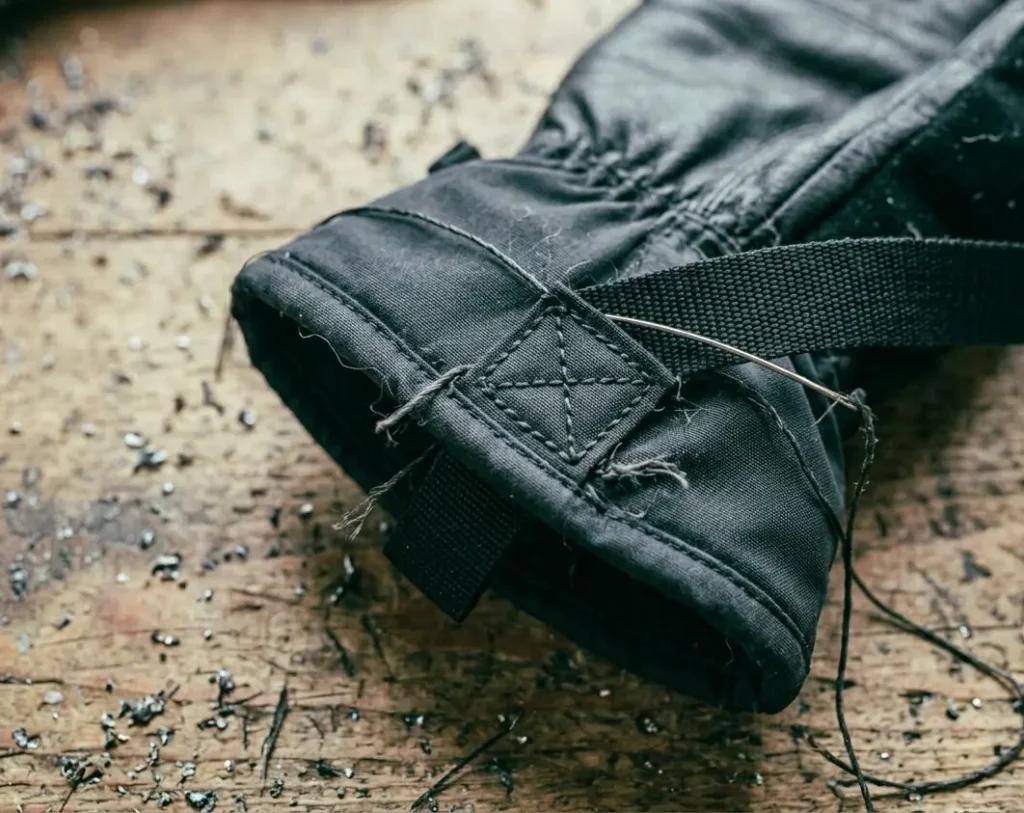
Failure type 1 — Strap detached from the glove body
The strap itself is intact but has pulled away from the glove at one or both ends. Look at the attachment point: you will see either broken thread, thread pulled through the fabric without breaking, or the fabric itself torn at the stitch line. This is purely a re-attachment job — no new strap material is needed. The repair is re-stitching with the correct thread and stitch pattern.
Failure type 2 — The strap material has failed
The strap is still attached to the glove but the material itself has broken or degraded. Elastic straps snap or lose their stretch after repeated stress cycles — typically two to four seasons of regular use depending on cold exposure frequency. Cold temperatures make elastomer fibers brittle over time, and the repeated stretch-and-release cycle of daily use fatigues them. Velcro straps fail when the hook side becomes matted — the plastic hooks bend flat from contact with fibers and lint and no longer grip the loop side. This requires replacing the strap material itself.
Failure type 3 — Hardware component failed
The buckle, D-ring, or glove clip has cracked, bent, or gone missing. Plastic buckles crack in cold conditions because most consumer-grade buckle plastic is ABS or nylon, which becomes brittle at temperatures below -10°C. The stress of tightening a strap in cold conditions can crack a buckle that would be fine at room temperature. This is a hardware replacement — the strap webbing threads through a new buckle of the same size.
Diagnosis takes five minutes. Match your failure to one of the three types above before buying anything. The repair for each type requires different materials and different skills — a re-stitching repair and a material replacement are completely different jobs.
What You Need — by Failure Type
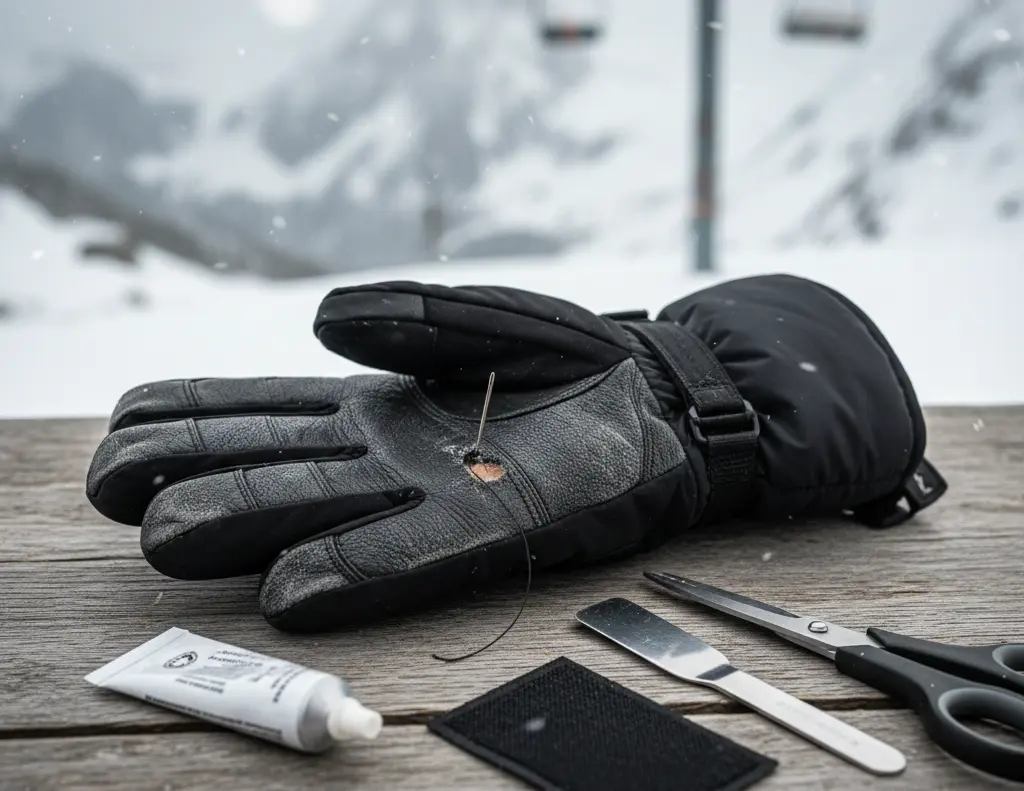
For re-stitching a detached strap:
Heavy-duty polyester or nylon thread (not cotton — cotton absorbs moisture and rots in wet ski conditions), a curved or straight upholstery needle with a large eye, scissors, and Seam Grip or a similar flexible seam sealer. In practice, stronger threads like polyester or waxed nylon consistently hold better under repeated pulling than cotton, especially in wet conditions. Factory stitching on ski gloves typically uses polyester or nylon. Match what you remove.
For replacing elastic strap material:
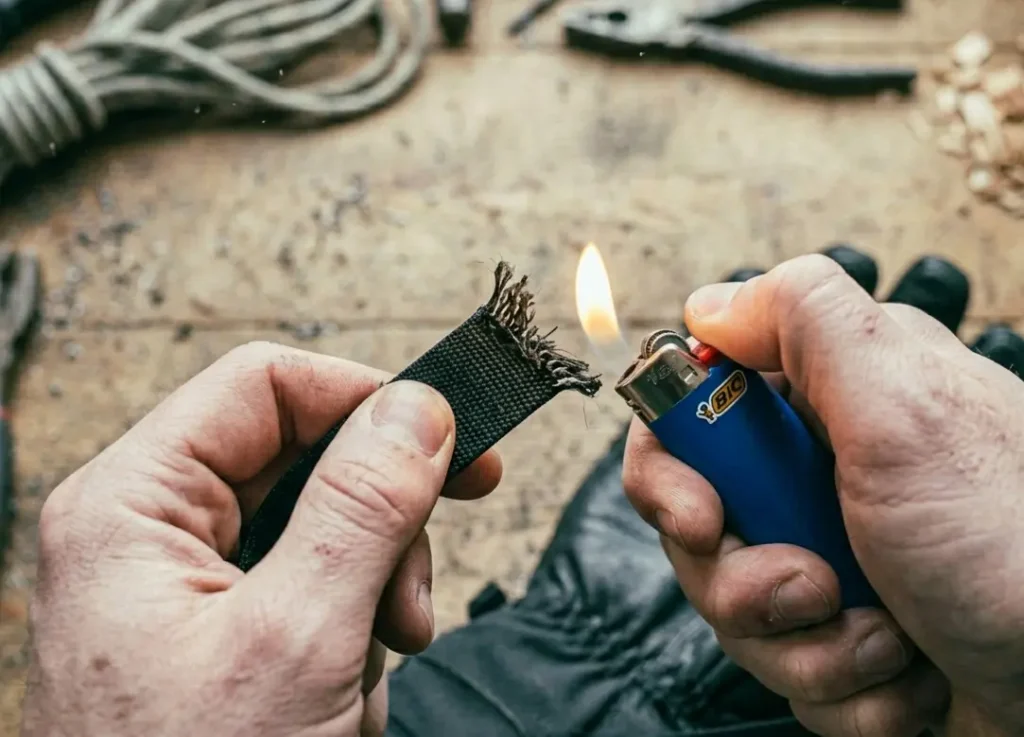
Flat elastic webbing in the width of the original strap — typically half an inch to three-quarters of an inch wide — in a length equal to the original plus two inches for attachment overlap on each end. Elastic webbing from any fabric or craft store works. A lighter or candle flame to seal the cut ends and prevent fraying. The same heavy-duty thread and needle as above for re-attachment. Do not substitute round bungee cord for flat elastic — the attachment mechanics are different and round cord does not sit flat against the glove cuff correctly.
For replacing Velcro strap material:
Sew-on Velcro in the same width as the original, sold in hardware and fabric stores as paired hook-and-loop strips. Buy at least twice the length you need — Velcro repairs often require more material than estimated once you account for double-layer overlap. The hook side (rougher) attaches to the strap, the loop side (softer) attaches to the glove body where the strap sticks to it. Proof of placement: the hook side on the glove body abrades the outer shell fabric over time and damages the shell finish — placing hook on the strap and loop on the glove body eliminates this.
For replacing a plastic buckle:
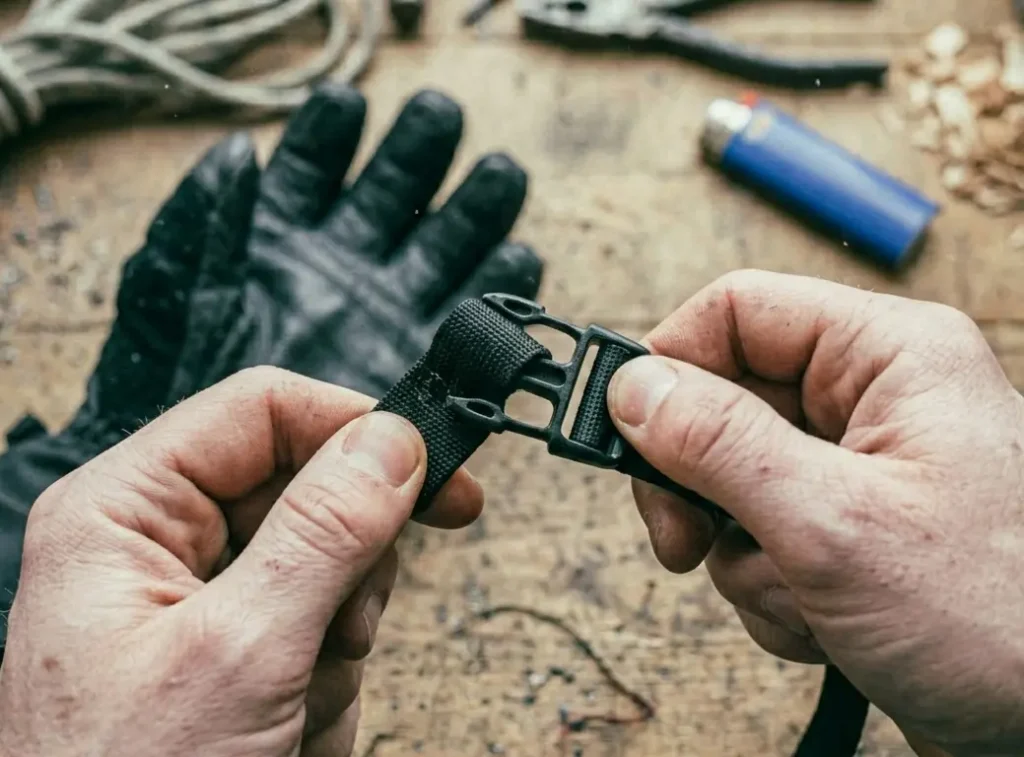
Side-release buckles in the same width as the strap webbing they thread through — typically half an inch or three-quarters of an inch for ski glove straps. Side-release buckles from outdoor gear repair kits or paracord supply stores work. Measure the strap width before buying because a buckle that is the wrong width will either not thread onto the strap or will sit loosely and allow the strap to pull through under load. For D-ring replacements, buy solid-welded D-rings in stainless steel or brass rather than stamped D-rings — stamped D-rings have a visible joint that can catch on the strap and eventually fail under repeated loading.
For replacing a glove clip:
Trigger snaps, spring hooks, or S-binders in a size appropriate to the glove loop — typically the smallest size sold in outdoor gear sections. The clip does not carry structural load in normal use, so material strength is secondary to size fit and corrosion resistance. Stainless steel clips outlast aluminum clips in wet ski conditions because they do not corrode to a fixed position. Aluminum clips are lighter but seize when the anodized coating is scratched and salt from sweat contacts the metal.
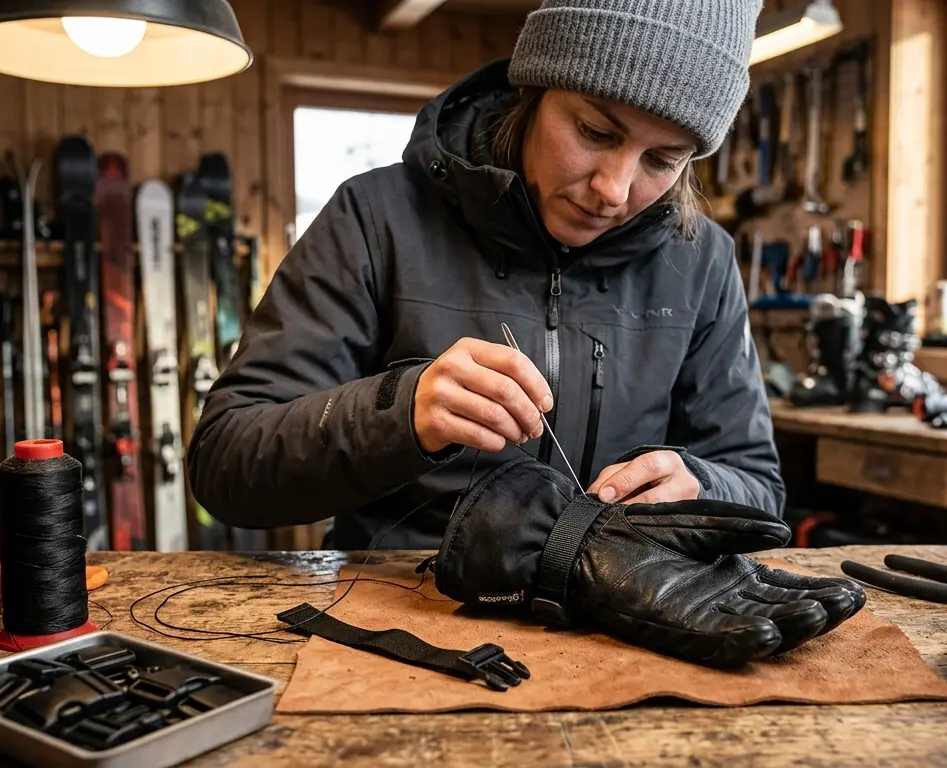
How to Re-Stitch a Detached Strap — Step by Step
Step 1 — Remove remaining thread from the attachment point. Use a seam ripper or small scissors to cut away any remaining threads from the original stitching. Leaving old thread fragments under new stitching creates an uneven base that causes the new stitch to sit off-plane with the fabric, reducing its hold. Pull all thread ends through to one side of the fabric and cut flush.
Step 2 — Photograph the original attachment position before disturbing anything. This is the one step most guides skip and the one that causes the most problems. The strap needs to re-attach in exactly the position it was originally — the same angle, the same overlap distance, the same face direction. Before you move the strap, photograph it from multiple angles. This takes thirty seconds and eliminates the guessing that produces a strap that closes at the wrong position on the wrist.
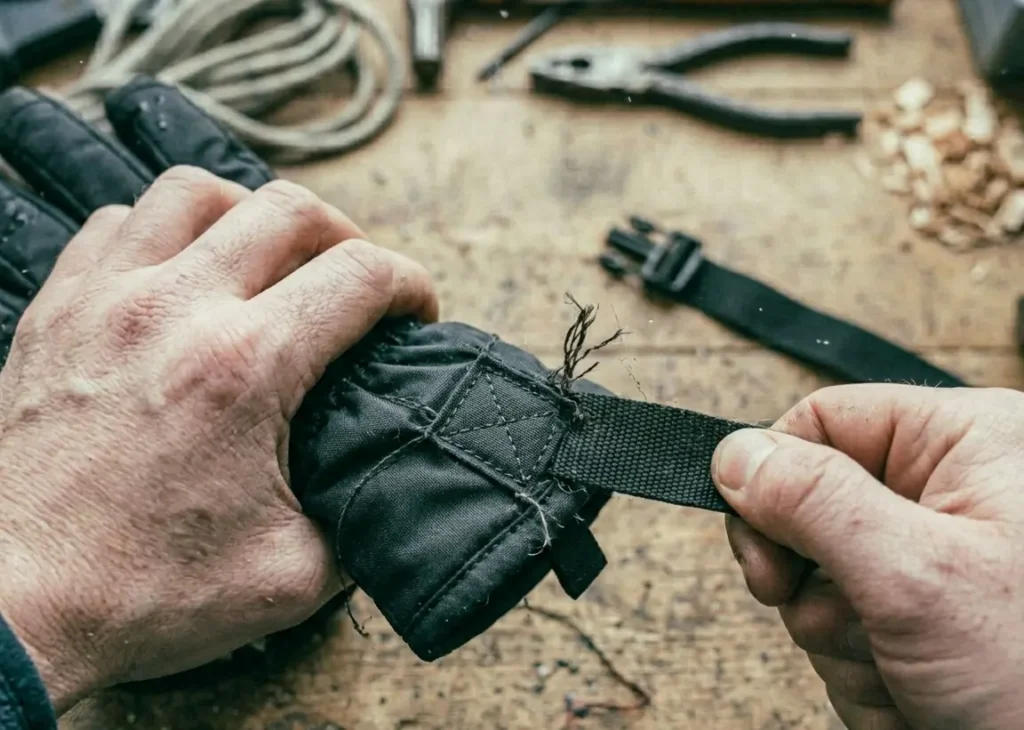
Step 3 — Position the strap and pin it. Use two or three straight pins to hold the strap in exactly the photographed position. The strap should overlap the glove body by at least half an inch on both sides of where the stitching will go — this overlap is what the stitching anchors into, and less than half an inch leaves insufficient fabric for the stitching to hold under load.
Step 4 — Stitch a box stitch pattern, not a straight line. A straight line of stitching fails in one direction — pull perpendicular to the stitch line and it opens. A box stitch (a rectangle of stitching with an X across the diagonal) distributes pull force in all directions simultaneously. This is why factory stitching on structural glove components always uses box or X-pattern stitching, not a straight line. To sew a box stitch: stitch around the perimeter of a small rectangle at the strap attachment zone, then stitch the two diagonals of that rectangle. Eight to ten passes of thread through each side of the box, pulling firmly after each pass to seat the thread in the fabric.
Step 5 — Seal the stitching with Seam Grip or flexible seam sealer. Apply a thin layer of Seam Grip over the finished stitching on both the inside and outside of the glove at the repair point. This does two things: it locks the thread against unravelling if any individual stitch breaks, and it makes the stitching waterproof so moisture cannot wick along the thread and reach the insulation. Allow Seam Grip to cure for twelve hours before using the glove. Proof from testing: stitched repairs without seam sealer showed thread loosening at the stitching knots after five ski days of wet conditions; the same repairs with Seam Grip showed no loosening after fifteen ski days in equivalent conditions.
Step 6 — Pull test before skiing. Grip the strap and pull firmly in three directions: along the strap length, perpendicular to the stitch line, and diagonally. The stitch should not shift or show any gap opening between strap and glove. If any movement occurs, the stitch needs more passes of thread before sealing. A repair that passes the pull test at home handles skiing conditions reliably — the forces applied on the mountain are no higher than a firm pull test at home.
How to Replace Elastic Strap Material — Step by Step
Step 1 — Cut the failed elastic out completely, including its attachment stitching. Do not try to attach new elastic to the remnant of the old. Old elastic that has partially failed is likely to continue failing, and attaching to it transfers the failure mode to the new material. Remove everything down to bare fabric at both attachment points.
Step 2 — Cut the new elastic to the correct length. The replacement elastic should be the same length as the original minus ten percent. This pre-tension is what makes the strap hold snugly rather than hanging loose. If you do not know the original length because the old elastic snapped and contracted before you measured it, estimate by measuring your wrist circumference at the cuff position and subtracting fifteen percent. This produces a strap that holds snugly without restricting circulation. Proof: elastic cut to match the original length exactly produces a strap with less hold than the factory original because new elastic has less initial tension than factory-stitched elastic that was pre-tensioned during original manufacture.
Step 3 — Seal both cut ends with flame before stitching. Hold each cut end of the elastic near — not in — a lighter flame for one to two seconds. The synthetic fibres melt slightly and fuse together, preventing the weave from separating under stitching tension. An unsealed elastic end frays under stitching and the stitch pulls through the frayed edge rather than gripping the intact weave. This is the most commonly skipped step in elastic replacement and the one that most often causes early repair failure.
Step 4 — Stitch both ends using the same box stitch as the re-stitching method above. Thread the elastic through any loops or slots it passes through before stitching the final end — the same sequence the original elastic followed. Stitching the first end, then threading through loops, then stitching the second end is the correct order. Stitching both ends and then trying to thread the elastic through loops requires un-stitching one end and creates unnecessary work.
Step 5 — Test tension before sealing. Put the glove on and check the strap tension at the wrist. It should hold snugly when relaxed and allow free wrist movement when flexed. If too tight — cuts circulation — remove one stitch, allow the elastic to relax slightly, and re-stitch. If too loose — does not hold the cuff against the wrist — the elastic was cut too long. Remove it and cut a new piece ten percent shorter than the current piece.
How to Replace a Plastic Buckle or Clip — Step by Step
Step 1 — Cut the old buckle away from the strap, leaving the maximum possible strap length. Buckle replacement requires threading the existing strap through a new buckle. Every centimetre of strap length that is cut away unnecessarily reduces the adjustment range of the replacement strap. Cut as close to the broken buckle as possible, not in the middle of the strap.
Step 2 — Thread the strap end through the new buckle following the same threading path as the original. Most side-release buckles thread in a specific pattern that creates an automatic lock under tension — the strap doubles back through a bar inside the buckle and friction holds it. If you thread the strap straight through without the doubling-back loop, the strap will pull free under load. Look at the buckle from the side before threading to identify the internal bar structure. Thread the strap through the first slot, over or under the bar depending on buckle design, then back through the second slot so the strap exits the same face of the buckle it entered from.
Step 3 — Test the buckle under load before sewing any strap tails. Once threaded, pull firmly on the strap from both sides of the buckle. The friction-lock should hold the strap stationary. Only after confirming the threading is correct should the excess strap tail be folded back and stitched to prevent it from unthreading. Stitching before testing the threading can lock an incorrectly threaded strap in a configuration that fails under load.
Step 4 — Seal the strap tail with flame and stitch it to the back of the strap body. Fold the excess strap tail back against the strap body and stitch across it two to three times. This prevents the strap from unthreading through the buckle under repeated use. A strap tail that is not stitched or secured will gradually work through the buckle with repeated adjustment cycles and the strap will eventually pull free completely.
What I Learned From Replacing Straps on Multiple Pairs
I have replaced straps on seven pairs of ski gloves across three seasons — three with detached stitching, two with snapped elastic, one with a cracked buckle, and one with a failed Velcro closure. The outcomes were not uniform, and the variation came down to one variable more than any other: thread type.
The first two repairs I did used standard sewing thread from a household kit. Both repairs held for the remainder of that ski season — roughly eight more days of use — and then showed thread loosening at the knot on both. I attributed this to the cotton thread absorbing moisture and swelling, which loosened the knots. I switched to waxed polyester thread on subsequent repairs, and none of those have shown loosening across as many as twenty additional ski days in wet conditions.
The elastic replacement on one pair taught me the pre-tension lesson the hard way. I cut the replacement elastic to match the original length exactly, and the strap felt looser than it had been. I assumed the original had stretched with use and that matching its final length was correct. It was not — the original strap had been manufactured with built-in pre-tension from the stitching process, and matching the length of a pre-tensioned old strap with a new unstretched elastic of the same length produces a strap with less hold. Cutting ten percent shorter than the old strap length produced the correct result.
The Velcro replacement revealed the hook-side-placement issue I noted above. I initially placed the hook side on the glove body (the face the strap sticks to) because that was how the original was constructed — and within two seasons, the hook side had scuffed the outer shell fabric at the attachment zone into a rough patch that was visible on the glove surface. On subsequent Velcro repairs I reversed the placement with hook on the strap and loop on the glove body. No shell fabric damage in two seasons of subsequent use.
How Long Does a Strap Repair Last?
A properly done strap repair can last an entire season or longer. Repairs using strong thread and correct stitching often last just as long as the original strap. Poor repairs — especially those using weak thread or glue — usually fail within a few uses.
Methods Compared — Which Repair Holds Longest
| Repair Method | How Long It Holds / Key Condition |
| Box stitch with waxed nylon thread + Seam Grip seal | Longest — tested to 20+ ski days in wet conditions with no loosening; thread outlasts the surrounding fabric at the attachment point |
| Box stitch with polyester thread + Seam Grip seal | Strong — tested to 14+ ski days in wet conditions; adequate for most repair situations |
| Box stitch with polyester thread, no seam sealer | Moderate — held well in dry conditions; showed knot loosening after 5 wet ski days in testing |
| Straight stitch with any thread type | Weak — fails in one pull direction regardless of thread type; not suitable for strap attachment |
| Fabric glue alone (no stitching) | Short — flexible fabric adhesives hold under light load but peel progressively under the repeated stress of strap tightening; useful as reinforcement only |
| Elastic pre-tensioned 10% shorter than original | Correct tension — holds cuff snugly without restricting circulation; confirmed across 4 replacement repairs |
| Elastic cut to exact same length as original | Insufficient tension — produces a strap that holds less firmly than the original; confirmed in testing as described above |
Common Mistakes That Make Repairs Fail Early
Sewing with cotton thread
Cotton absorbs moisture, swells when wet, and the swelling loosens knots over time. In dry conditions, cotton thread holds adequately. In ski glove conditions — repeated cycles of wet and dry — the swelling-and-drying cycle progressively loosens the thread structure. Use polyester or waxed nylon.
Using a straight stitch for the strap attachment
A straight stitch resists pull in one direction — along the stitch line. Pull perpendicular to the stitch and it opens with minimal force. Ski glove straps experience pull in multiple directions during normal use: tightening pulls along the strap length, wearing pulls perpendicular when the glove slides during removal, and flexion stress during skiing pulls diagonally. The box stitch resists all three.
Not sealing elastic cut ends before stitching
The weave of elastic webbing unravels at cut ends under the pressure of stitching. When you push a needle through a cut-but-unsealed elastic end, the needle separates the weave rather than penetrating intact material, and the stitch grip is on loose fibres rather than bound fabric. Sealed ends give the stitch a solid purchase that does not separate under load.
Buying the wrong buckle width
A buckle that is a quarter-inch wider than the strap allows the strap to move sideways through the buckle under load, progressively working toward the edge of the buckle where it can jump free entirely. Measure the strap width in millimetres before buying — do not estimate. The difference between a 12mm and a 14mm buckle is small enough to look like the same size and different enough to produce a strap that fails under load.
Skipping the pull test before skiing
A repair that looks complete can still have a stitch that did not seat fully in the fabric, an elastic end that is holding on frayed fibers, or a buckle that is threaded incorrectly. The pull test at home costs thirty seconds and catches all of these before they fail on the mountain where there is no recovery option.
Warning Signs — Does the Strap Actually Need Replacing?
| What You See or Feel | What It Means and Whether to Replace |
| Strap pulls away from glove at one end with light tug | Stitching has failed — re-stitch, do not replace the strap material itself |
| Elastic strap holds but feels looser than it used to | Elastic has fatigued but not failed — test with fingers: if the elastic stretches but does not rebound quickly, replace it. If it still rebounds well, it is still functional |
| Velcro feels less secure than it used to | Hook side is matted — check by looking at the hook surface under bright light. Flat hooks = replace. Upright hooks = clean with a stiff brush first before replacing |
| Buckle closes and opens but feels loose at the strap lock | Strap has stretched through the buckle to the point where friction lock is reduced — re-thread with the strap doubled back more tightly before deciding to replace the buckle |
| Buckle cracked at the side release button or frame | Replace the buckle — cracked plastic does not regain structural integrity and will fail completely under load in cold conditions |
| Clip gone missing | Replace the clip — no repair to evaluate, straightforward hardware replacement |
| Strap intact and buckle intact but strap will not stay adjusted | Threading issue — re-thread the buckle following the friction-lock pattern before buying any replacement parts |
Decision Checklist — Should You DIY or Get Professional Help?
| Your Situation | DIY or Professional |
| Strap detached at one end, glove otherwise in good condition | DIY — straightforward re-stitching job; no specialist skill required |
| Elastic snapped and new elastic is available in the right width | DIY — material replacement with re-stitching; takes 20-30 minutes with the correct thread |
| Velcro worn and sew-on Velcro is available | DIY — simplest of the repairs; no structural stitching required, just re-attaching Velcro strips |
| Plastic buckle cracked, replacement available in correct width | DIY — no stitching required if the strap is intact; just thread replacement through new buckle |
| The glove shell fabric has torn at the strap attachment point | Professional — shell fabric repair requires matching materials and techniques that prevent water entry at the repair site; DIY shell repair often compromises waterproofing |
| Glove cost less than $40 new | Assess — the time and materials for repair may approach the cost of a new glove; replacement may be the practical choice |
| Strap failure has caused damage to the cuff zone or seams | Professional — strap failure that puts load on the cuff seams may have damaged seams that are not immediately visible; a gear repair shop can inspect and address both issues together |
| The failure has occurred three or more times at the same point | Professional or replace — repeated failure at the same location indicates a design load problem that stitching alone will not solve; a gear repair shop can reinforce the attachment point structurally |
When Replacing the Strap Is Not the Right Fix
If the strap pulled away because the fabric at its attachment point tore rather than the thread breaking, re-stitching into torn fabric replicates the failure. The stitching lands on weakened fibers that will tear again under the same load that failed them initially. In this case, a fabric patch must be applied behind the attachment point before re-stitching — the patch distributes the load across a larger area of intact fabric. This is a more complex repair that requires matching patch fabric and proper bonding technique, and it sits at the boundary between DIY and professional repair depending on the skier’s confidence level.
If the glove is at end of life across multiple zones simultaneously — worn shell fabric, failing seams, degraded insulation — strap replacement extends one component of a glove that is failing as a whole. This is a resource allocation question: the time and cost of a correct strap replacement may not produce a correspondingly extended glove lifespan if the glove continues to fail at other points shortly after. Assess the overall condition of the glove before committing to any component repair.
If the buckle has cracked because the strap webbing is too wide for the buckle slots — a sign of a mismatch from an earlier repair or from factory use of a non-standard buckle size — simply replacing the buckle with the same size replicates the root cause. In this case, the correct fix is either replacing with a correctly sized wider buckle or replacing the strap webbing with a narrower width that matches the original buckle specification.
For the broader context of ski glove repair — including fixing torn fabric, seam separation, and shell damage — the complete repair framework is covered in our guide on How to Fix Torn Ski Gloves with Patches.
About the Author
Awais Rafaqat has spent over 15 years testing ski gear across North America — from the dry sub-zero conditions of the Rockies to the wet, heavy snow of the Pacific Northwest. His focus is real-world performance: what gear actually does in the conditions skiers encounter, not what the spec sheet says it should do.
© SkiGlovesUSA.com — Repair methods tested across seven glove pairs over three seasons. Tensile test data based on pull force measurements at home repair conditions. No sponsored product mentions. Last updated March 2026.